unSpooled
  • Home
  • Galleries
    • Tuffet Gallery >
      • Student Tuffet Gallery
    • Quilt Gallery
    • Costume Gallery
  • Retreats
  • Tuffets
    • Tuffet fabric requirements
  • Store
  • Blog
  • About
    • Contact
    • Newsletter
    • FAQ
  • Classes

illinois tuffets! And a bonus wisconsin one

1/28/2016

0 Comments

 
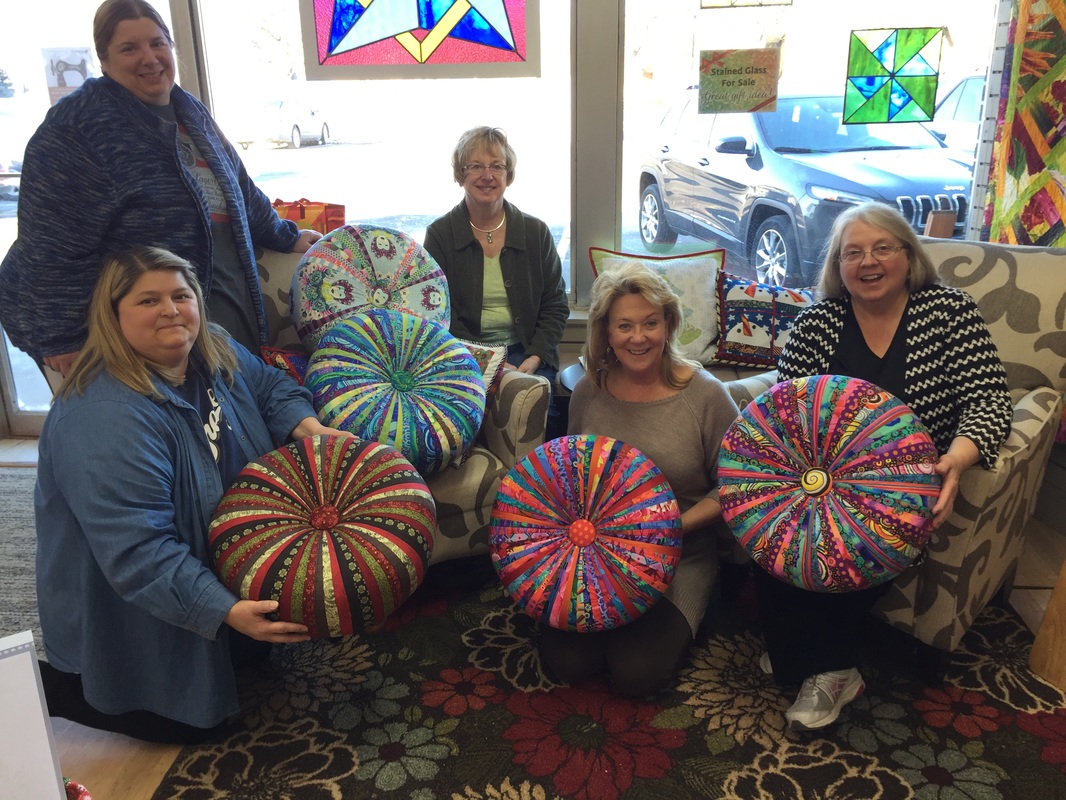
We had a fantastic time making tuffets at Quilt Play in Grayslake, IL, last week! It was my first time teaching at the shop and the students were very enthusiastic. That always makes for a fun time. Again, I was having so much fun that I didn't get any action shots. But I do have results!
Picture
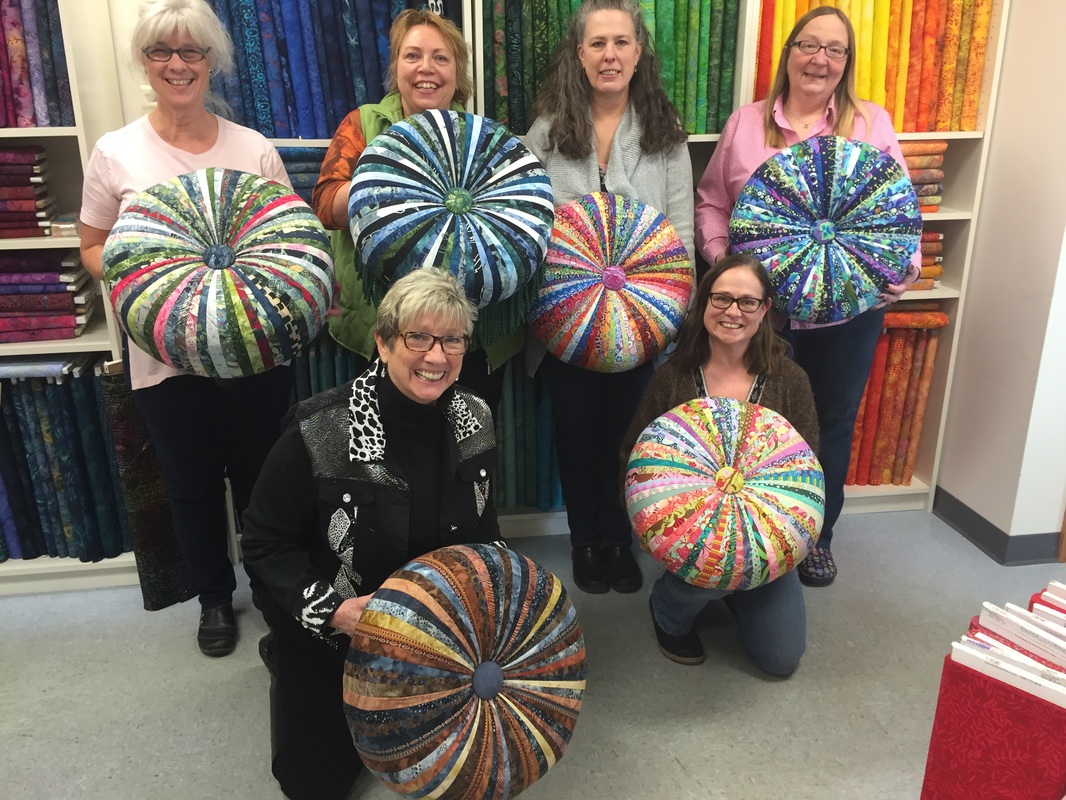
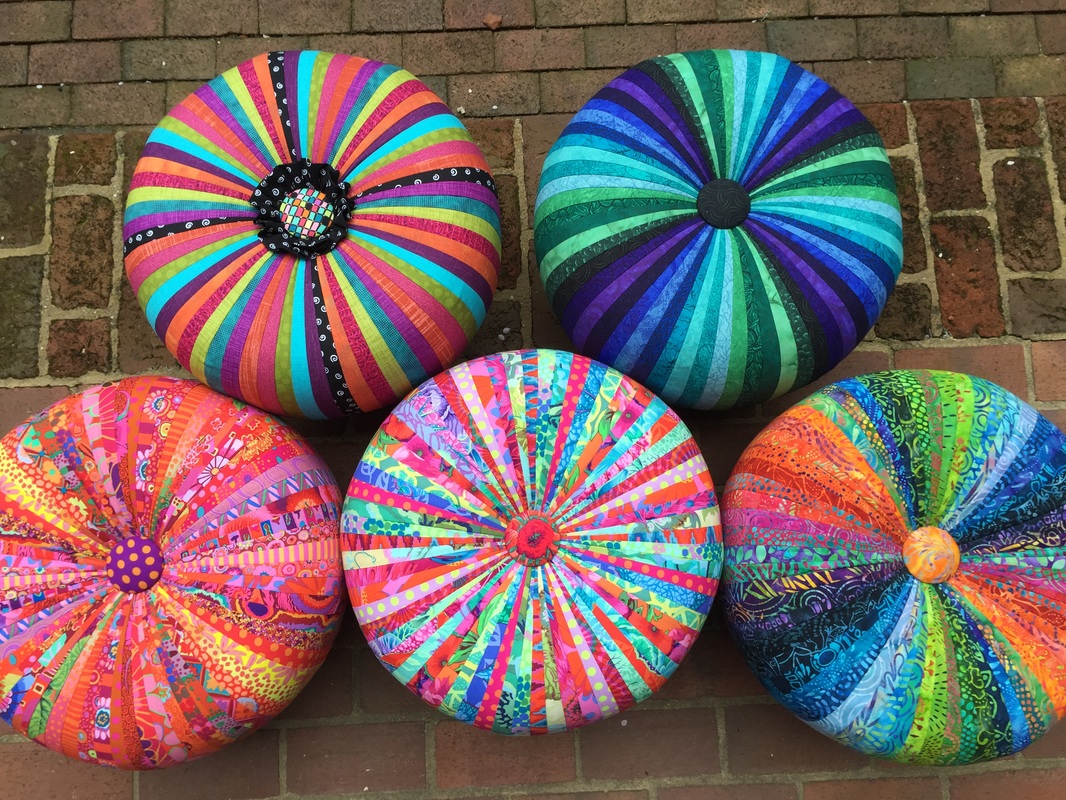
Georgia, Marla, Susan Shelley, Barbara, and Xenia show off their beautiful tuffets!
Picture
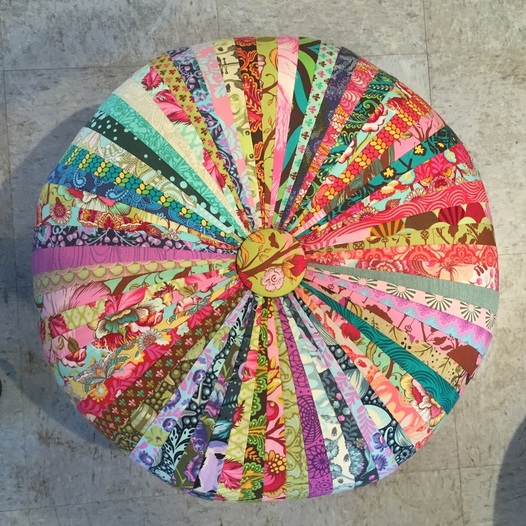
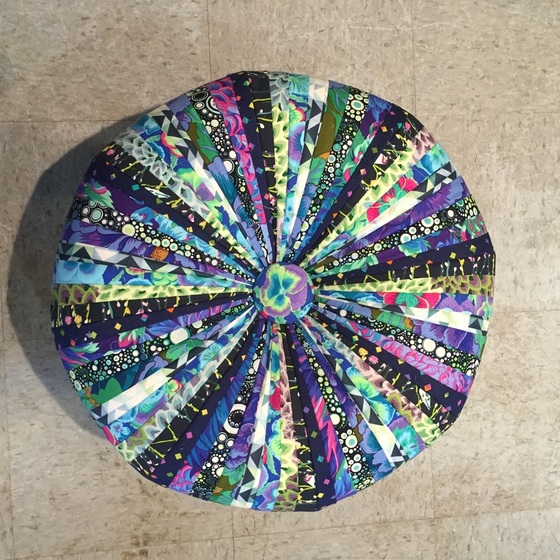
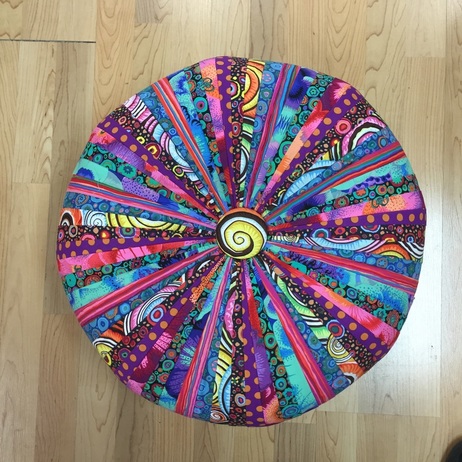
Xenia's Tula Pink tuffet is super cute!
Picture
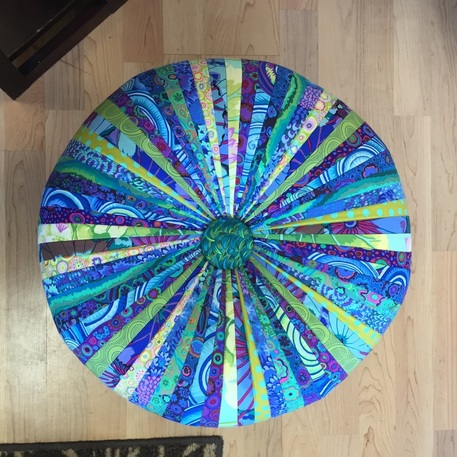
Georgia's tuffet is gorgeous in batiks. I love the pops of pink!
Picture
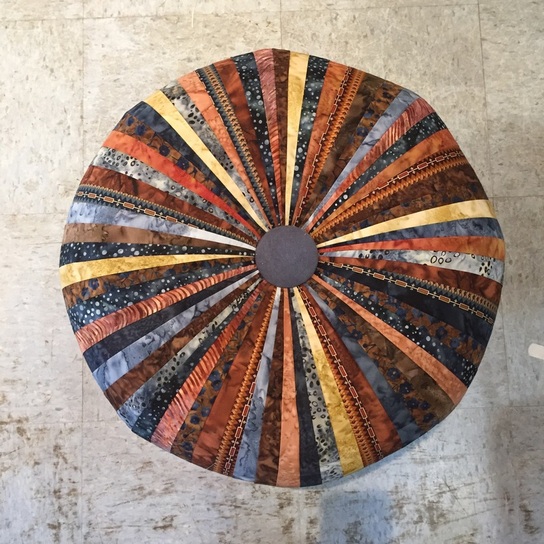
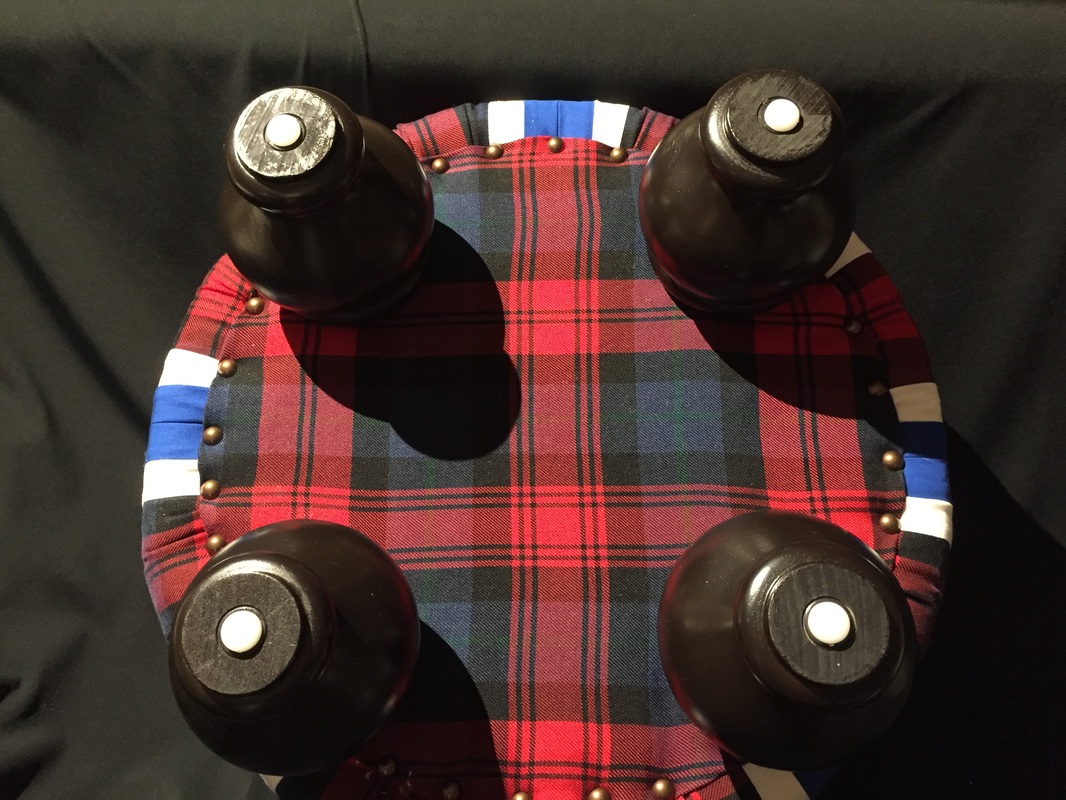
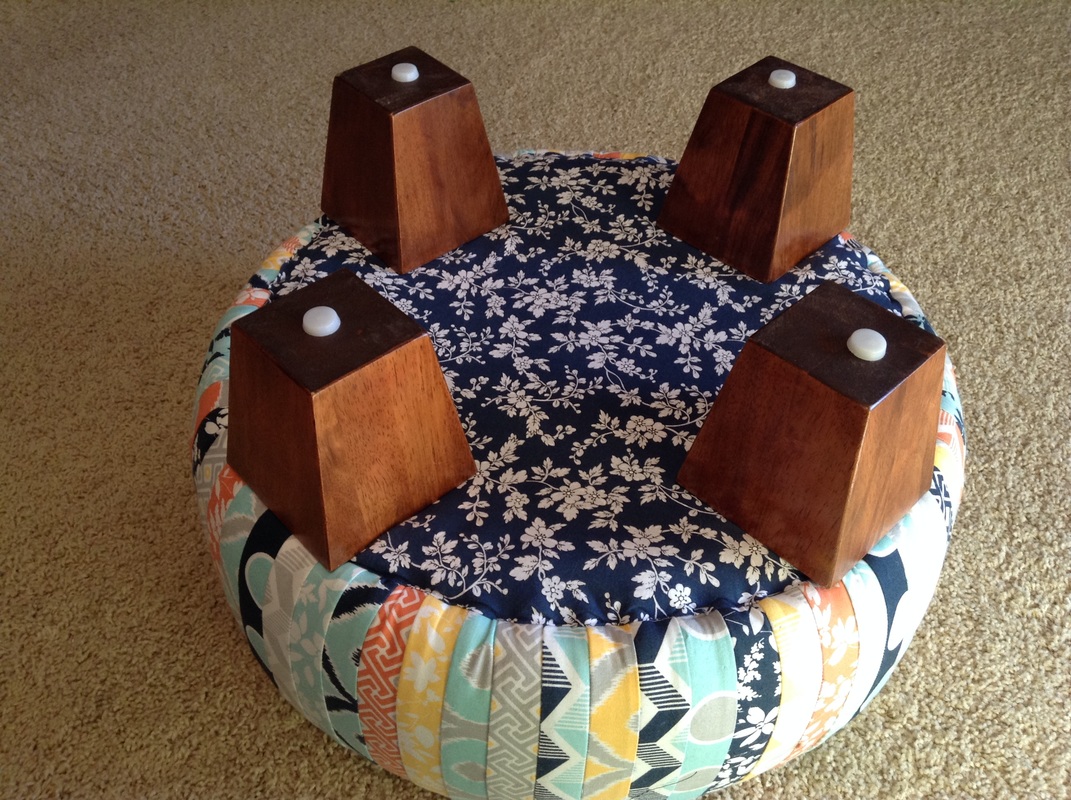
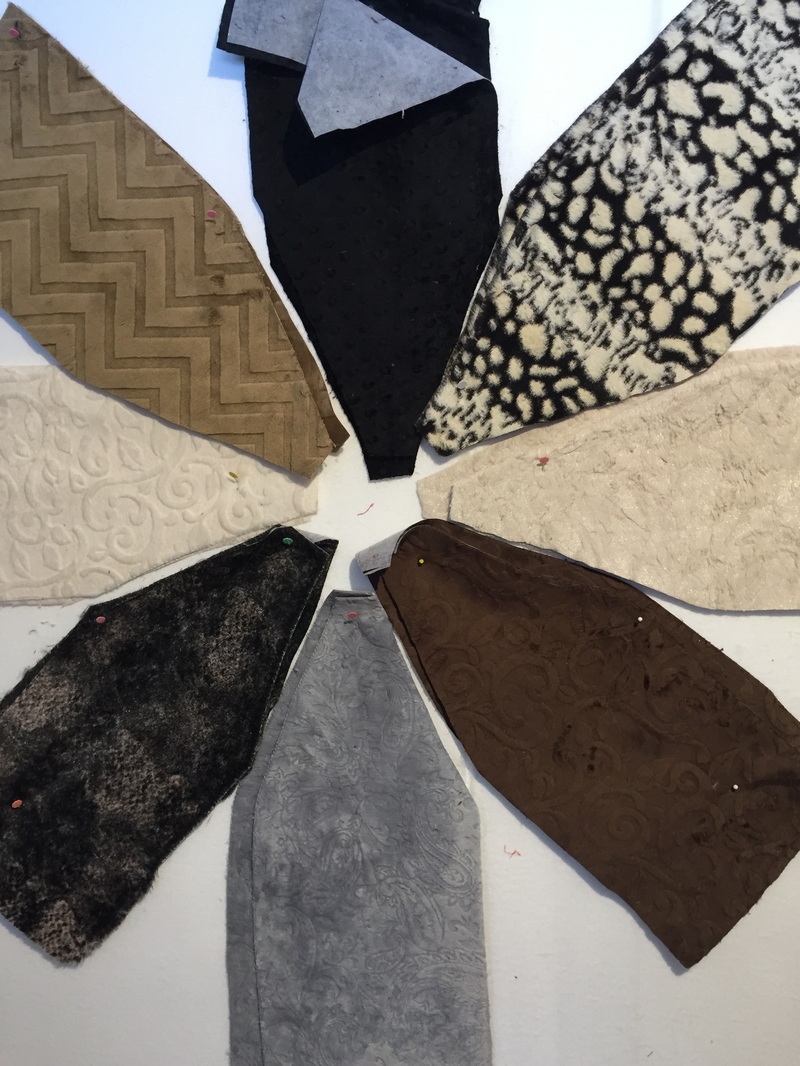
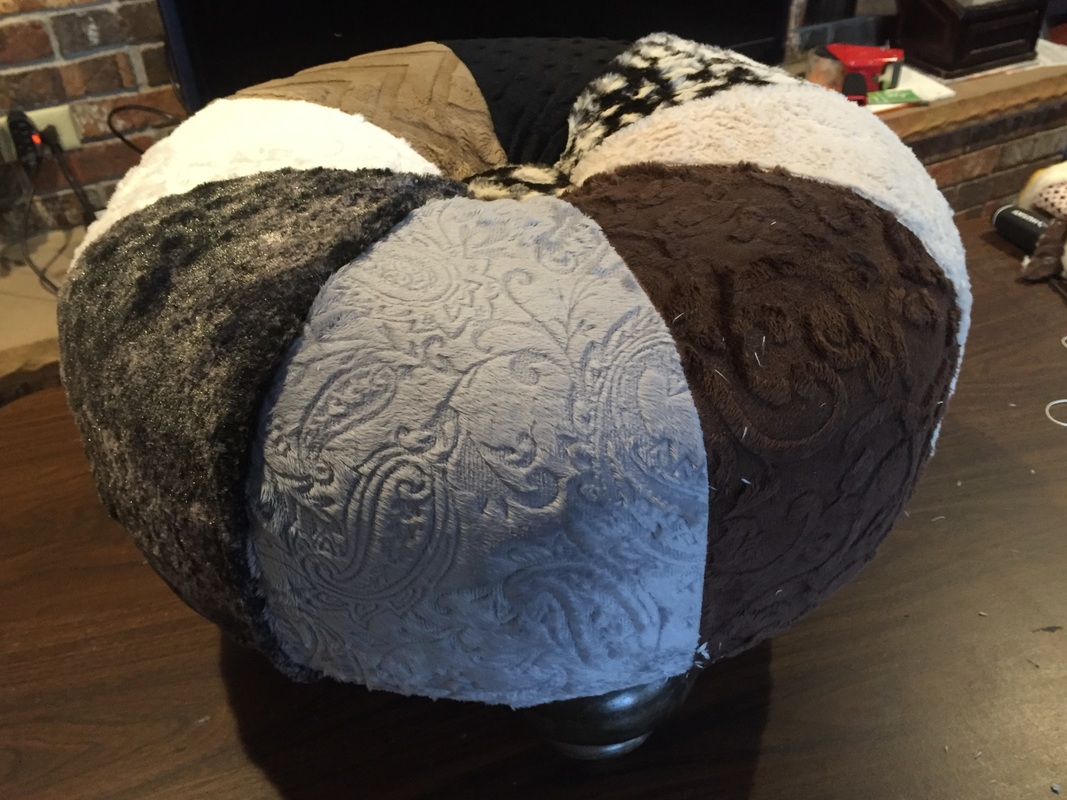
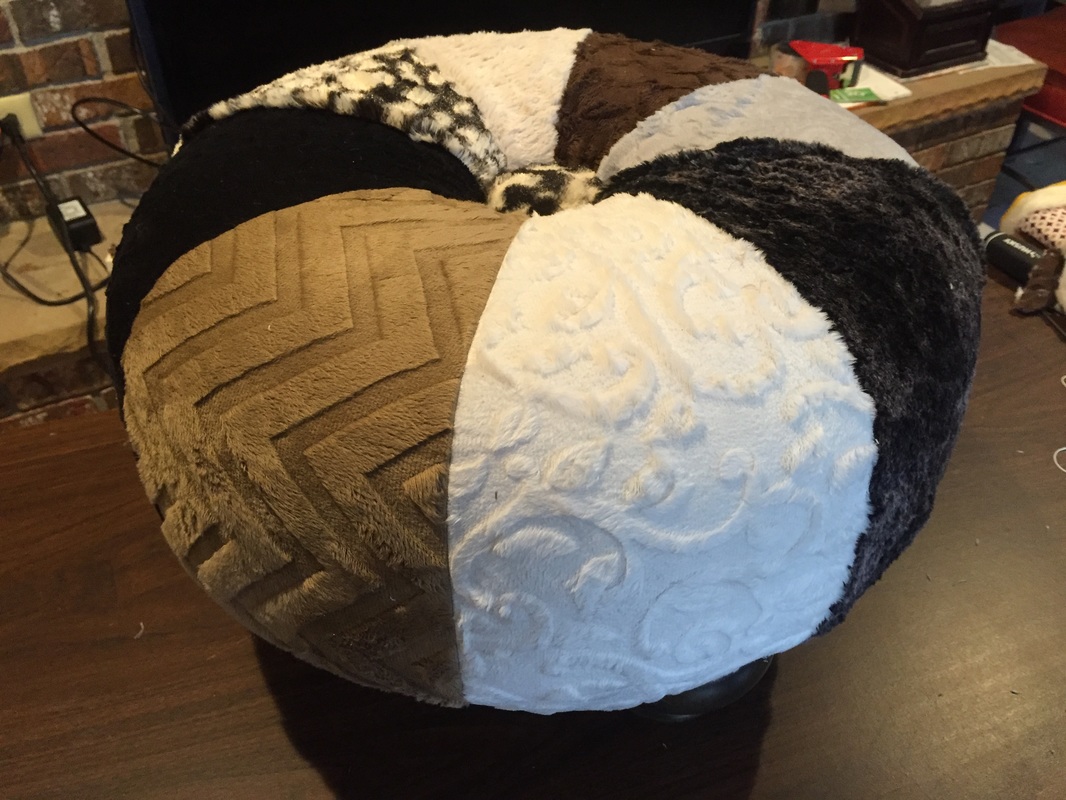
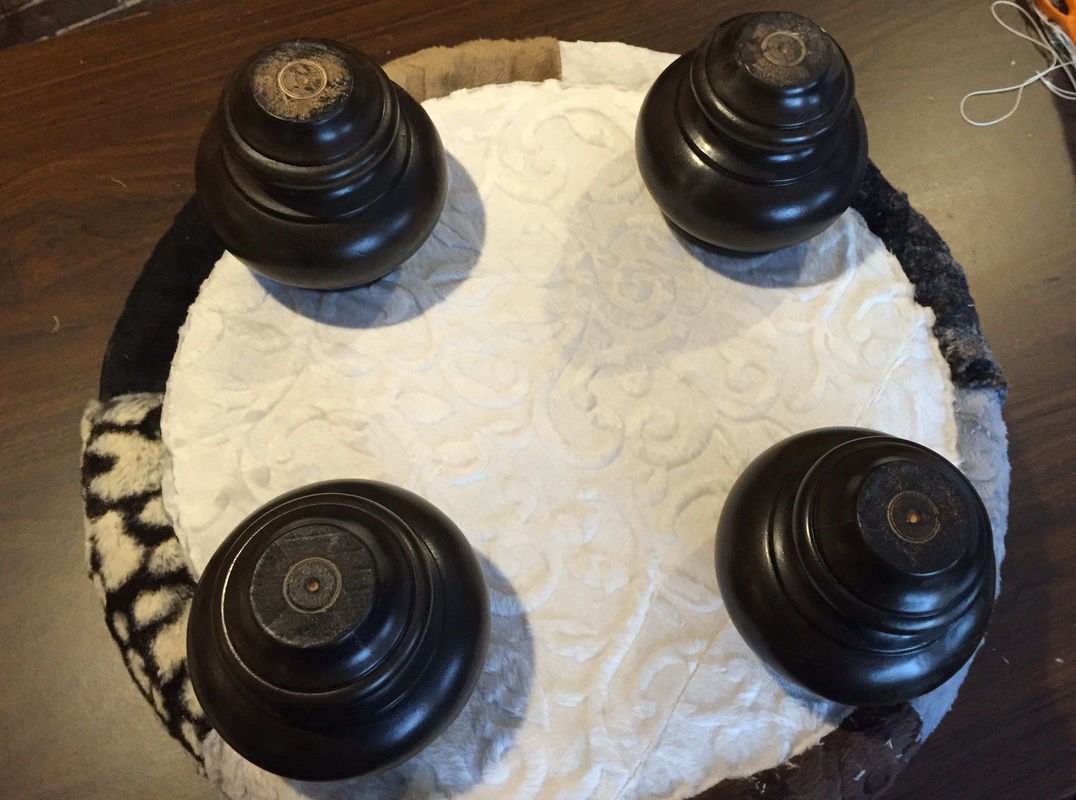
Barbara's tuffet in rich earth tones. The button is microfiber and the bottom is faux leather.
Picture
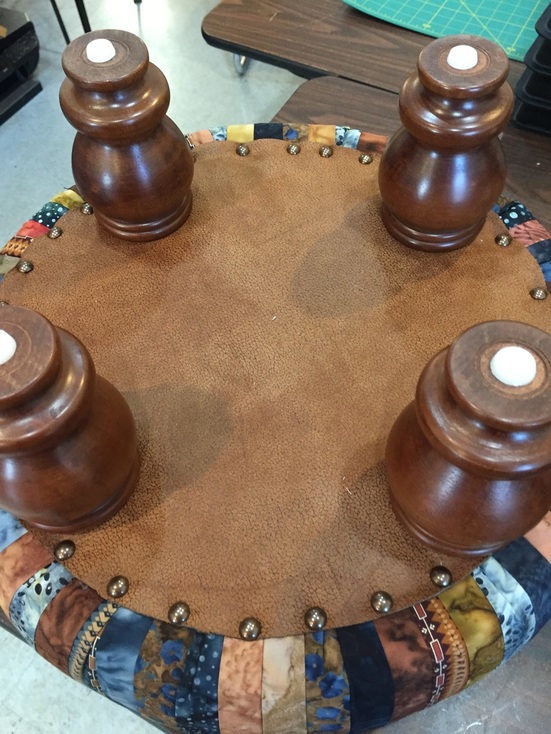
Great bottom fabric!
Picture
Shelley's tuffet has lots of pretty florals. And I really like the value range. Plus, that Effervescent fabric is one of my favorites!
Picture
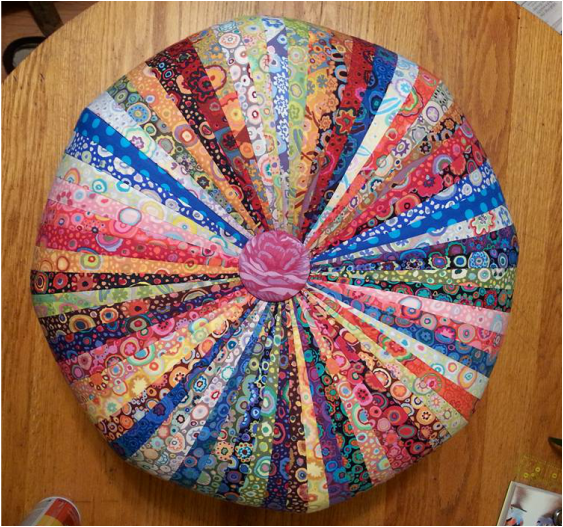
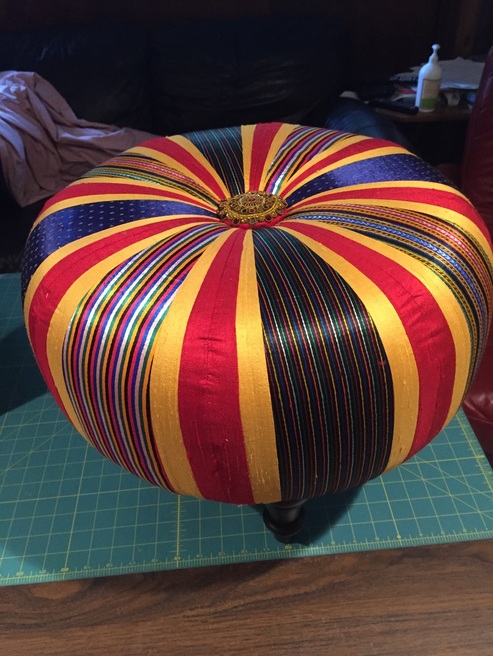
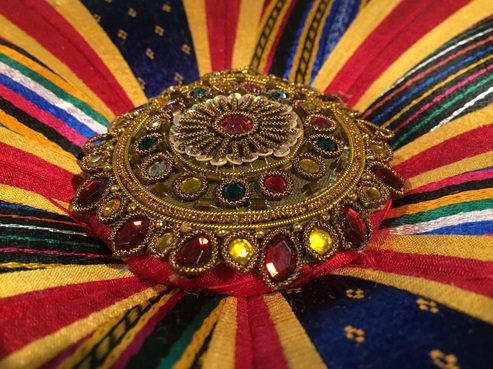
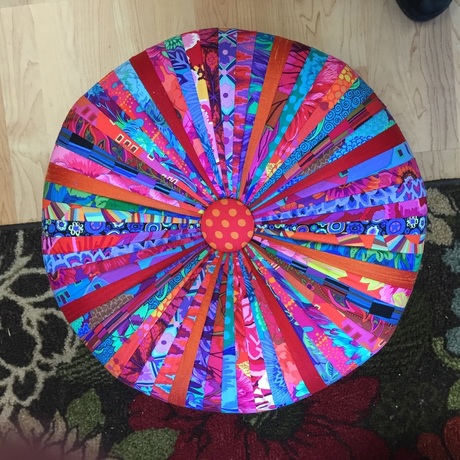
Susan's tuffet was all Kaffe Fasset paperweight (and a few dots). I love the effect, and I really like that her button is of a different scale fabric. It really makes it stand out nicely!
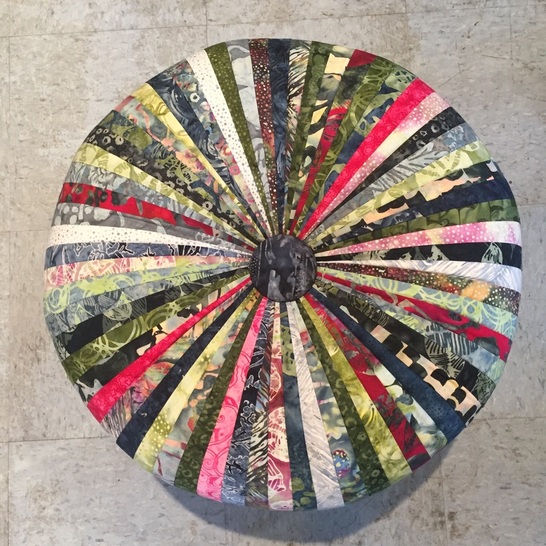
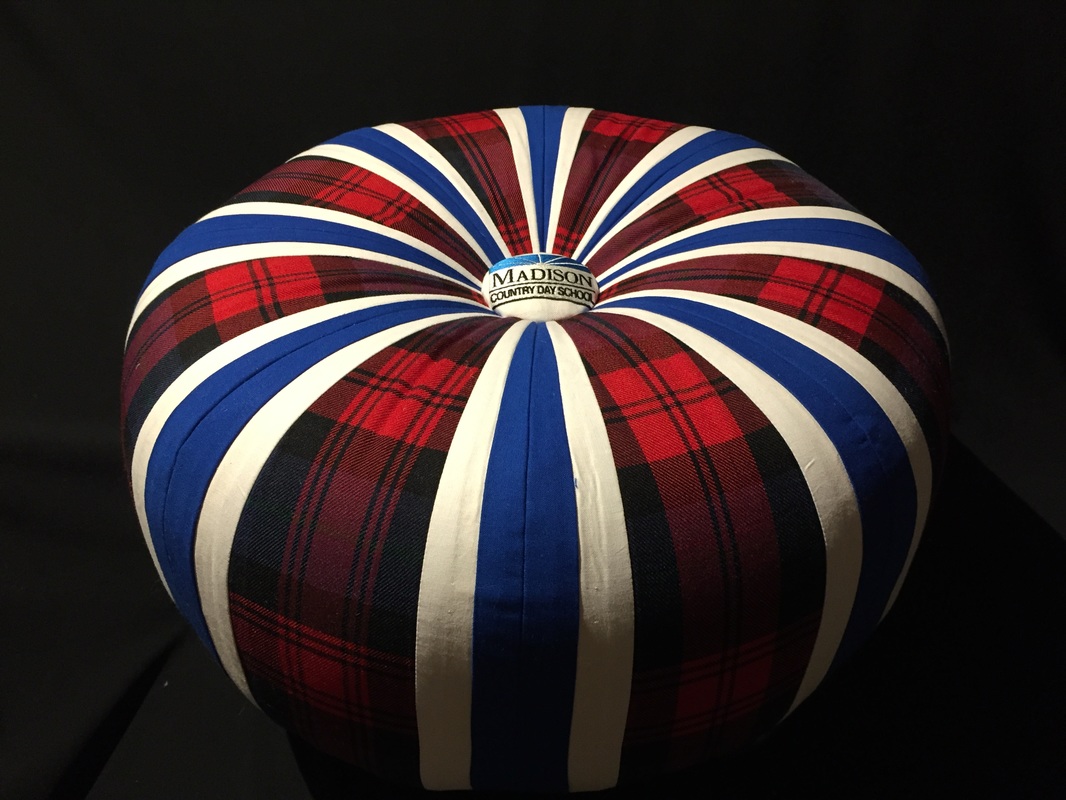
And a bonus Wisconsin tuffet from my latest class at Quilt-agious in Mukwonago, Wisconsin (finished outside of class). 
Picture
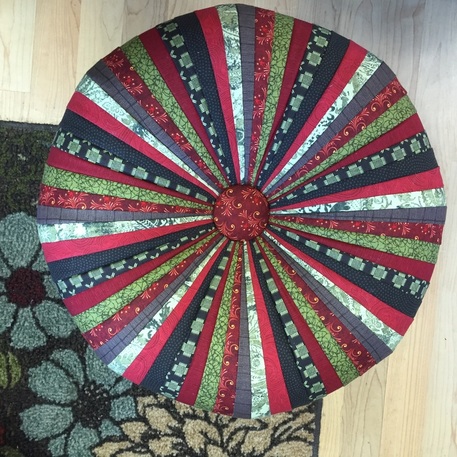
Roxann's tuffet is more traditional. I like her color groupings.
0 Comments

auction tuffet

1/24/2016

0 Comments

 
Every year my daughter's school holds an auction to raise money. Last year I donated a quilt; this year I went with tuffets (of course)! This first one is from a used school uniform. It was a jumper, which gave me lots of yardage once I ripped out the seams. One half of the jumper went into the top and the other half I used for the bottom. The solids are Kona cottons in school colors, and the button is from an embroidered uniform shirt. 
Picture
Picture
Picture
Picture
I also donated the second tuffet I ever made, from the Moda Mixologie line of fabric. It was from a jelly roll, so I didn't have yardage. The button fabric was from my stash and the bottom fabric is from the Weekend line from Swirly Girls Design.
Picture
Picture
0 Comments

a minky tuffet!

1/20/2016

0 Comments

 
Ever since I became a TuffetSource affiliate, I've been wanting to do tuffets out of different materials. Up until now my biggest stretch had been this silk tuffet:
Picture
Picture
The striped fabrics are a cotton/silk blend and the solids are silk dupioni. The fraying was the hardest thing to deal with. I ended up zigzagging in the seam allowances to keep the fray in check. As for fitting the top, the silk doesn't have as much give as cotton, fitting is a little tricky, but not too bad.

Since then, I've been collecting fabrics to make different types of tuffets. I have some neckties, some leather scraps, and more silk. But I just had to try to make one from minky fabric.
Picture
The chosen fabrics.
Picture
All put together!
Picture
The other side.
Picture
Even the bottom is Minky!
I'm calling it the Fluffet.

I know some people don't like working with Minky because of the shedding which is really just from where you cut the fabric -- once that's done, the fabric itself doesn't actually shed). To them I say, "get thee a lint roller!" Of course, I don't mind glitter everywhere either. Personally, I love Minky, and using it just means it's time to vacuum my sewing room. 

I got all of these wonderful fabric from Quilt-agious in Mukwonago, Wisconsin. They've put together the Minky for the tuffet top in kits (I'm not sure if there is enough for the bottom in their kits, fyi). Click here to contact them if you want to make your own! While you're shopping, check my store here for tuffet kits. ;-)
0 Comments

First tuffets of 2016

1/19/2016

0 Comments

 
The high was -2 the day we finished these tuffets at Quilt-agious in Mukwonago! But though it was frigid outside, we stayed warm and had fun inside.
Picture
Brand new tuffets by Carrie, Lana, Karla, Linda, and Deb!
I'll be teaching tuffets at Quilt-agious again Fridays, February 5 and 12, from 1 to 5 pm. Call the shop at 262-363-3066 to sign up!
Picture
Karla's tuffet is beautiful in aquatic colors.
Picture
Lana's tuffet is bold yet traditional.
Picture
Carrie worked hard to center her Queen of Hearts!
Picture
Linda's bright tuffet is after my heart!
Picture
Deb's swirly button is so fun!
0 Comments

tuffet retreat!

1/7/2016

4 Comments

 
I'm thrilled to announce that I'll be hosting a tuffet retreat this summer at the Jones Mansion in Mineral Point, Wisconsin! The dates for the retreat are June 24 - 26, 2016. If you've been wanting to make a tuffet but live too far from me to take a class, this is a great chance for you to make a tuffet in a weekend. If you don't live in the area, that's okay, we'll help you get to and from the airport and even help ship your tuffet home! 

The Jones Mansion is gorgeous! It's a three-story home with seven bedrooms, plus a great work area. The town it's in, Mineral Point, is known for its art galleries and shops. 

Picture
Included in the retreat are most meals, lodging, a full tuffet kit, and expert instruction. You can even choose to make more than one tuffet if you'd like!

I've written up a FAQ which should give you all of the information you need. If you have other questions, please let me know and I'll add them to the list!

Registration is here. Sign up soon! Spots are very limited and some are already taken!
4 Comments

Perfect joined bindings

1/2/2016

6 Comments

 
Ah bindings, the last step to complete before your quilt is finished. Well, you should put a label on, but I'll assume that you've already done that. 

When I started quilting, I used to just tuck the end of the binding into where I started. It worked okay, but I wasn't quite happy. Then I learned how to join my binding ends together. It's such a good look, and it's too hard, provided you slow down and give yourself space to work.

How much fabric do you need?

First, you want to figure out how much binding you need. To do that, measure the perimeter of your quilt, then add 12 inches to account for going around the corners. For example if your quilt is 70 x 85 inches, you would add 70 + 70 + 85 + 85 = 310 + 12 = 322 inches. Divide that number by 40 (a conservative width of fabric) to get 7.75. This is the number of strips you need to go around your quilt. We'll round that up to the nearest whole number 8. 

I like to cut my bindings at 2.5 inches, so 8 strips multiplied by 2.5 inches equals 20 inches. If I were buying this from a quilt shop, I'd buy 2/3 yard (24 inches) to account for washing and squaring up. 

Making the binding

Join your 2.5 inch strips with a 45 degree angle seam so that you have one continuous length. 
Picture
Cut off the excess within the seam allowance and press your seams open. Then press the entire length of the binding wrong sides together. Trim dog ears.

Attaching the binding

I find a place to start, usually somewhere in the middle of one of the sides. I almost always lay out the binding as if I'm applying it to see if a seam is going to land at a corner. If it will, I adjust where I'm going to start. Once I've found a suitable place to start, I pin the binding to the quilt and take it to my machine.

I trim my quilt before I put the binding on. Then I lay the binding about 1/8 inch inside the raw edge of the quilt. You want the raw edges of the binding to be toward the outside. I leave a starting tail of about six inches before I start stitching. Stitch with a 1/4 inch seam allowance.
Picture
The bright green is the quilt top. The black and gray is the backing (you wouldn't necessarily see it here).
Stitch along merrily until you near the corner. Stop stitching 3/8 inch before the edge of the quilt. That 3/8 inch corresponds to the 1/4 inch seam allowance plus the extra 1/8 inch inside the edge that I've placed the binding. Backstitch.
Picture
What? Oh right, I'm not using my walking foot. My walking foot for this machine is jammed, so I just lower my presser foot pressure and it works just fine. Notice that I have a little indentation (and mark) on my foot. That, and the mark on my throat plate, let me know where 1/4 inch from the needle is. I eyeball that extra 1/8 inch.
Picture
Hopefully you can see where I've stopped stitching here.
This next part trips people up a little, but you'll get a chance to do it four times per quilt, so it'll be second nature before you know it.

First, take the quilt out of the machine. Then fold the binding away from the direction you're going to be heading. 
Picture
The trick here is to make sure you make that fold exactly 45 degrees. You should be able to fold it back on itself and not be able able to see any fabric peeking out.
Picture
NOT like this! Can you see that little sliver of fabric? That little sliver will cause big problems later.
Picture
MUCH better.
At this point it's a good idea to pin the binding in place while you get it situated under the needle. Once you've got it placed, start at the edge of the binding and backstitch.
Picture
Continue on this way, treating all of the corners the same way. When you get to the last side, stop about 8 or 9 inches from where you started stitching.
Picture
Stop here.
Trim off any selvage from the starting tail.
Picture
Now, I cut my binding 2 1/2 inches. If I had cut it, say, 2 1/4 inches, then that is the measurement I'd use for this next part. But we're sticking with 2 1/2 inches.

What we're going to do is measure and cut our ending tail so that we have exactly a 2 1/2 inch overlap of the two ends. 
Picture
Start with my ruler at the starting tail. Ignore the numbers on the ruler. I'm just going to use the marks on the ruler.
Picture
Here I have marked the 2 1/2 inch overlap on the ending tail.
Picture
Cut. It's only fabric! You might be able to see where I had marked 3 1/2 inches. That was wrong. :-)
Picture
All right! I have offset these a little so you can see the overlap. If anything it looks a little short here, but it worked just fine. Because the binding is cut width of fabric, there's enough stretch in it to take care of that. In fact, I'd rather err on the short side than the long side here.
Picture
Here you can see the two tails.
We are going to join these two ends with a 45 degree seam, just like when we made the binding. In order to do that, we need to bring the two ends together so that we can overlap them at that angle. I've pinned mine here to keep the bulk of the quilt out of the way.
Picture
We won't sew over this; it's just to bring the binding tails closer to each other.
Picture
This is the starting tail.
Picture
And here is the ending tail at a 90 degree angle to the starting tail, right sides together.
Picture
Pin that sucker! You'll be glad you did.
Picture
Mark a 45 degree line. See how I have the line on the ruler lined up with the edge of the fabric (well, sort of, it got shifted a little for the photo, but you get the idea).
Picture
My marked line. Now I stitch.
Picture
Picture
All done!
Before I trim the seam allowance to 1/4 inch, I'm going to unpin my quilt and make sure it lays correctly and that it's not twisted.
Picture
Happy day!
Picture
Here you can see what I'll be trimming out with scissors. Finger press the seam open.
Picture
Ever-so-slightly short, but that's fine. If it were too long, it would pucker for sure. I don't want it so short that it's going to distort the quilt, though.
Picture
Pin and stitch. You guessed it -- backstitch!
Picture
All done!
Picture
Here's the final quilt, before hand stitching the binding to the back.
I hope this tutorial helps you join those binding ends. No more tucked-in bindings!
6 Comments

    Archives

    November 2017
    September 2017
    July 2017
    May 2017
    April 2017
    February 2017
    January 2017
    December 2016
    September 2016
    August 2016
    July 2016
    May 2016
    April 2016
    March 2016
    February 2016
    January 2016
    December 2015
    November 2015
    October 2015
    September 2015
    August 2015
    July 2015
    June 2015
    May 2015
    April 2015
    March 2015

    Categories

    All
    Blog Hop
    Classes
    Commissions
    Focus Through The Prism Challenge
    Quilts
    Shop
    Shows
    Skating
    Student Tuffets
    TBT
    Troubleshooting
    T Shirt Quilts
    T-shirt Quilts
    Tuffet
    Tuffet Retreat
    Tuffets
    Tutorials
    Website

    RSS Feed

All images on this site are (c) unSpooled, LLC. Thanks for reading this far. You want to make a tuffet, right? Don't forget to like unSpooled on Facebook!