unSpooled
  • Home
  • Galleries
    • Tuffet Gallery >
      • Student Tuffet Gallery
    • Quilt Gallery
    • Costume Gallery
  • Retreats
  • Tuffets
    • Tuffet fabric requirements
  • Store
  • Blog
  • About
    • Contact
    • Newsletter
    • FAQ
  • Classes

retreat at jones mansion

7/28/2016

3 Comments

 
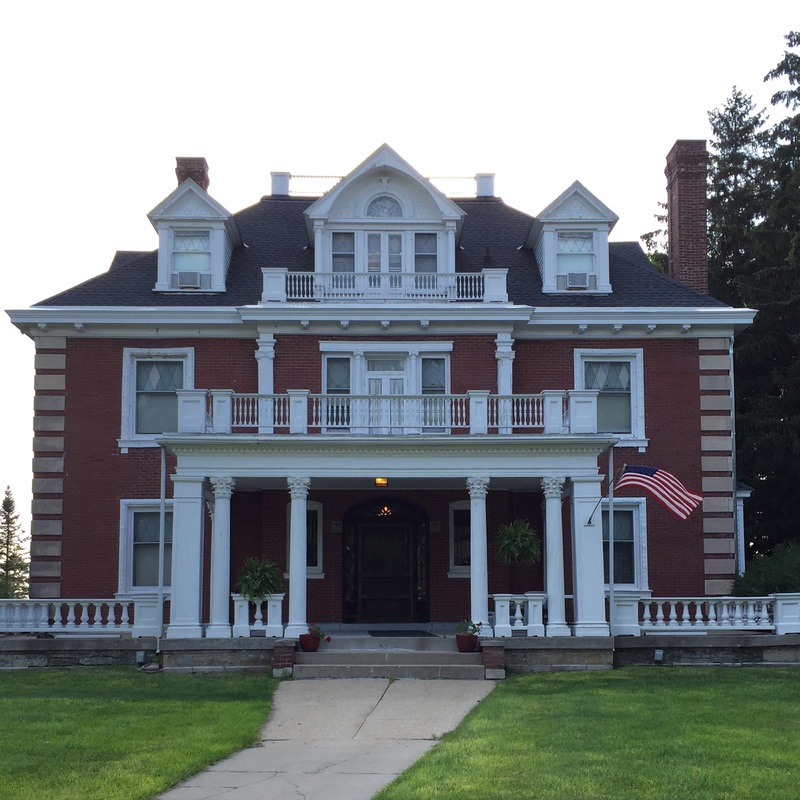
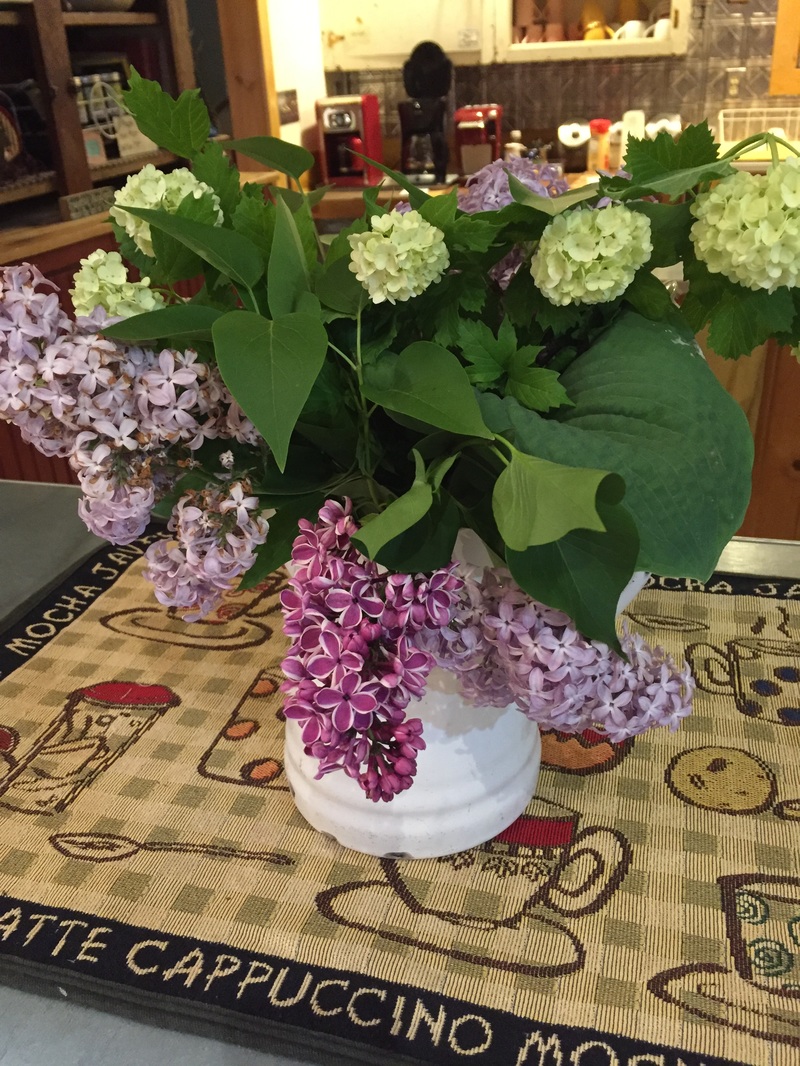
Picture staying at a beautiful, three-story, hundred-year-old mansion atop a hill in a town filled with artists and craftspeople. That was our setting when we had a retreat at the Jones Mansion in Mineral Point, Wisconsin. Be sure to read all the way to the bottom for some great news!
Picture
Now, often times, as is true in this case, I'm so busy when I'm teaching that I forget to take photos. So instead, for the next three, I'm borrowing some photos from the Jones Mansion website so you can see the lovely accommodations. Here you can see the gorgeous skylight (which is actually in the workroom!) and lovely curved banister on the second floor.
Picture
Photo courtesy of Jones Mansion.
Here's a photo of one of the bedrooms. It's the only triple room; most are doubles, and there are a couple of single rooms. All of the beds are topped with a handmade quilt.
Picture
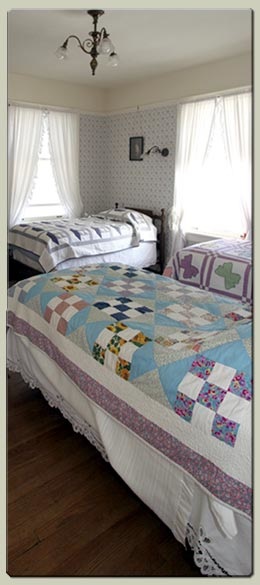
Again, a Jones Mansion photo.
And the bathrooms are wonderful too -- each has a claw foot tub and lots of character (and no, I don't mean that in a "nice personality" way, either)!
Picture
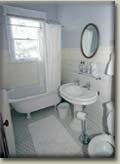
Another Jones Mansion photo. The bathroom is bigger than it appears here! Get it? Because it's a small photo....
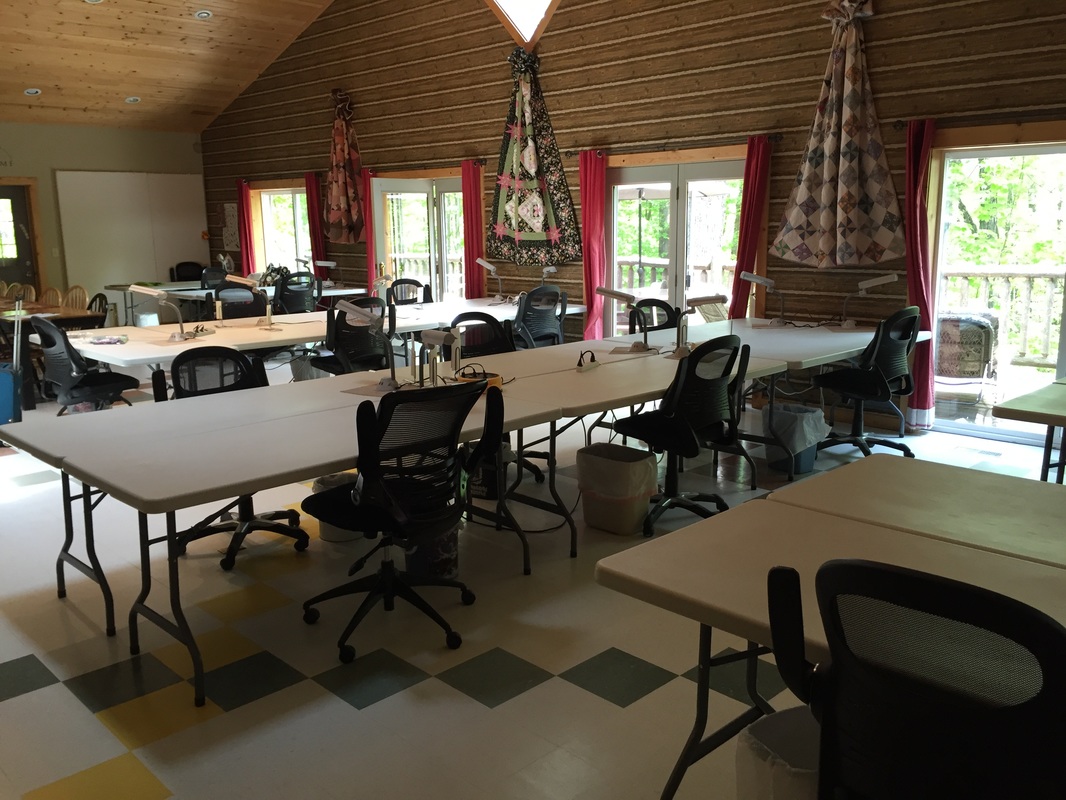
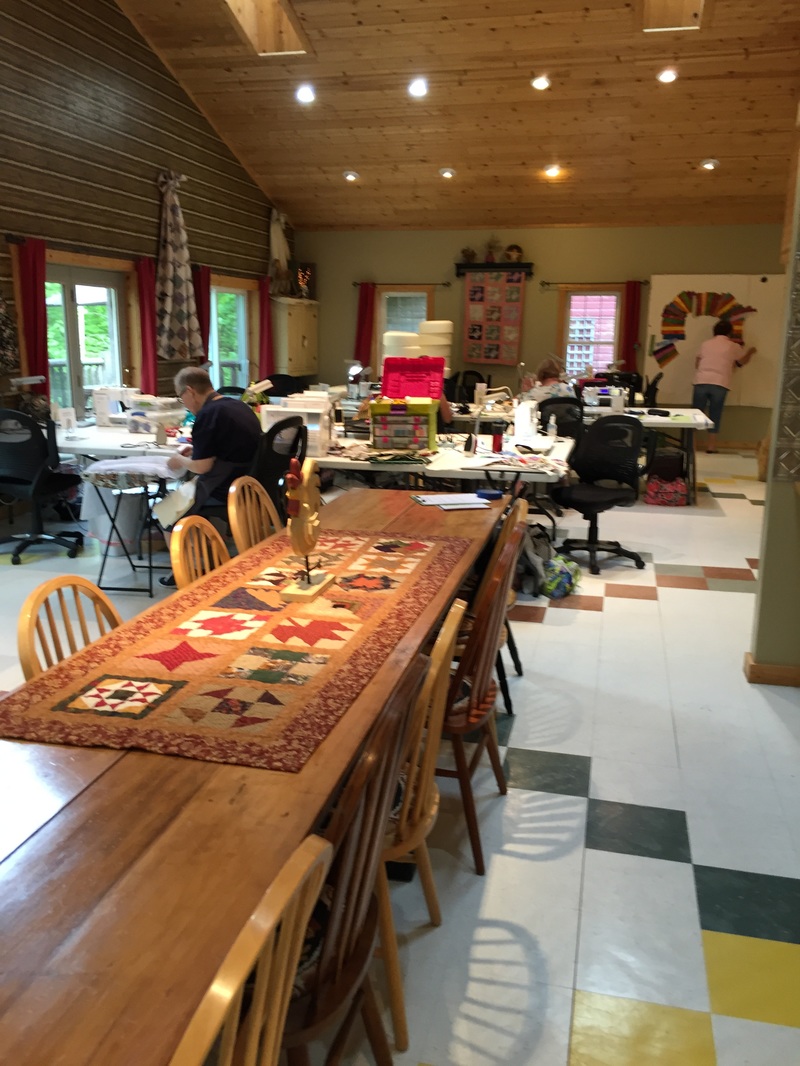
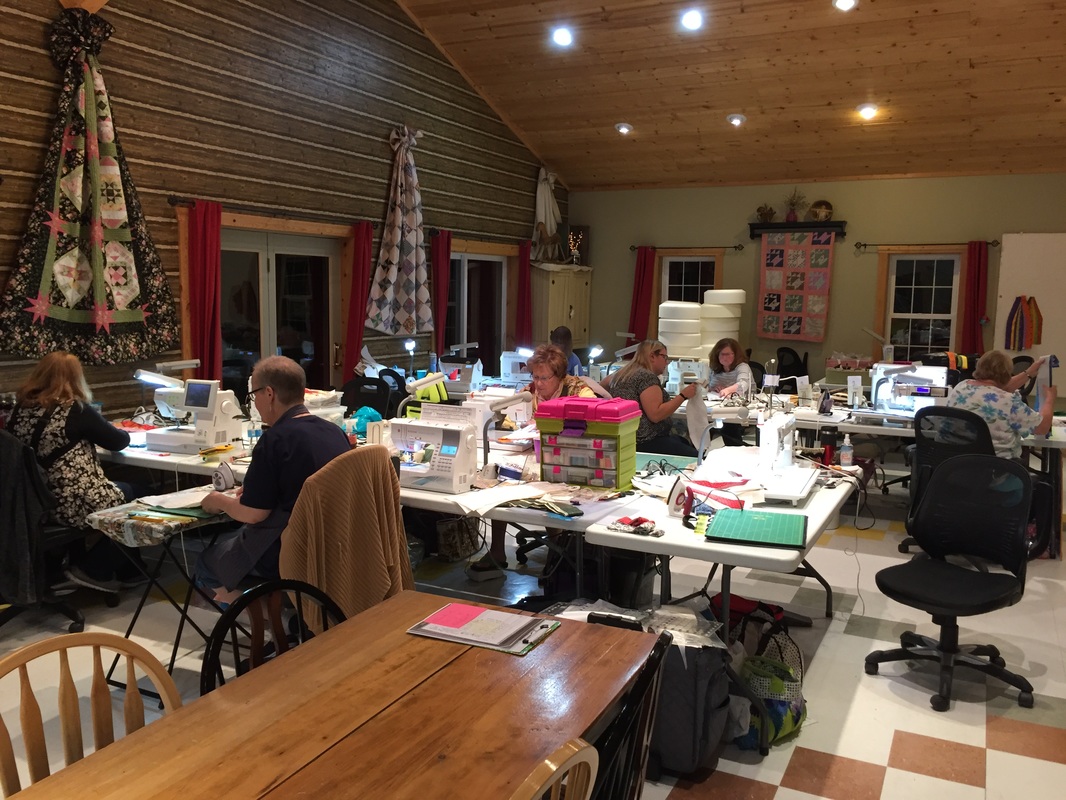
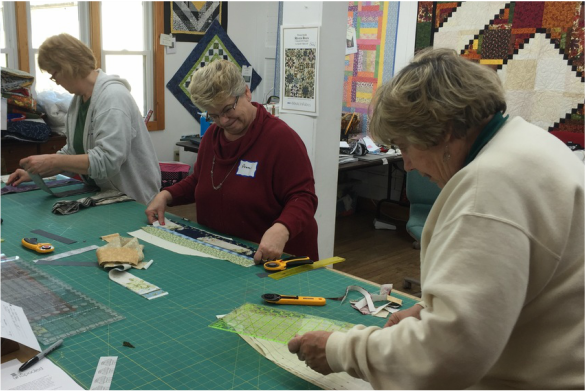
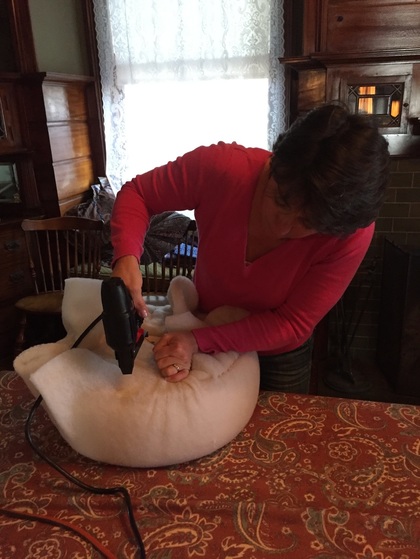
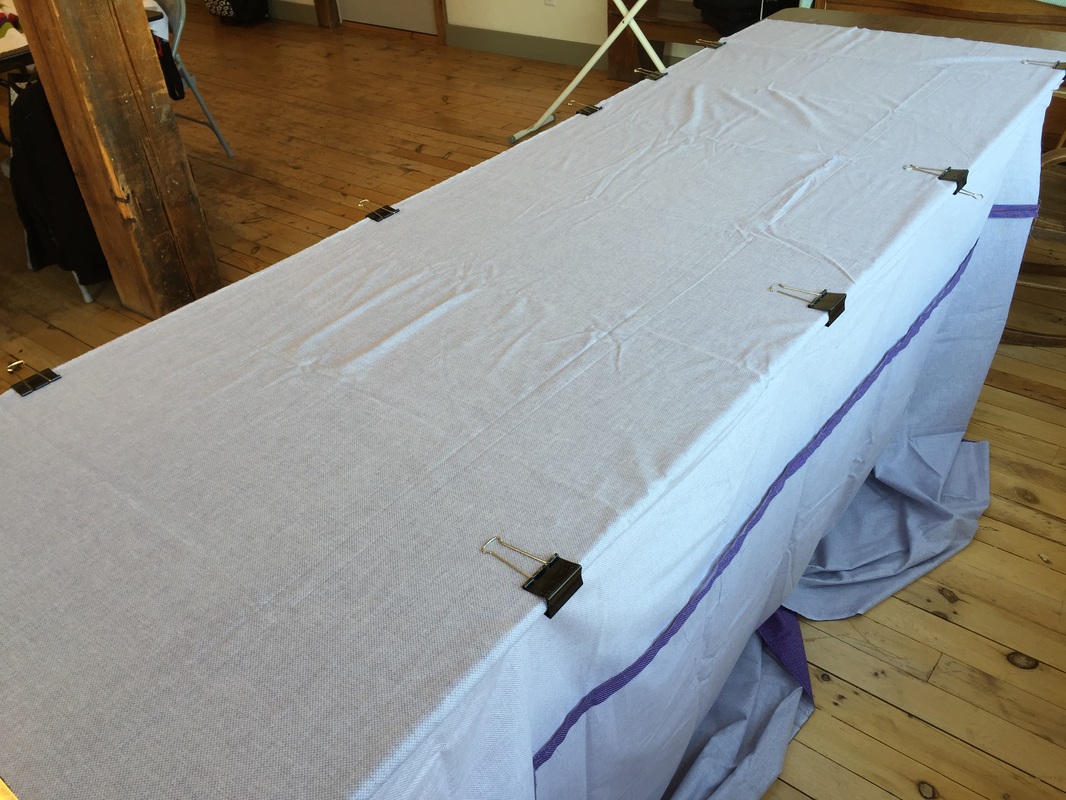
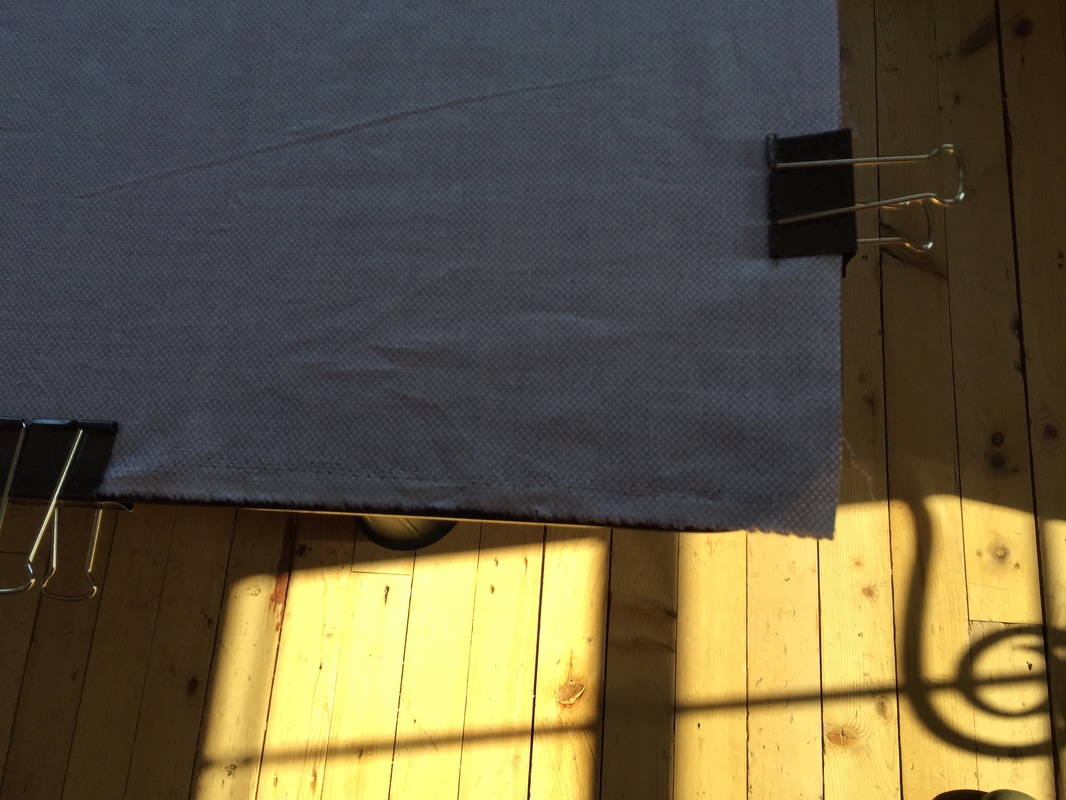
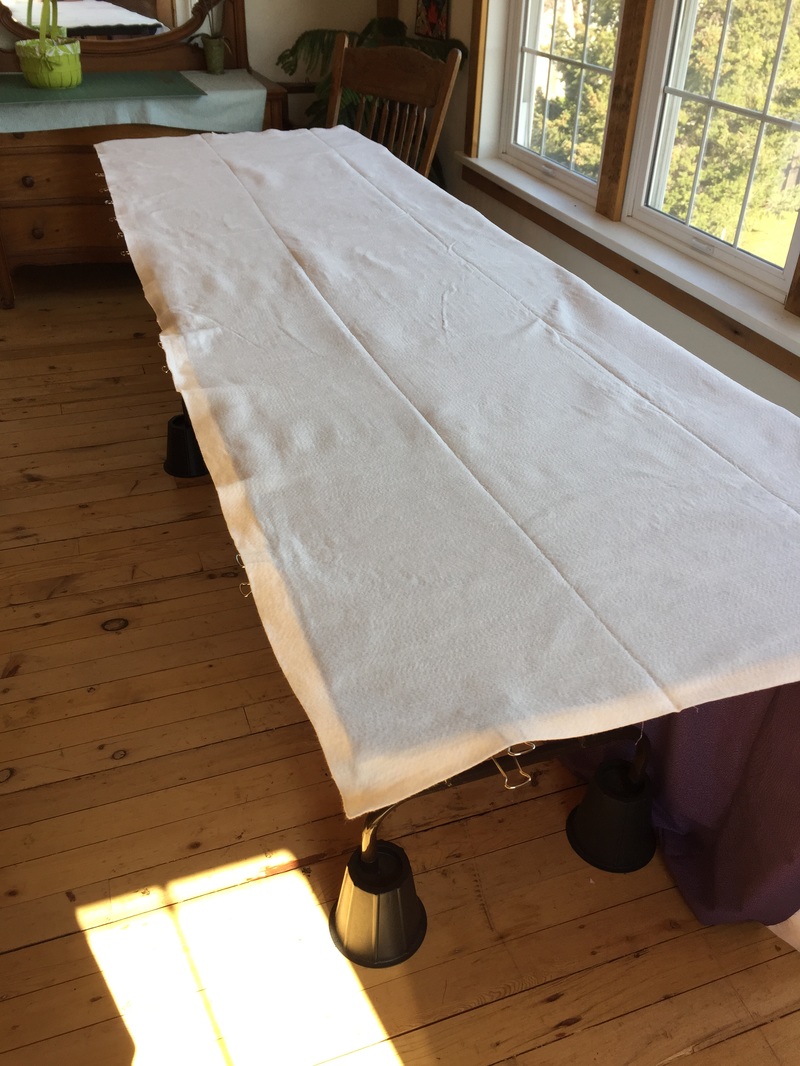
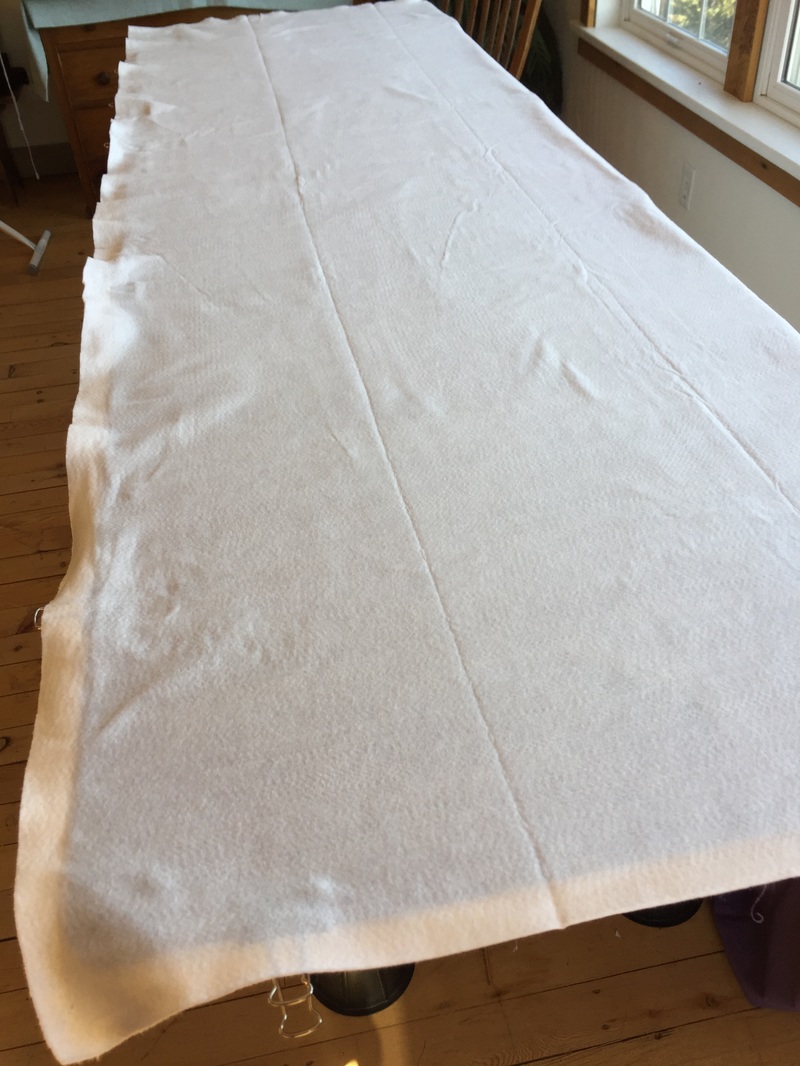
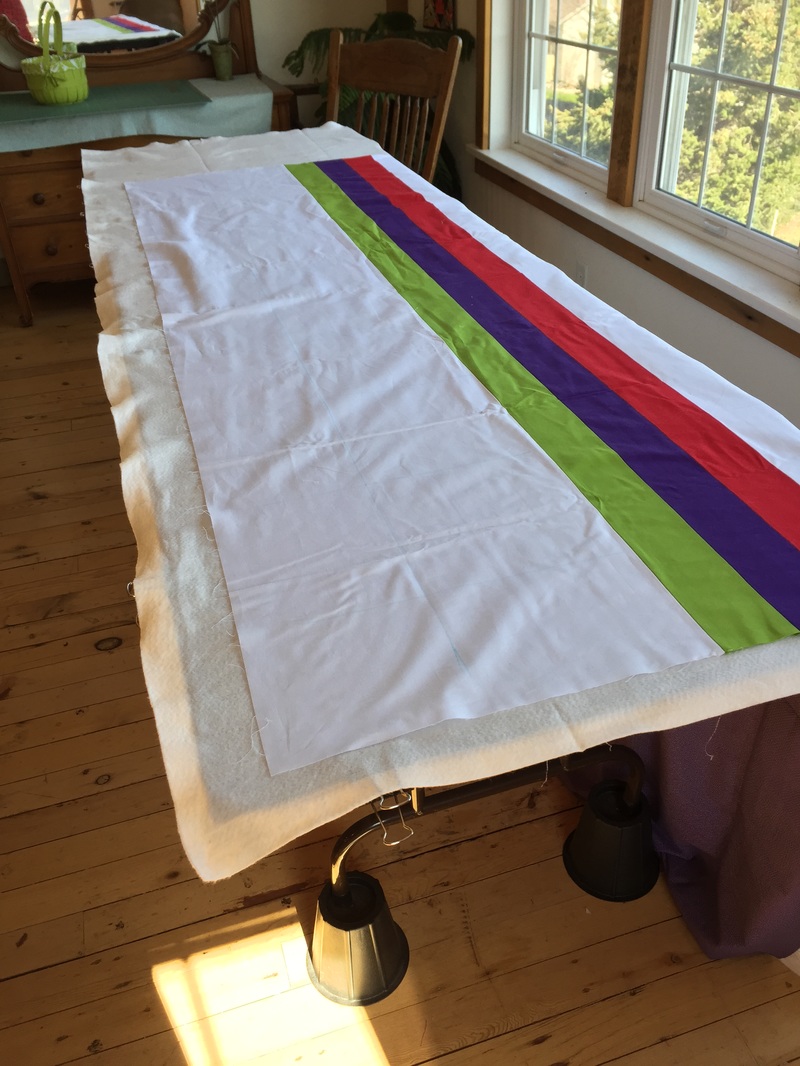
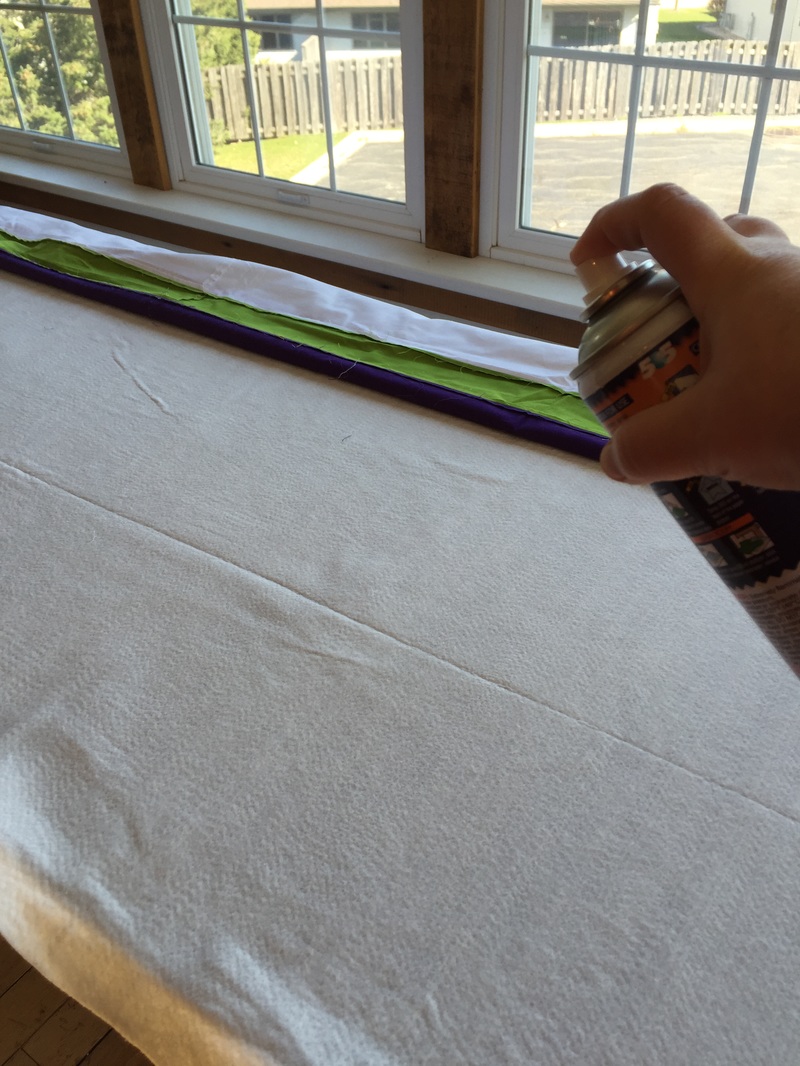
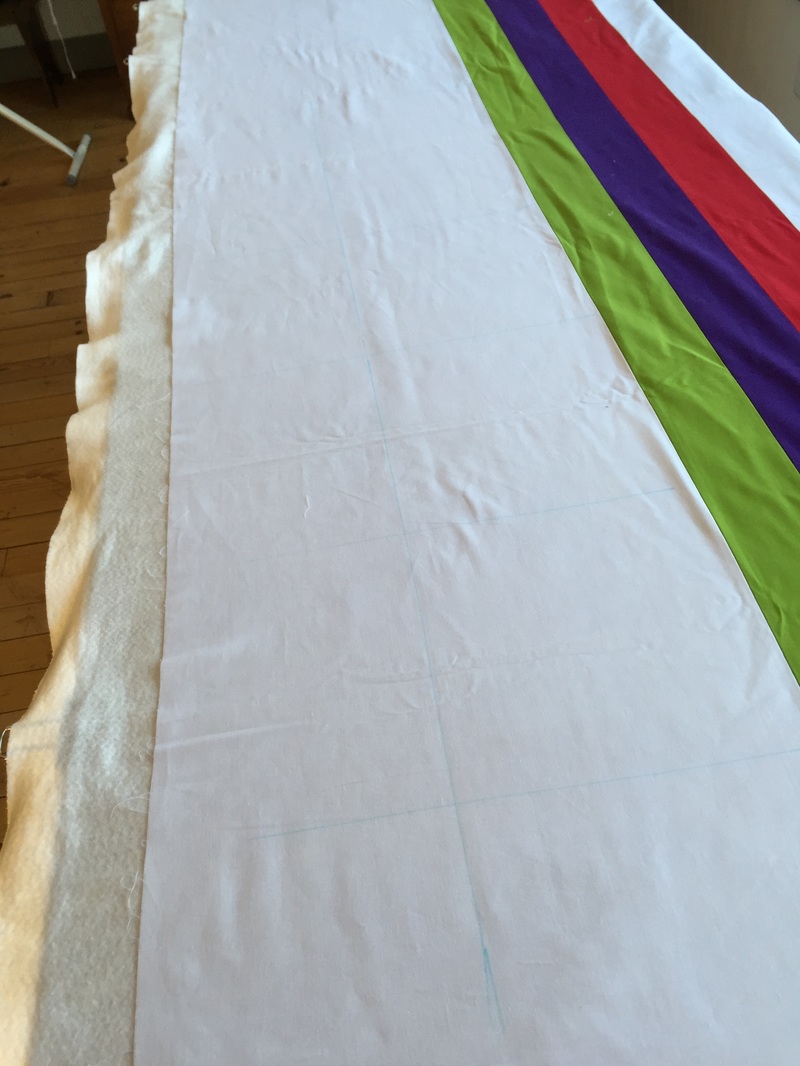
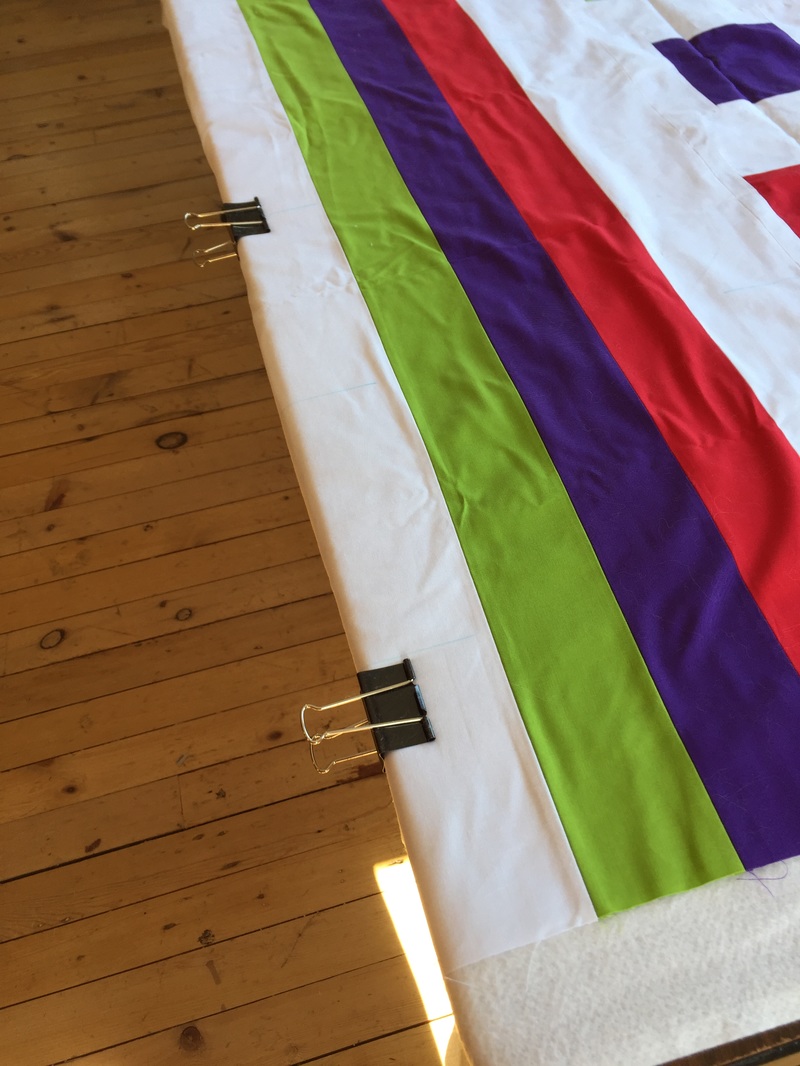
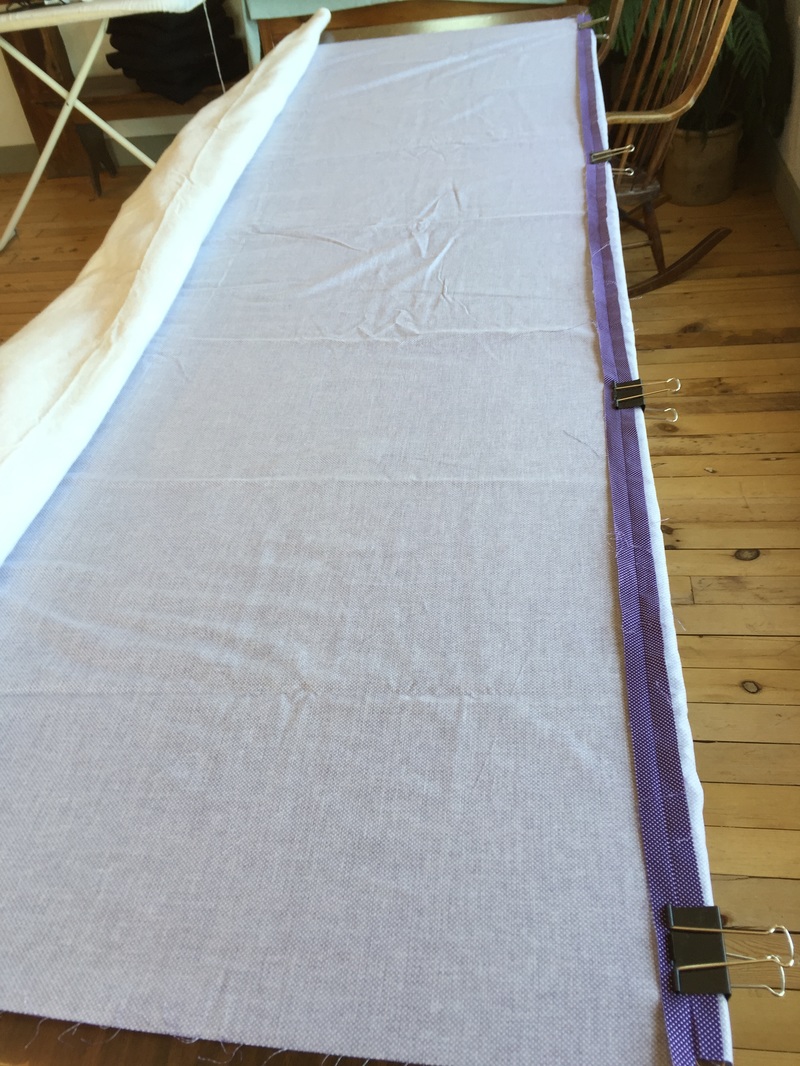
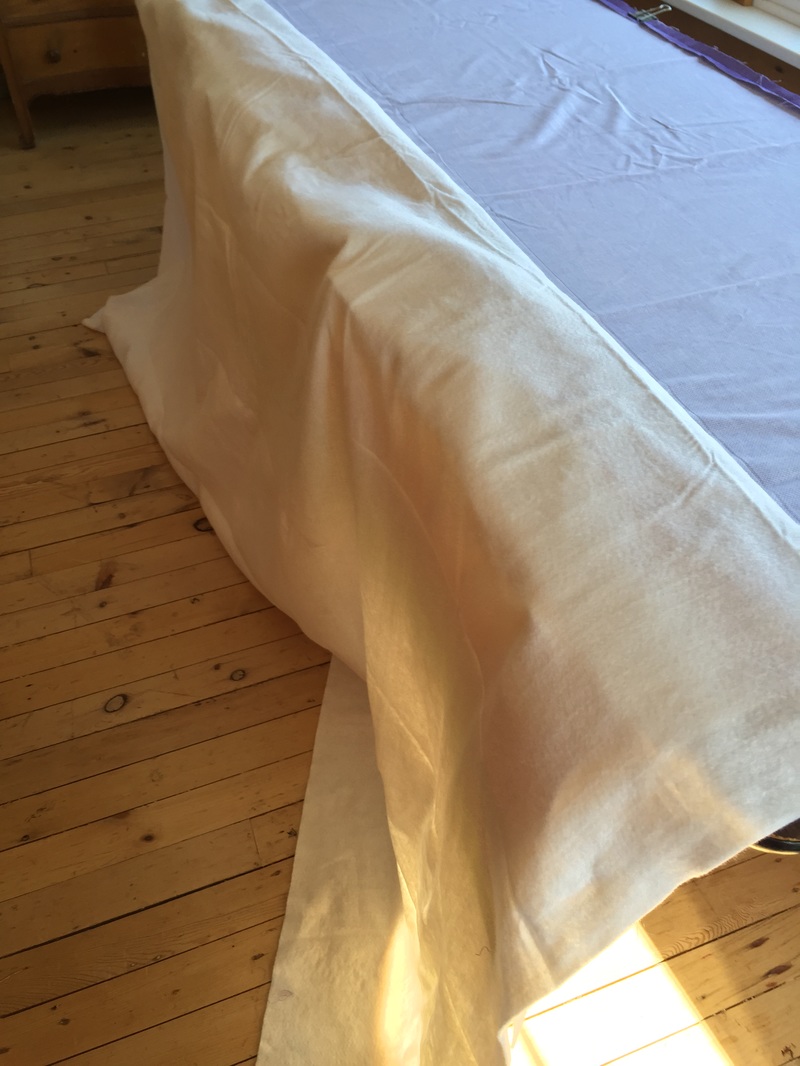
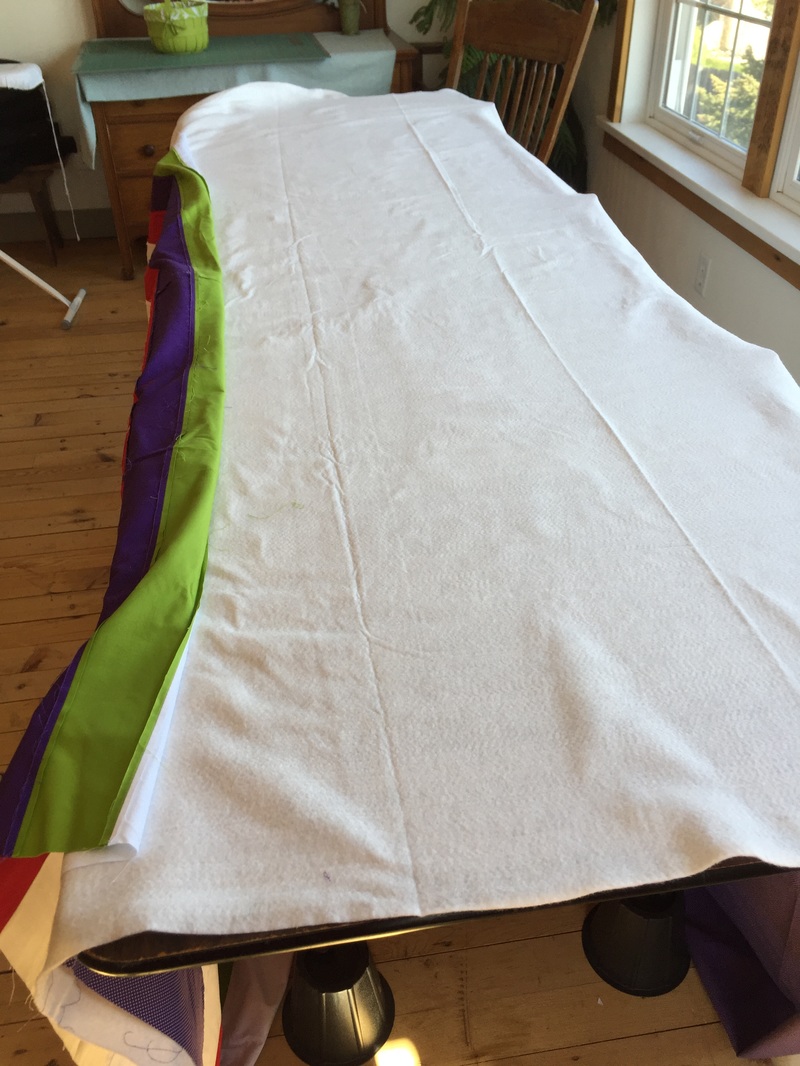
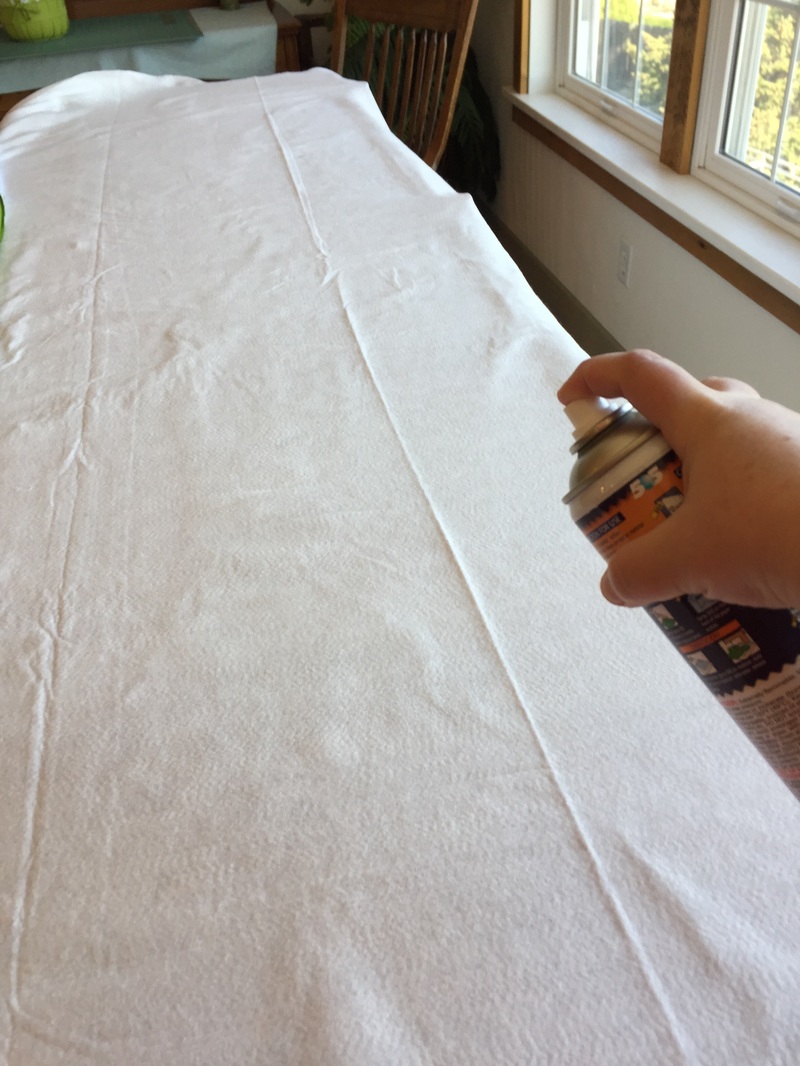
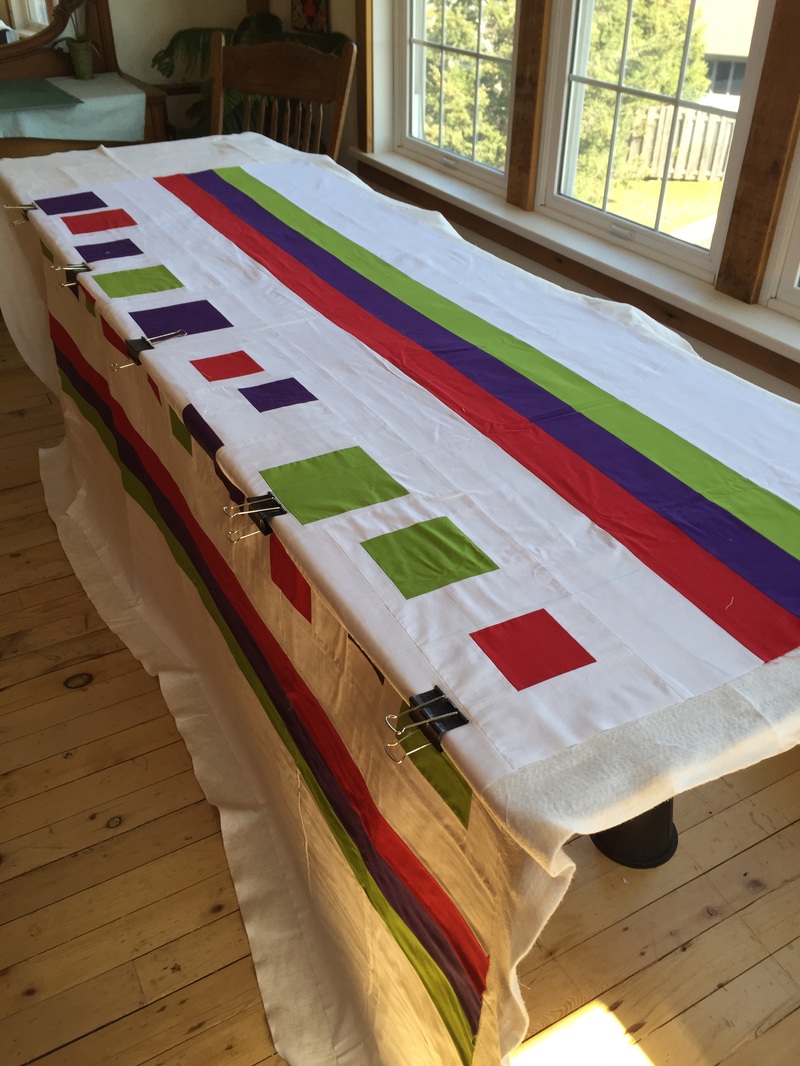
Okay, we're on to my photos now. There is a large workroom (you should go to the Jones Mansion website to check them out) and off of it are two rooms with cutting mats and ironing boards. 
Picture
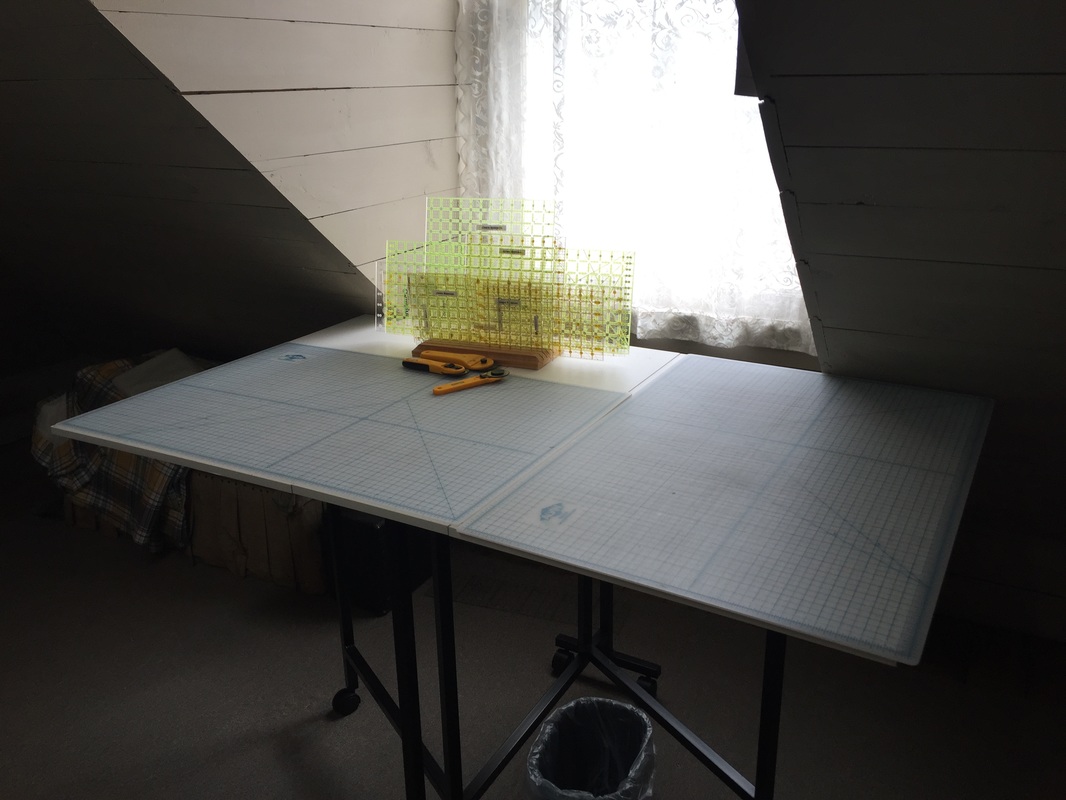
It's lighter in here than it looks.
Picture
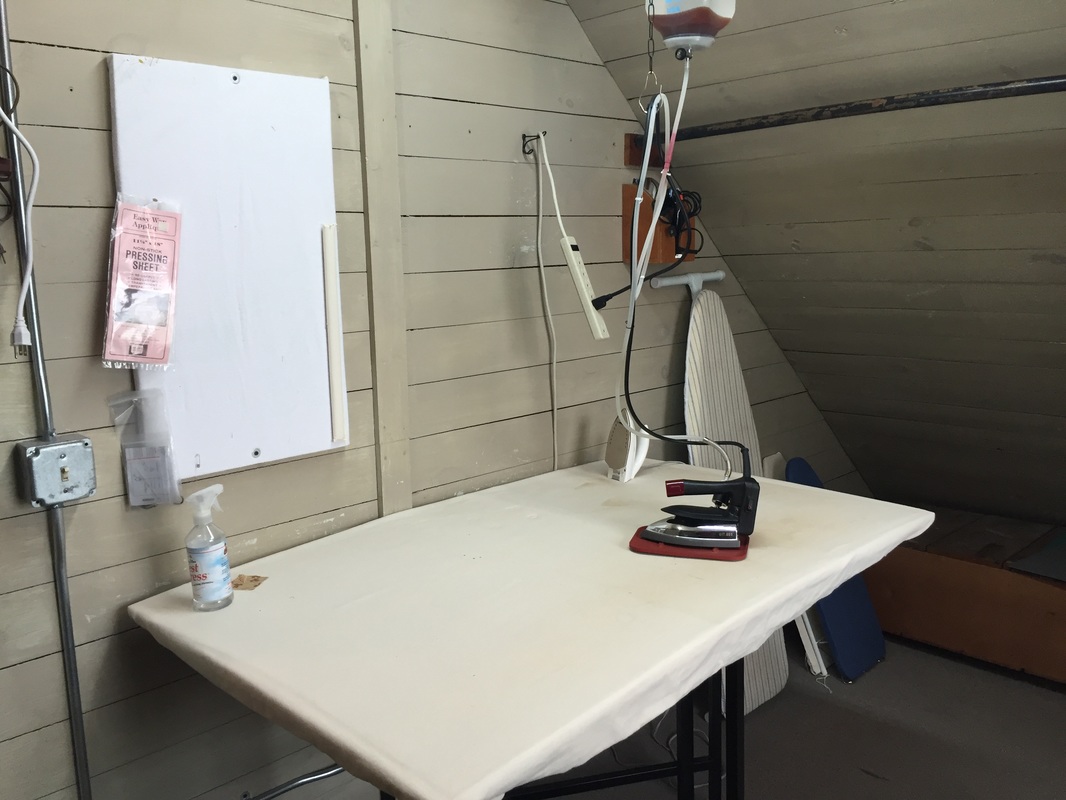
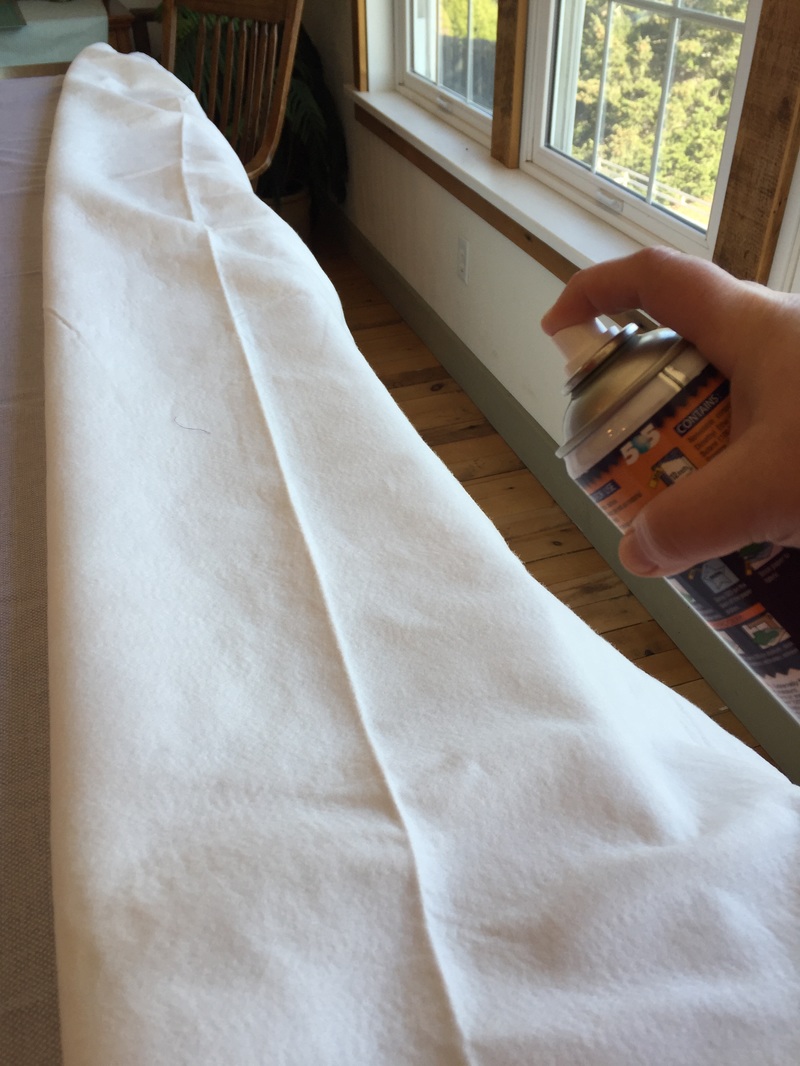
That iron? It gets the job done!
Picture
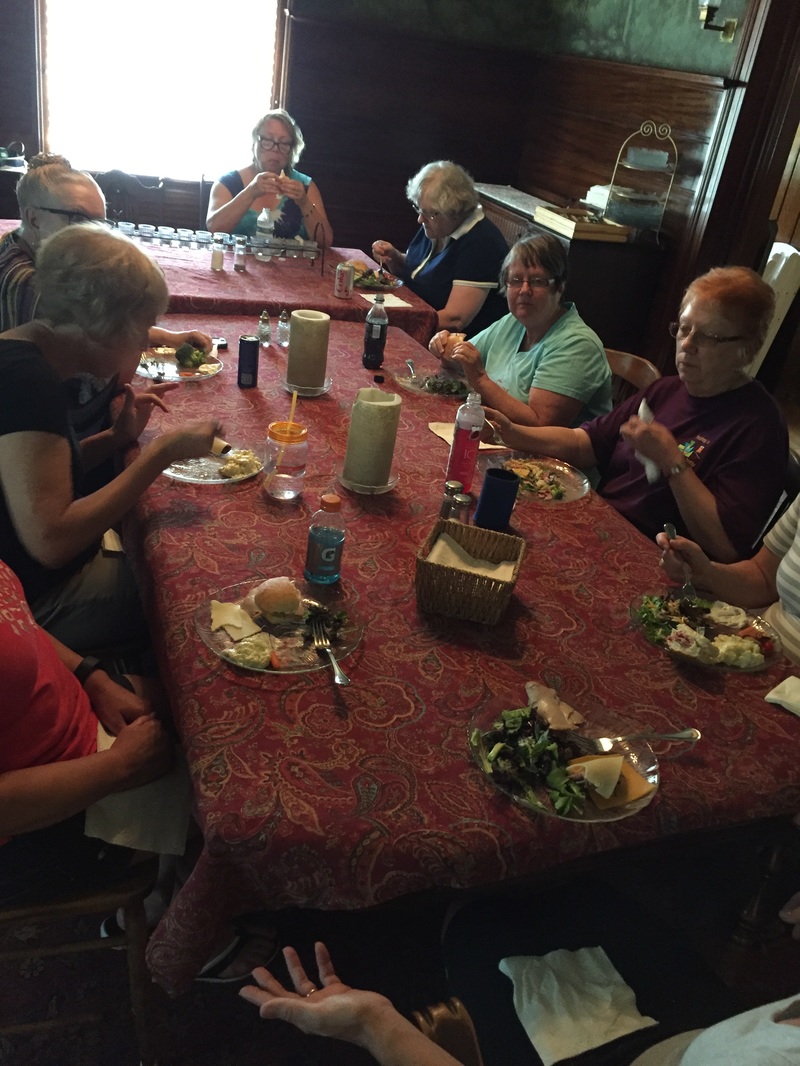
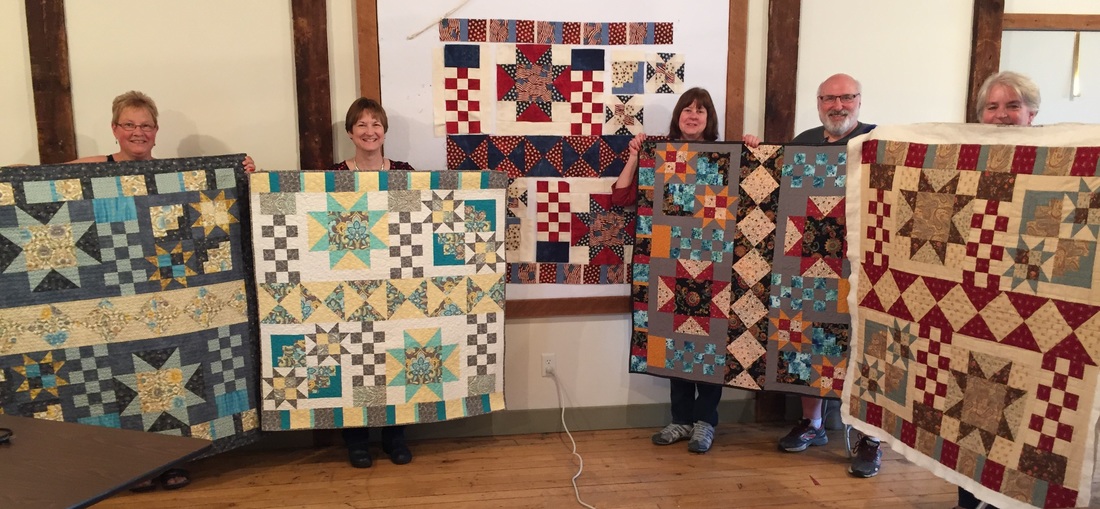
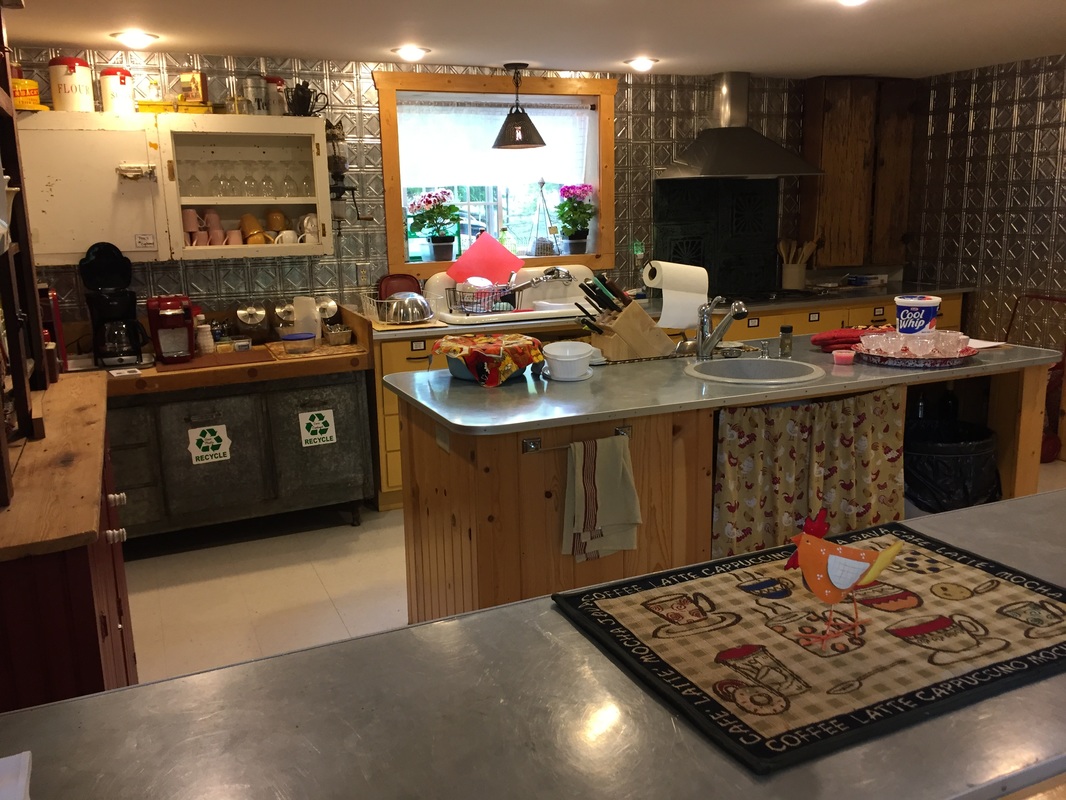
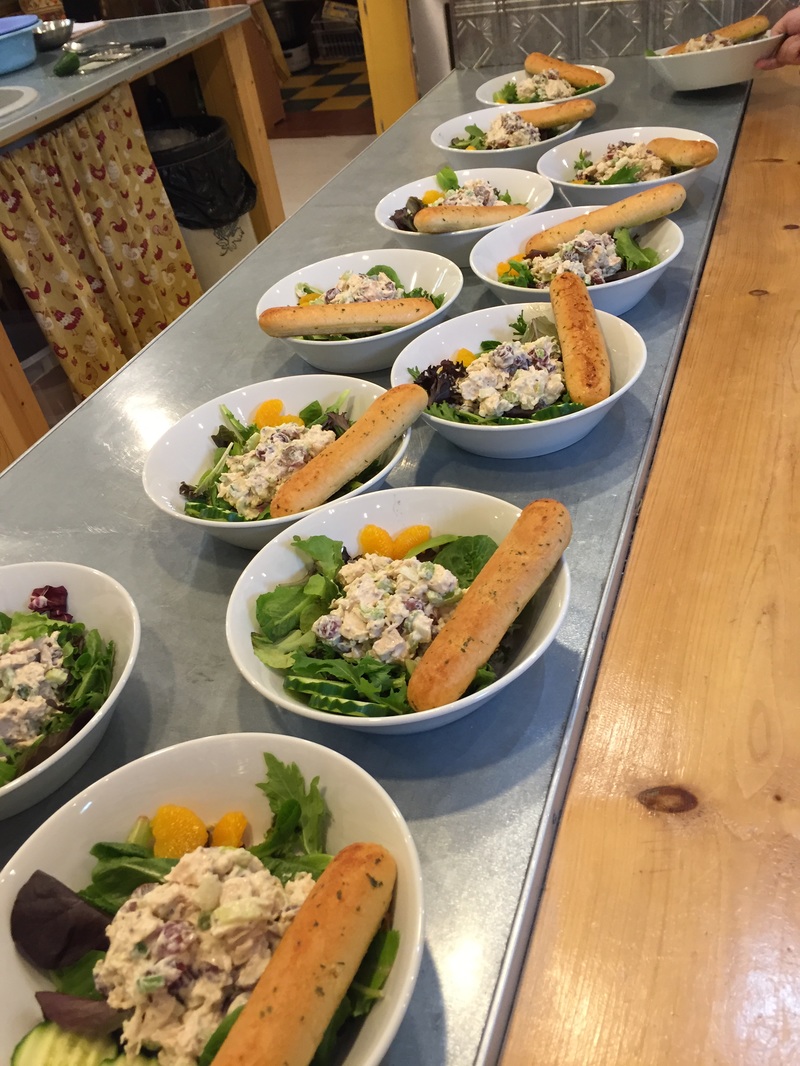
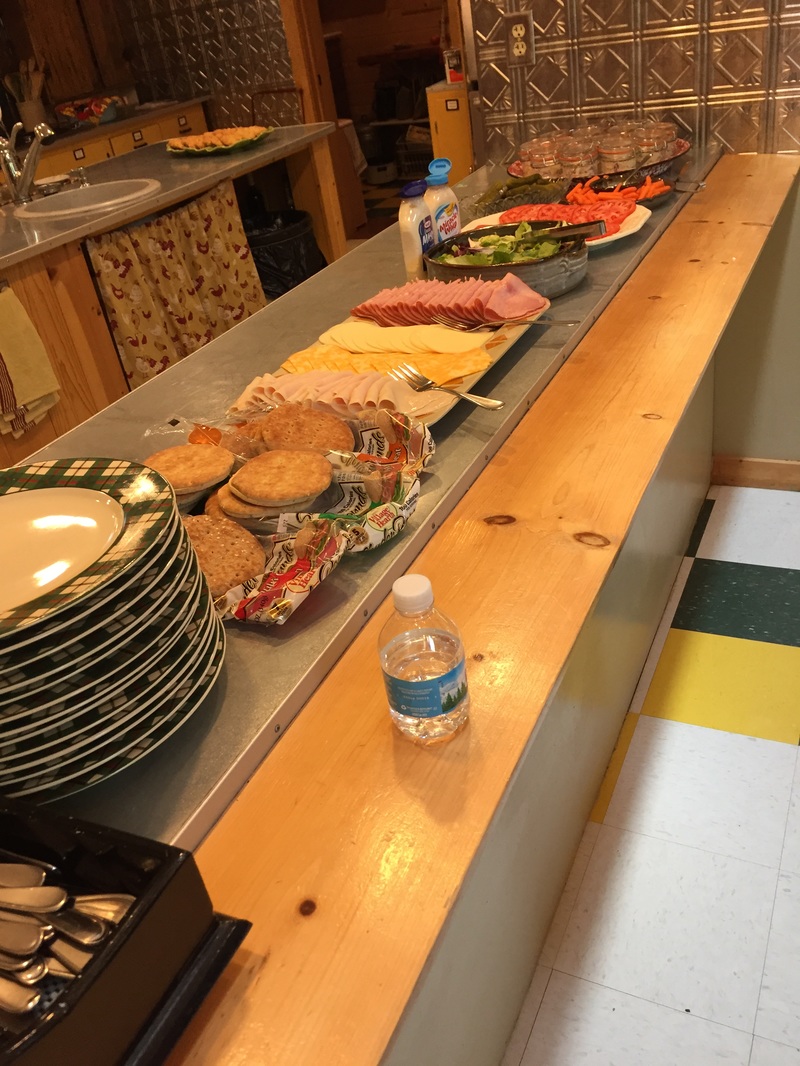
We had great food thanks to my friend Trish!
Picture
Followed by great dessert!
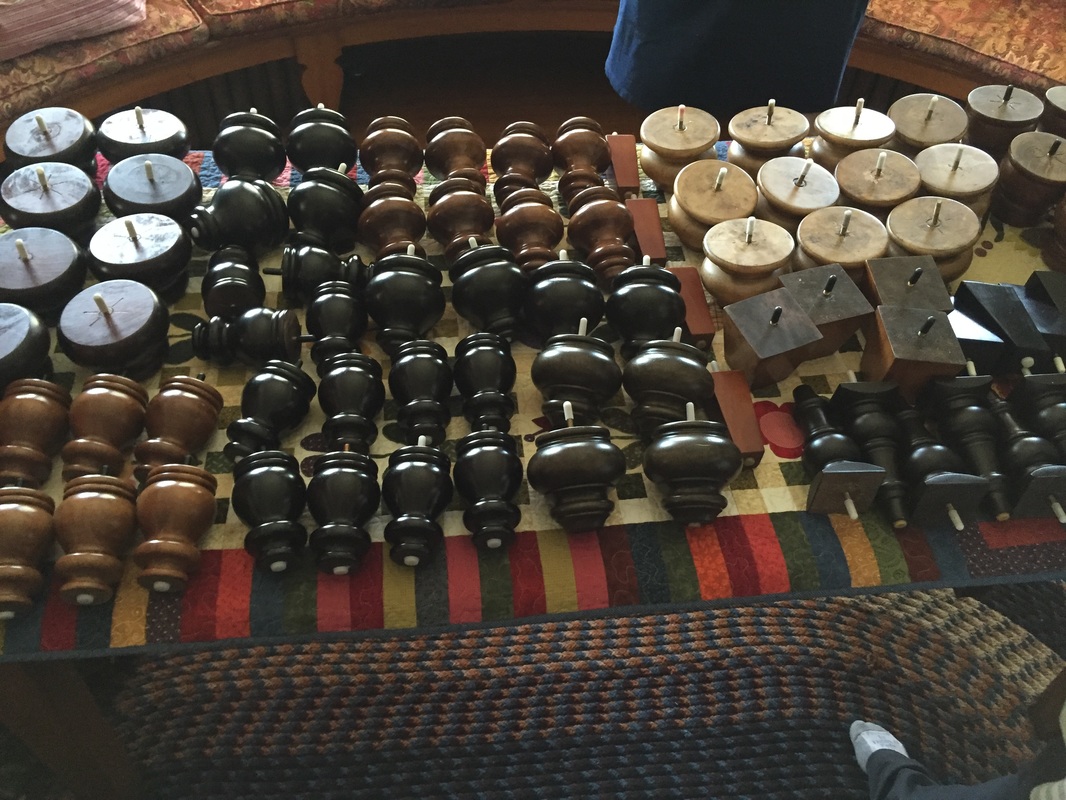
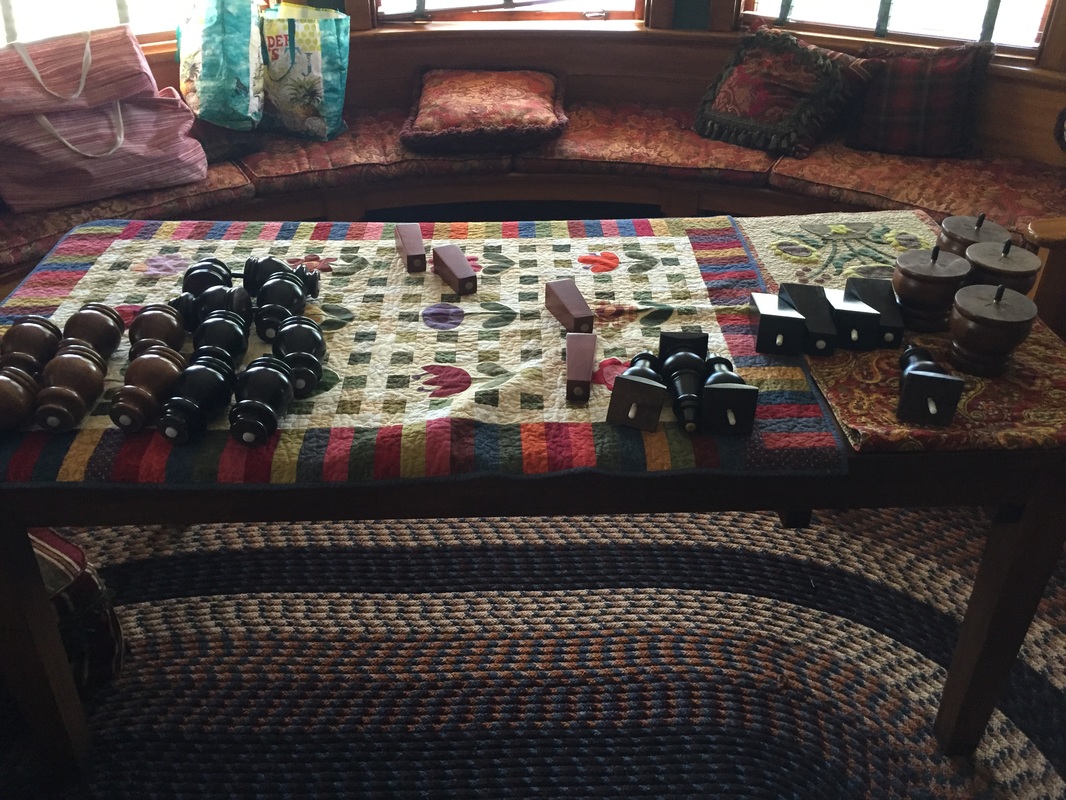
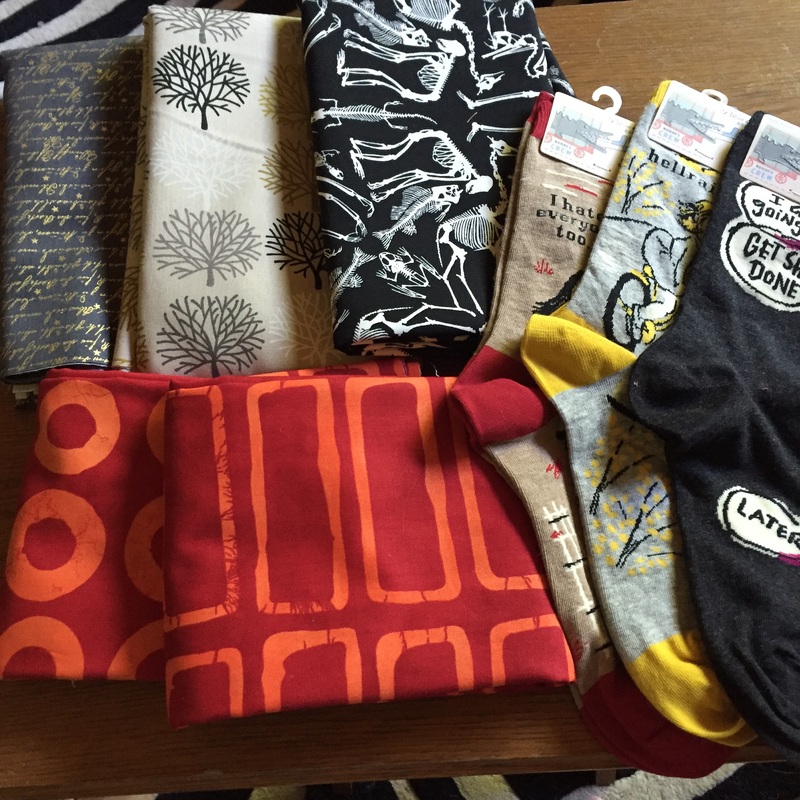
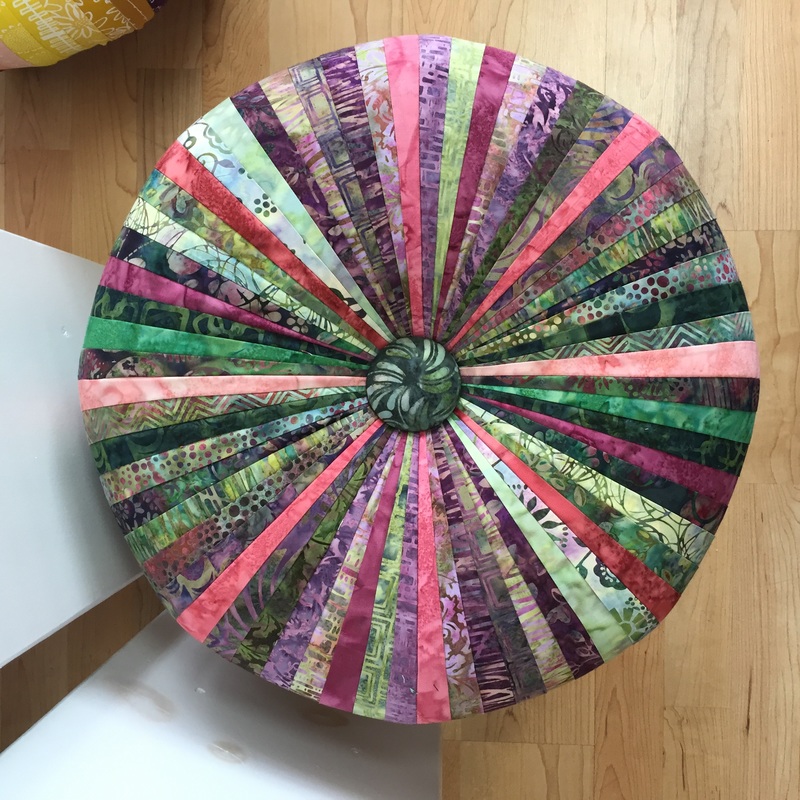
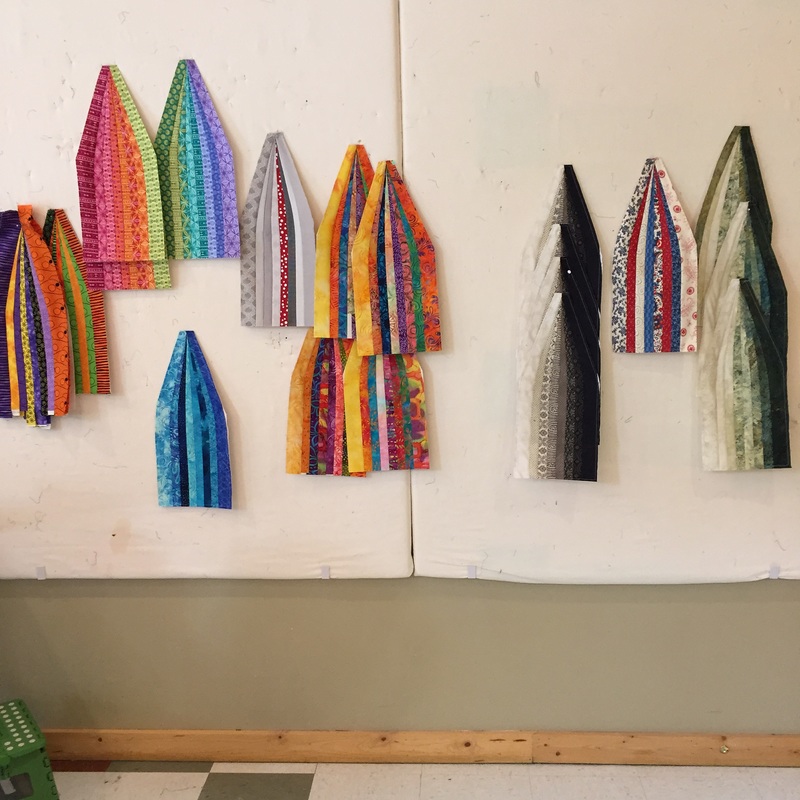
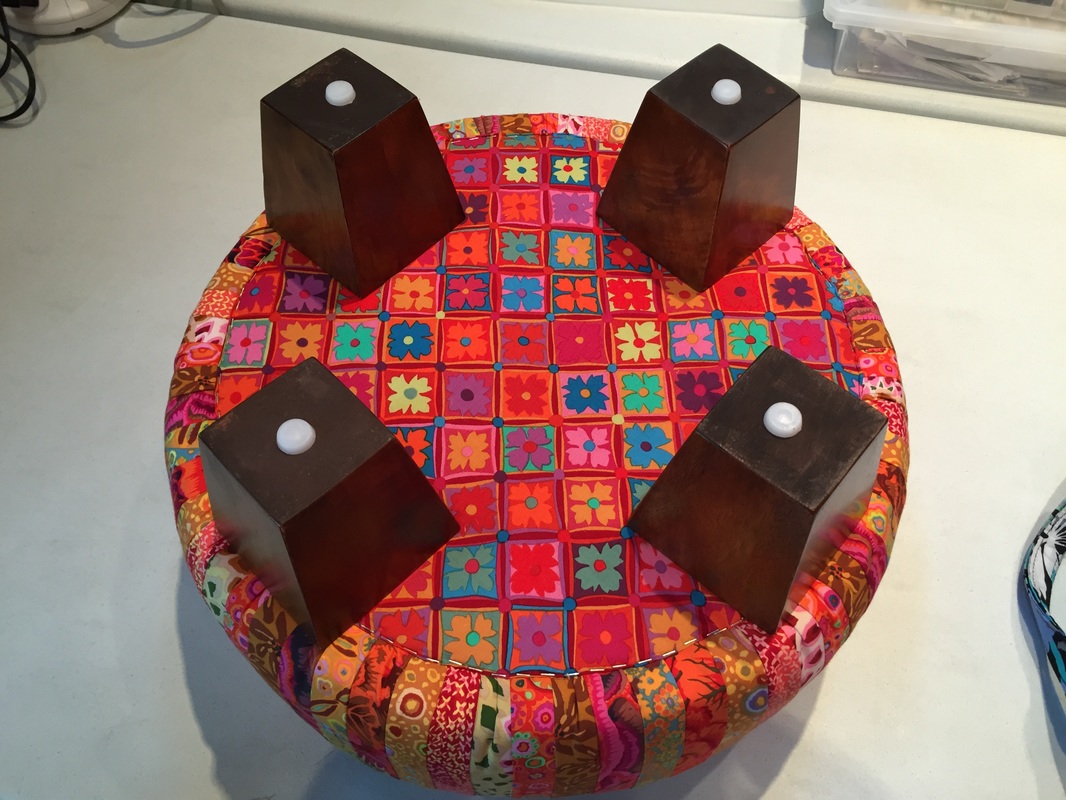
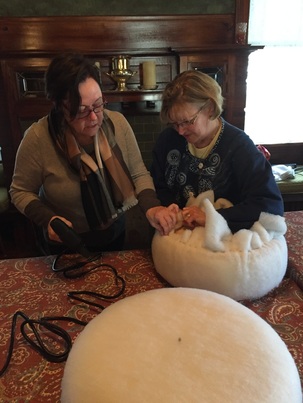
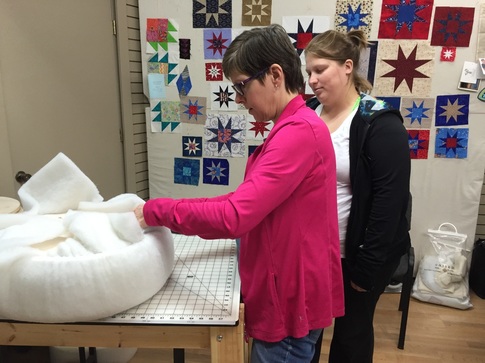
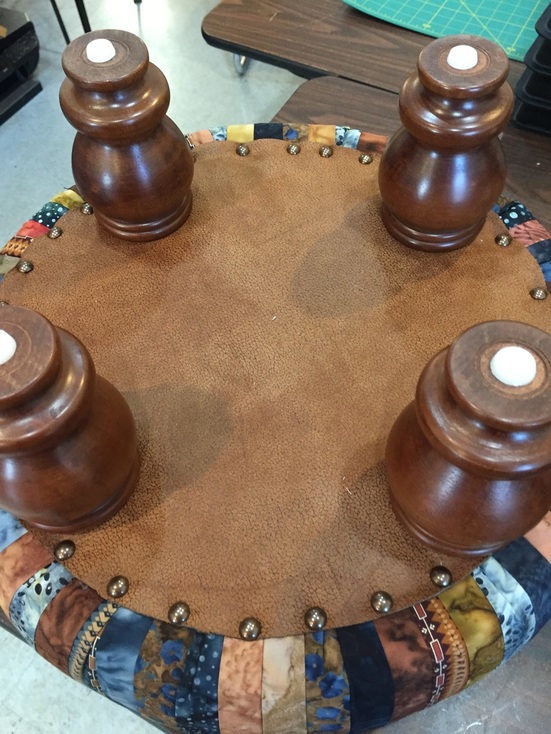
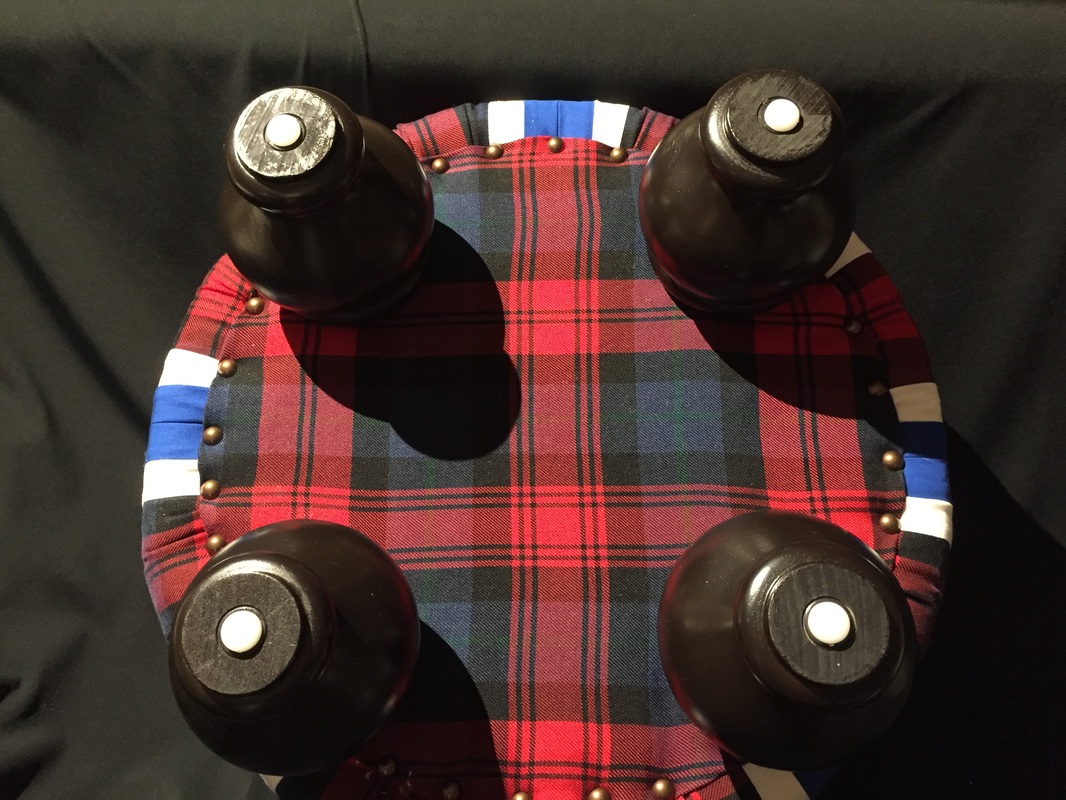
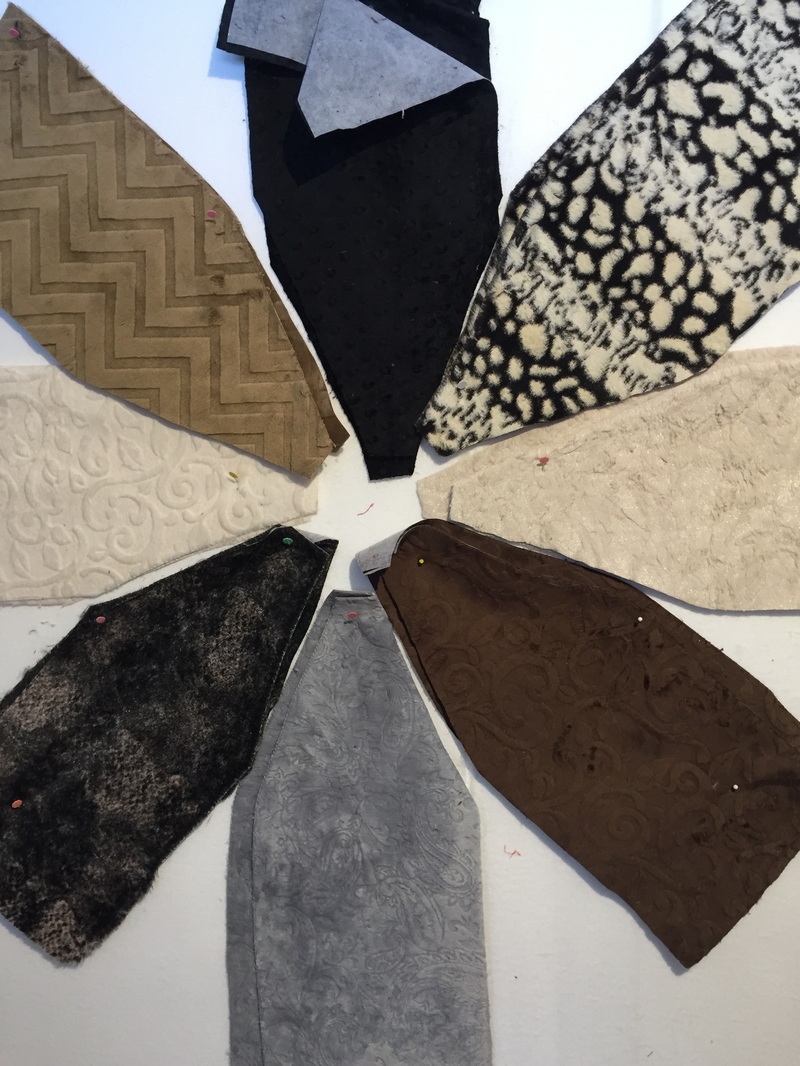
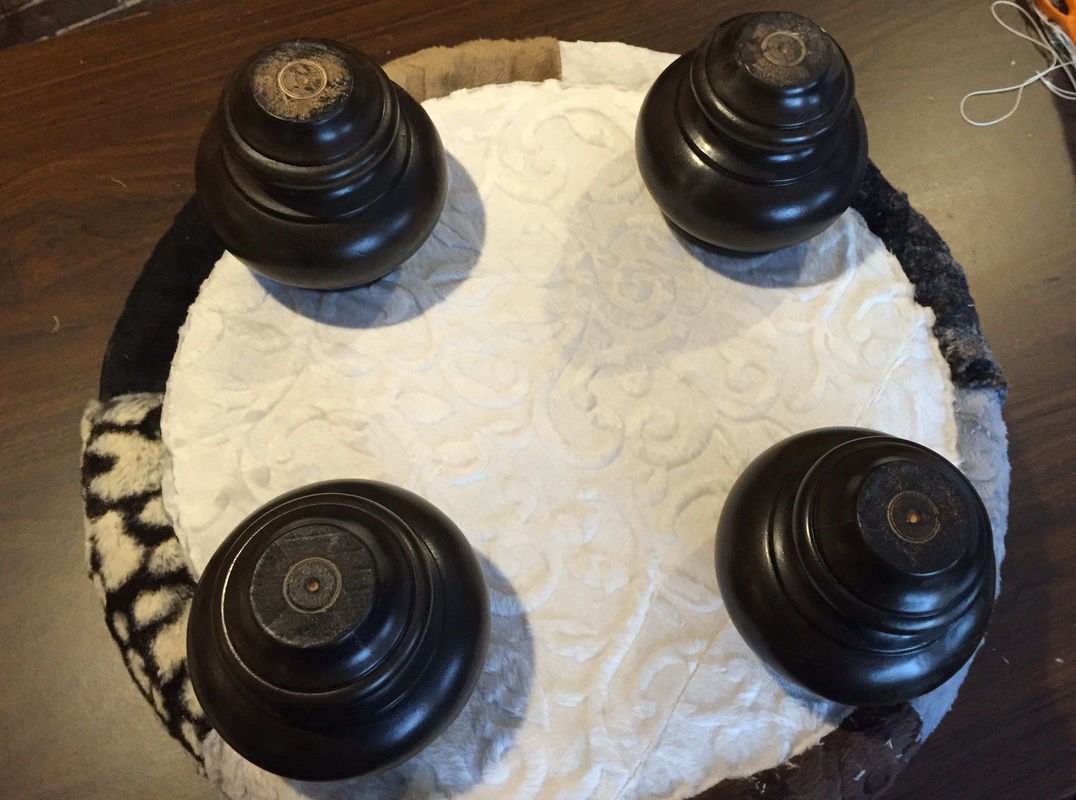
Now, why were we there? Oh yeah, tuffets! First I have to show you the table full of feet choices:
Picture
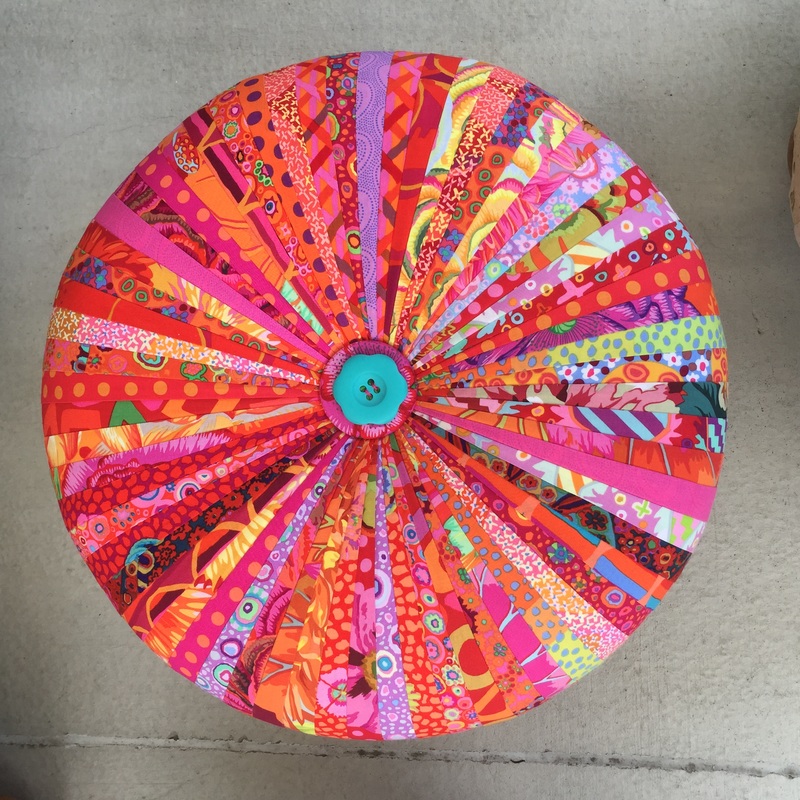
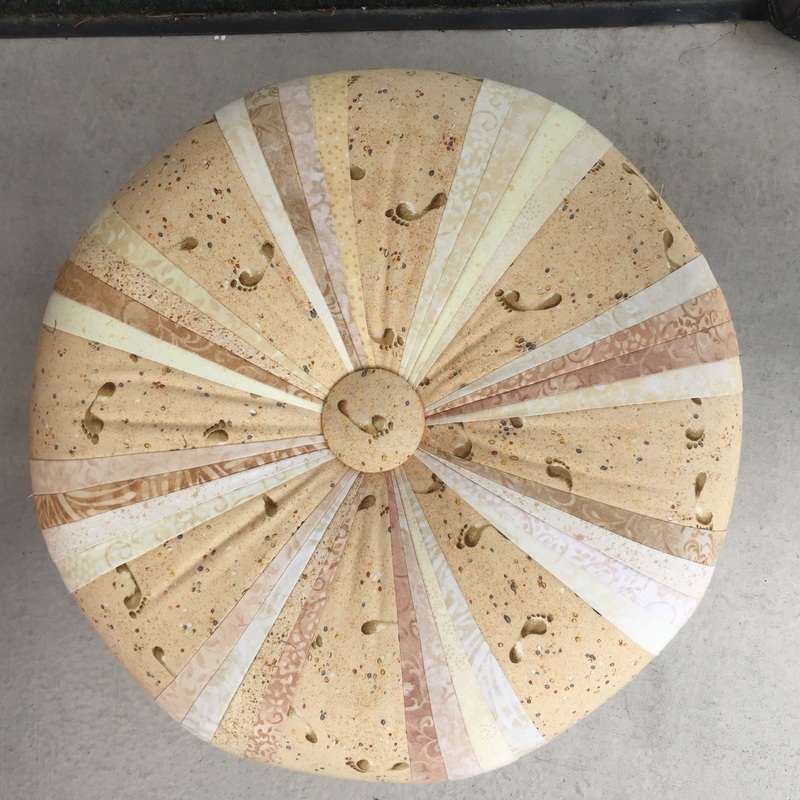
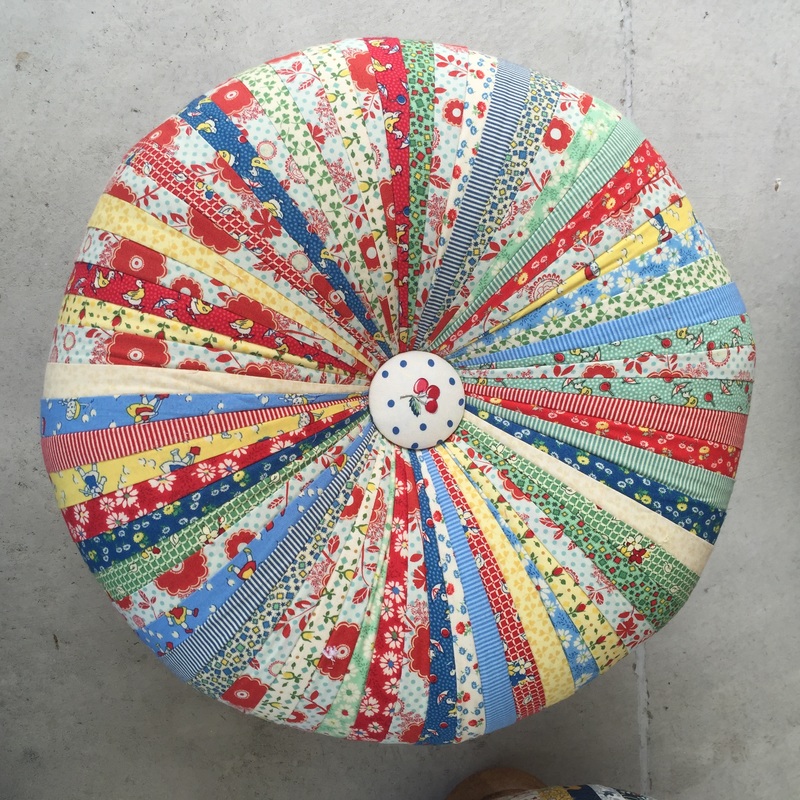
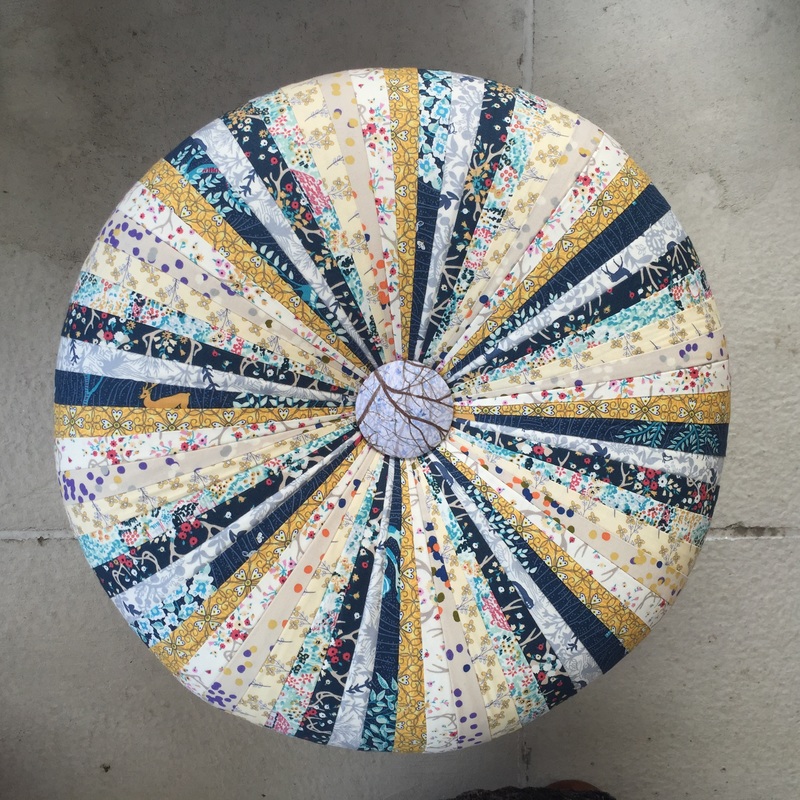
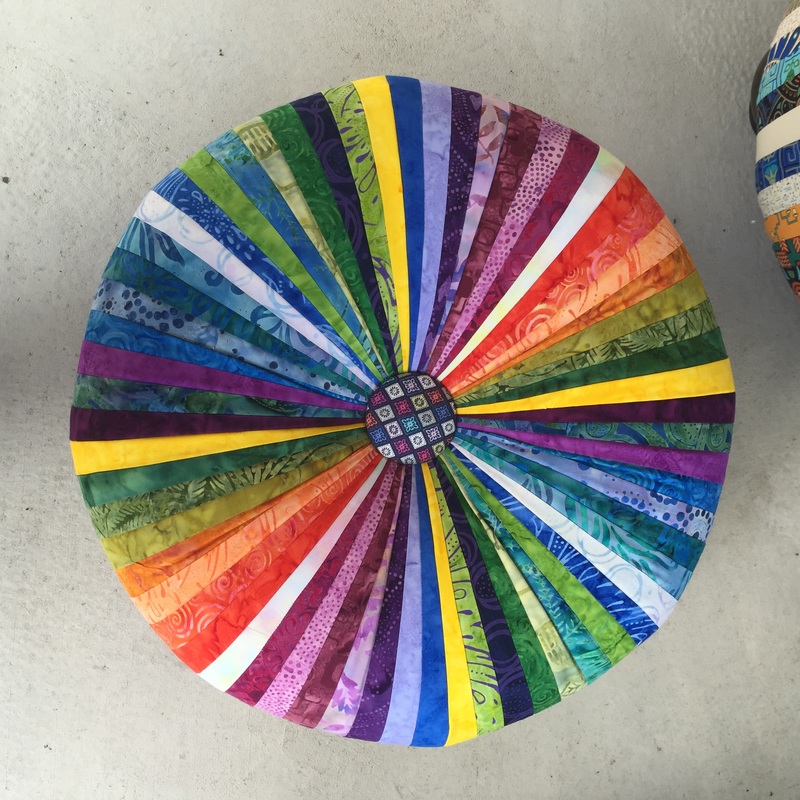
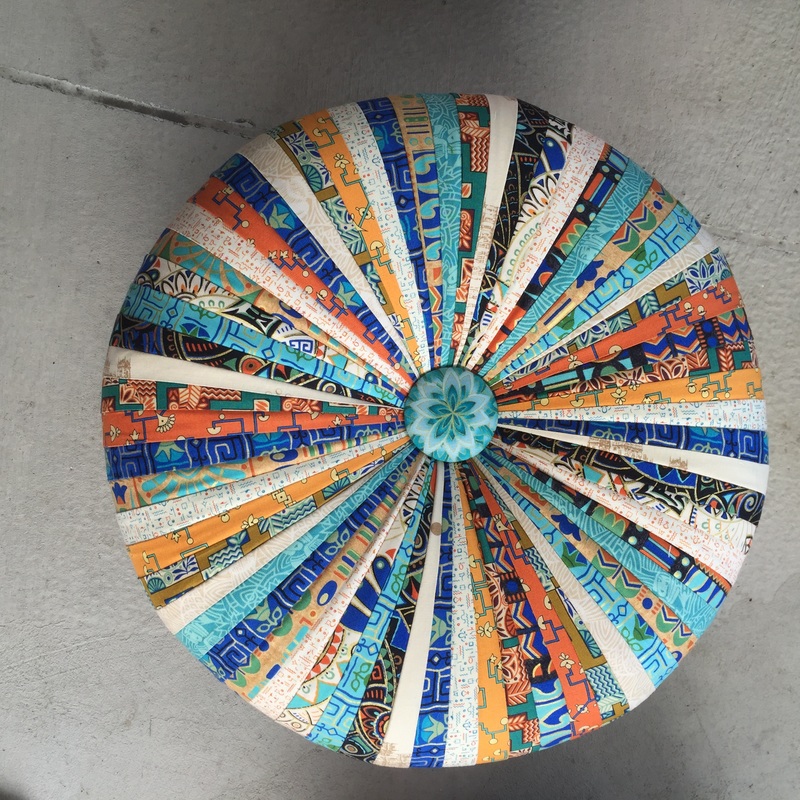
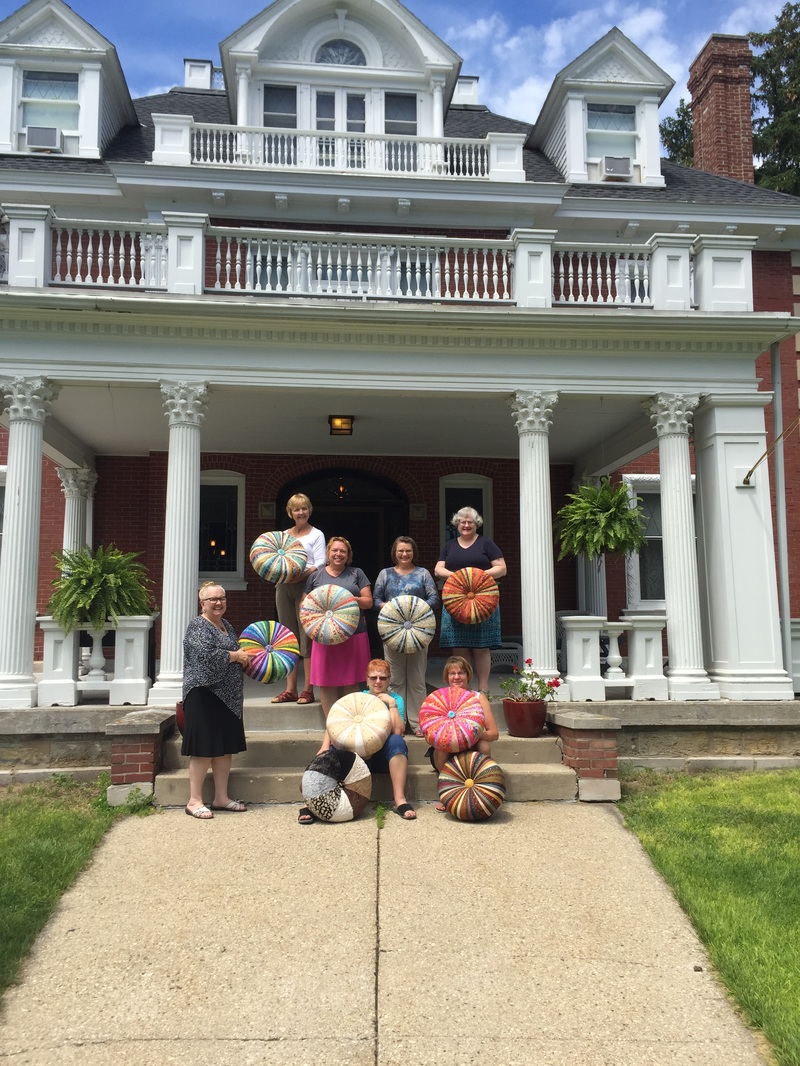
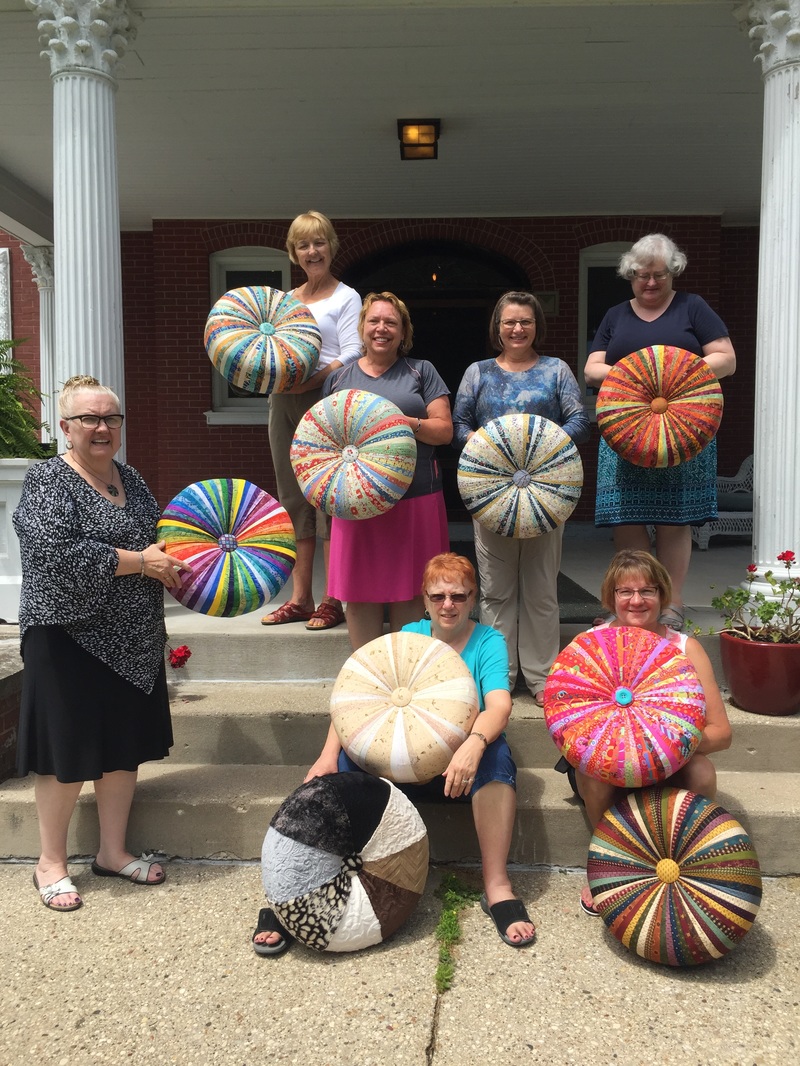
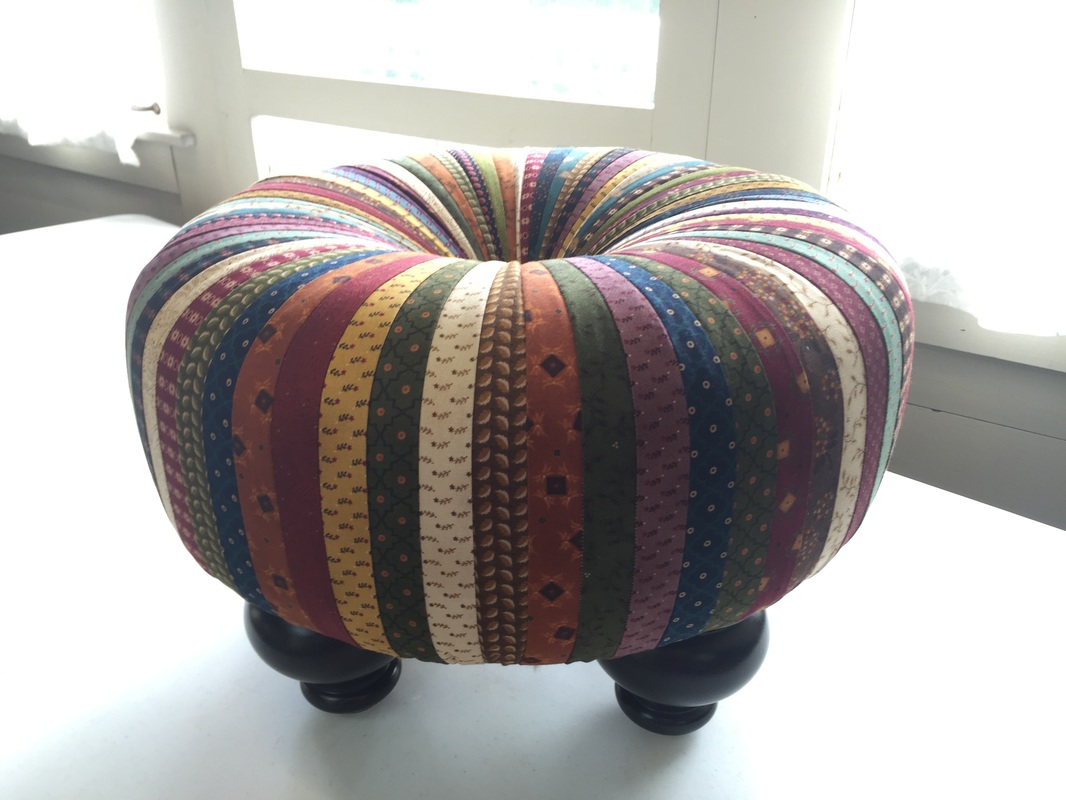
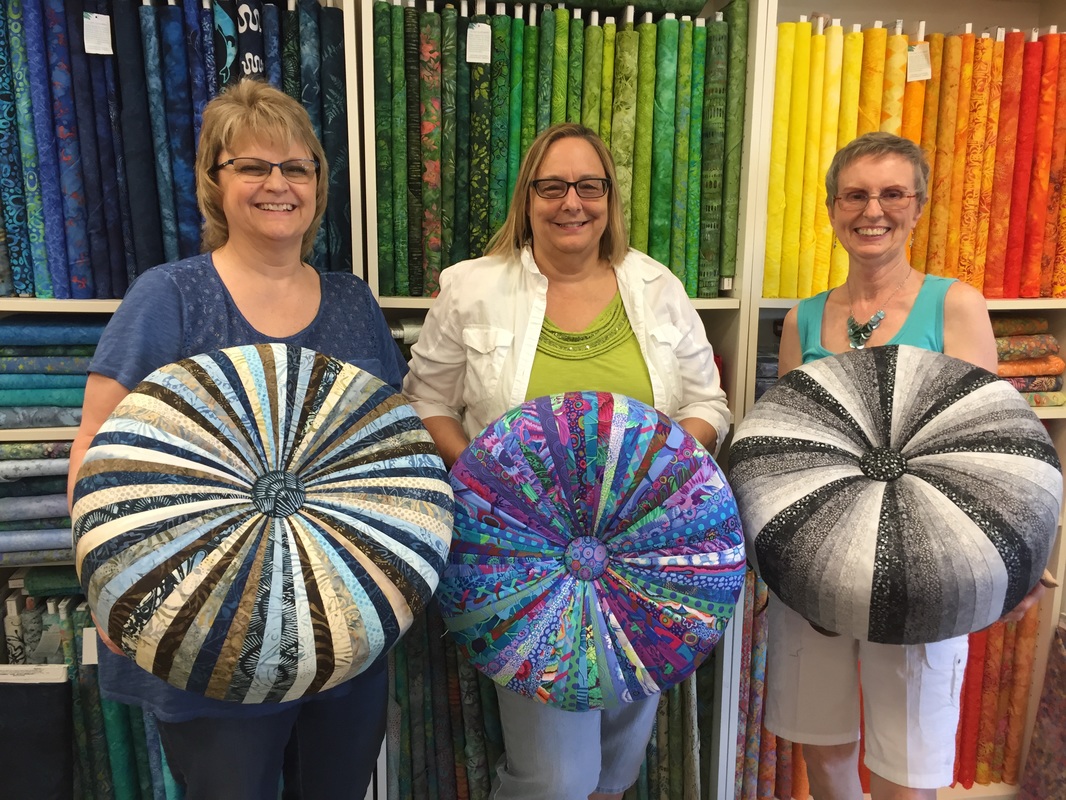
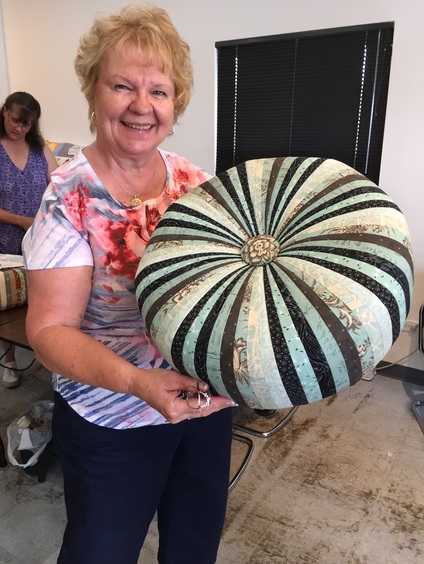
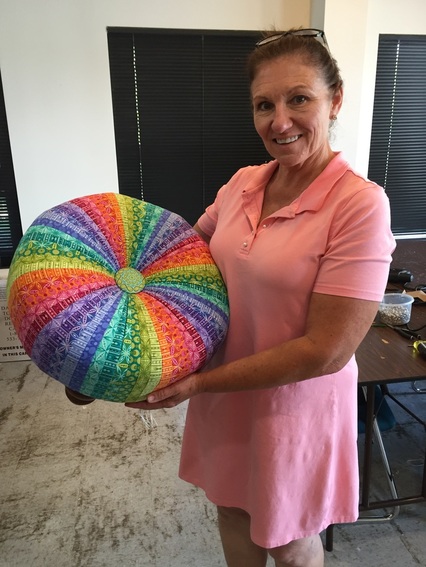
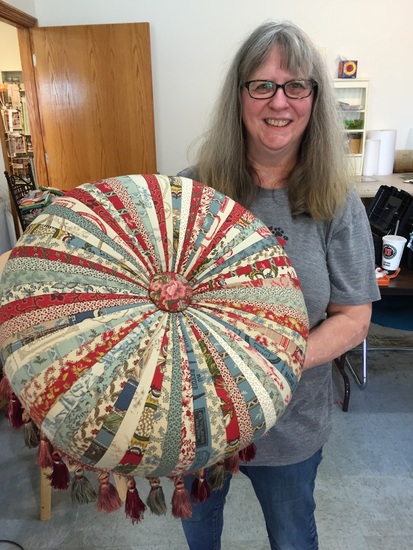
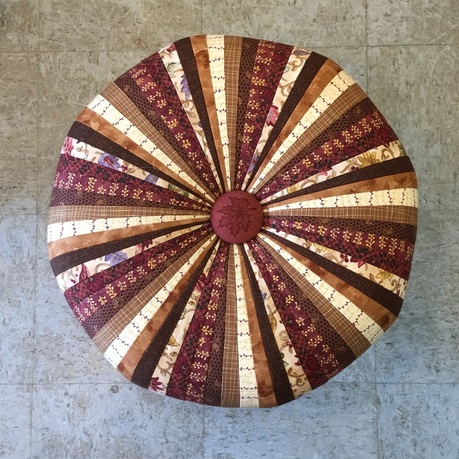
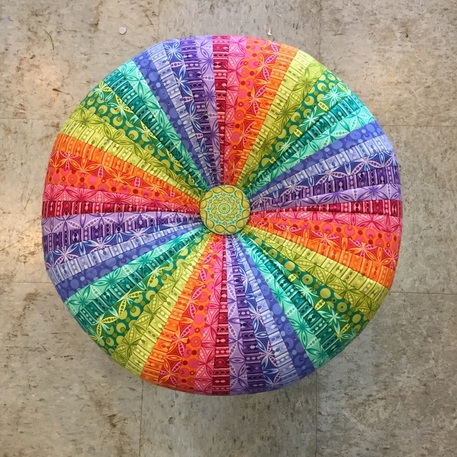
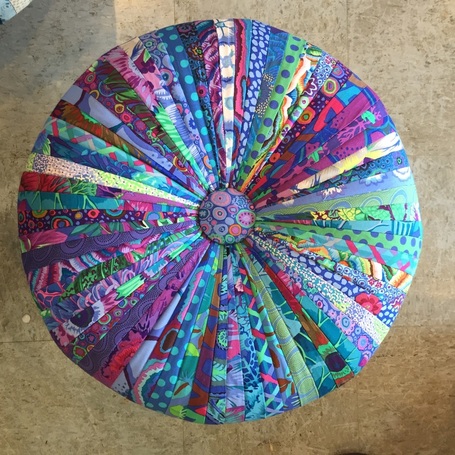
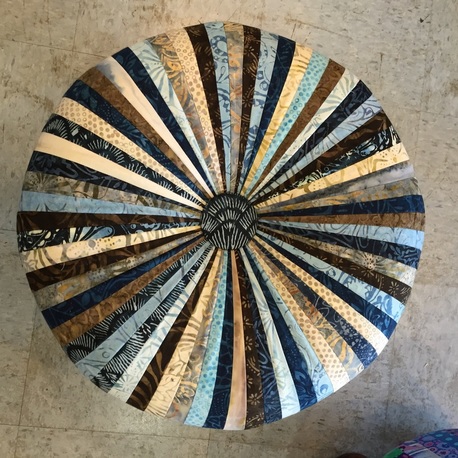
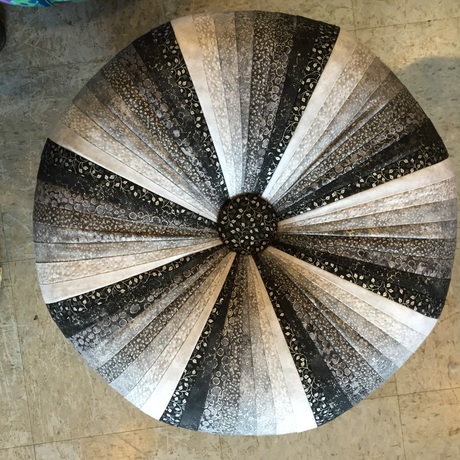
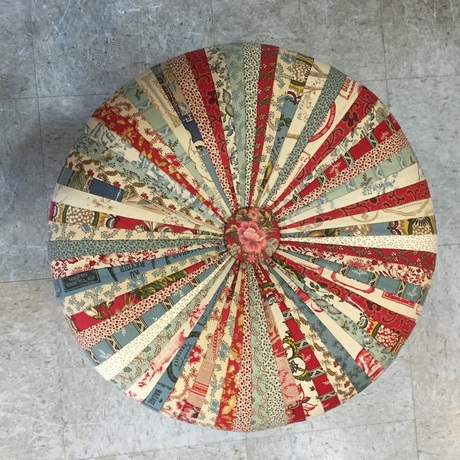
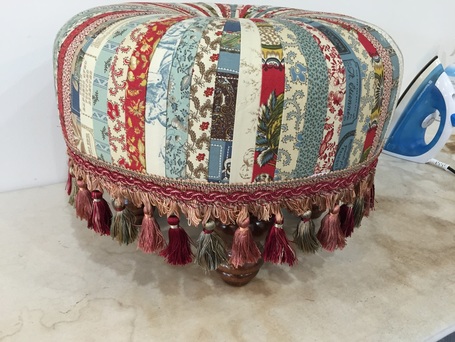
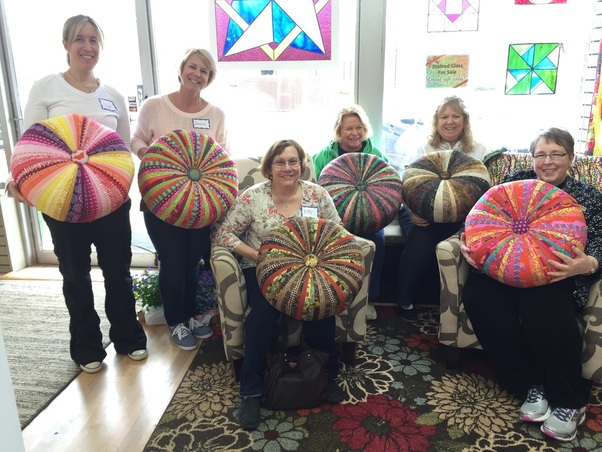
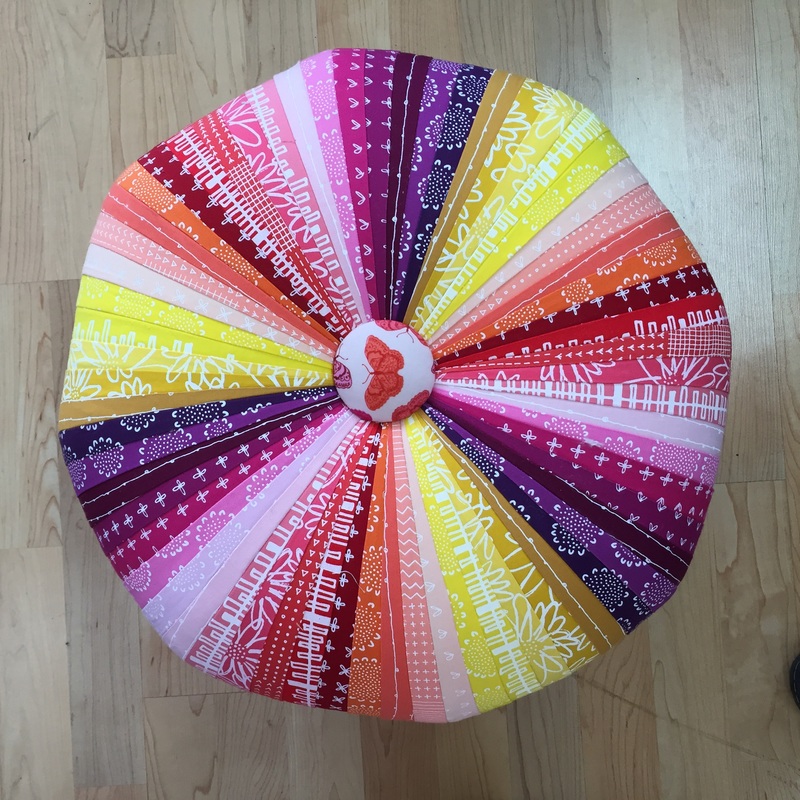
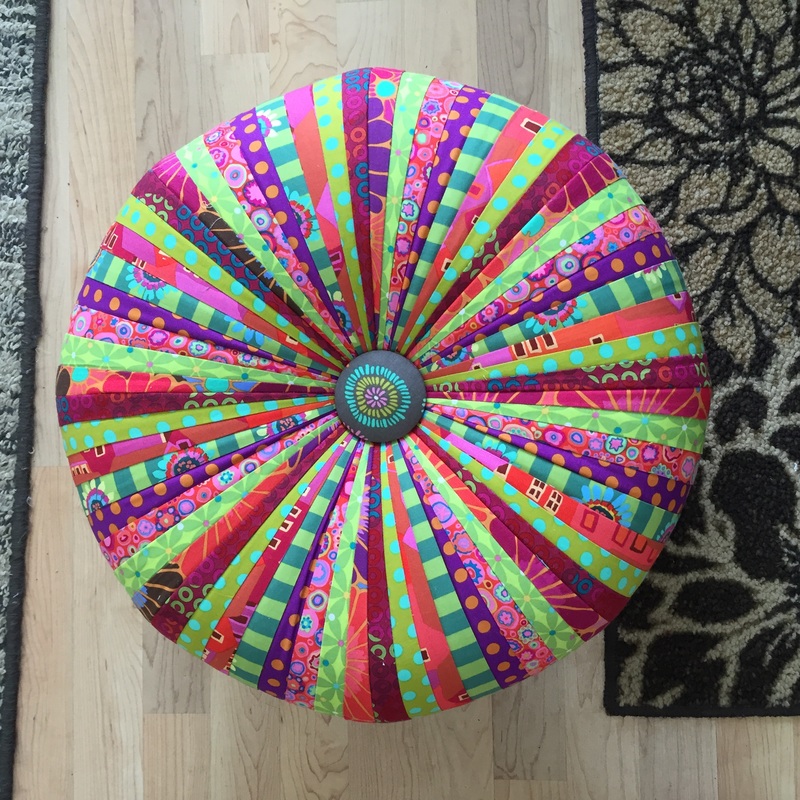
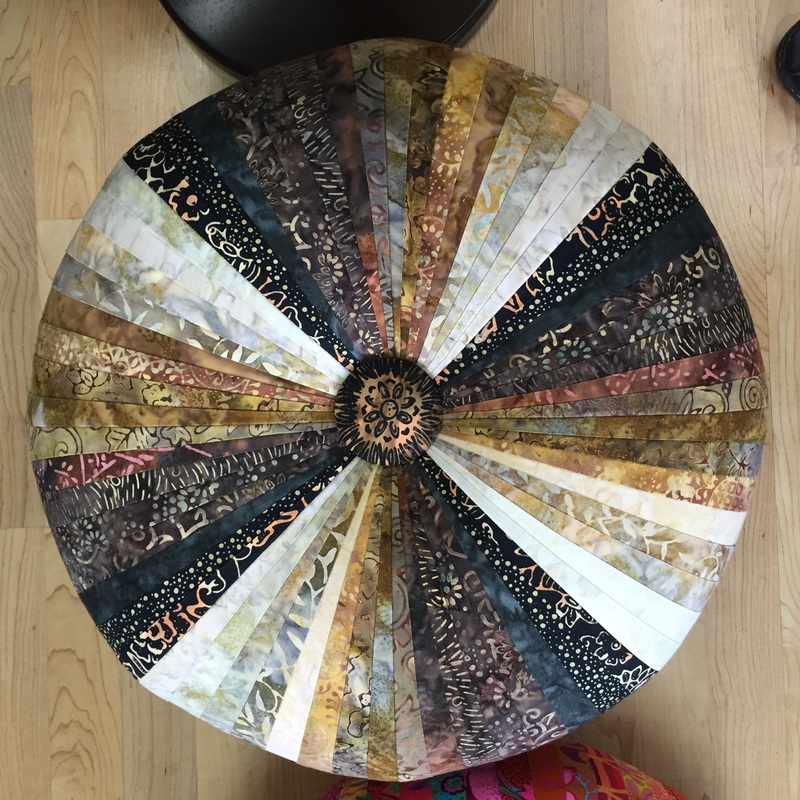
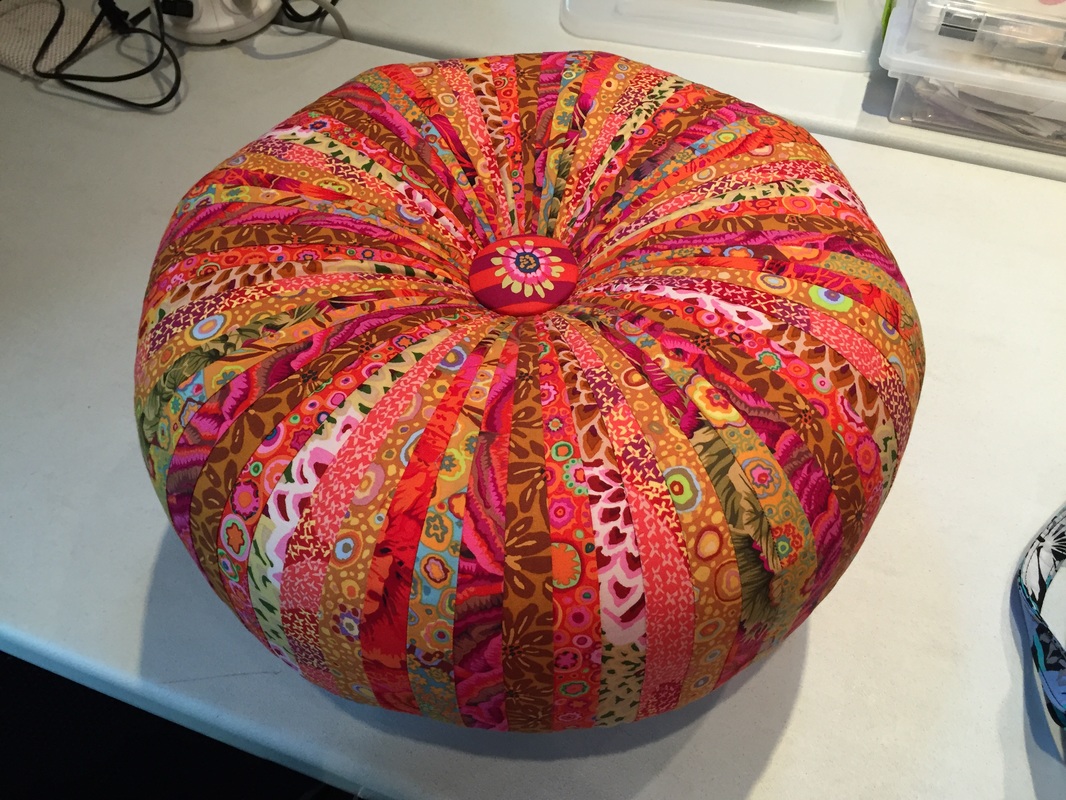
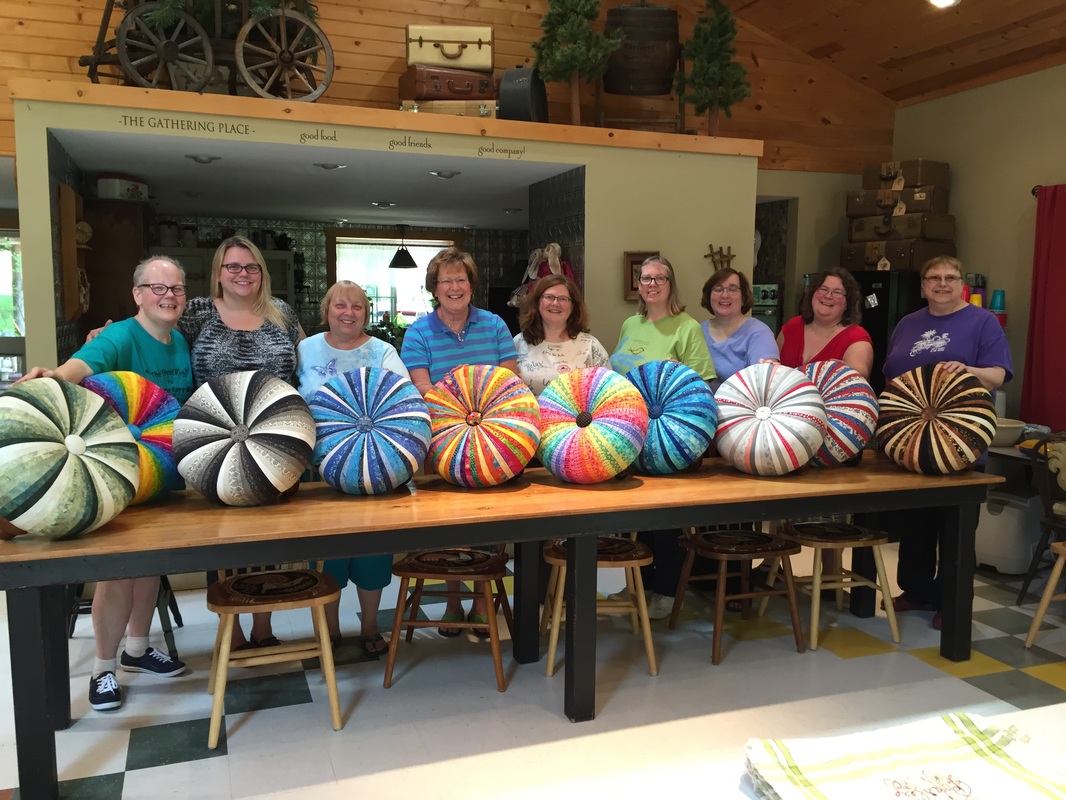
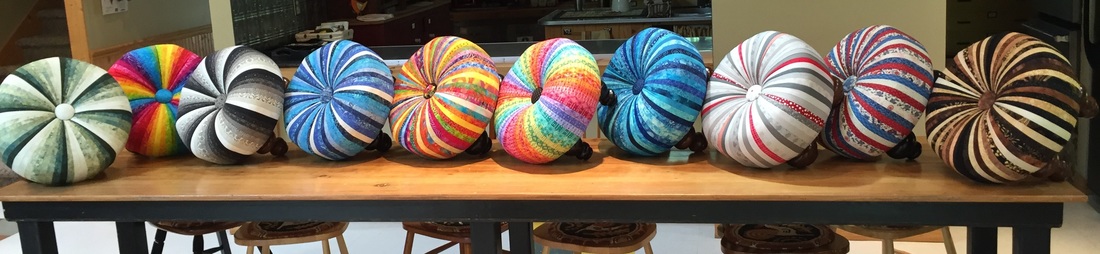
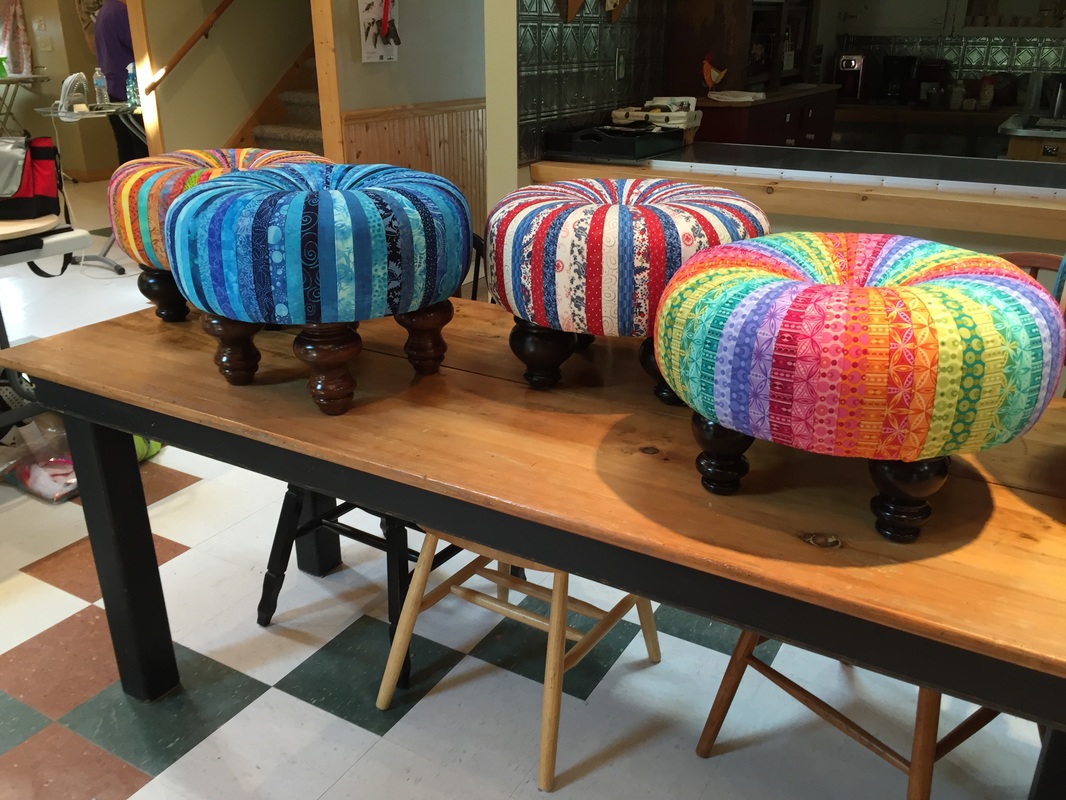
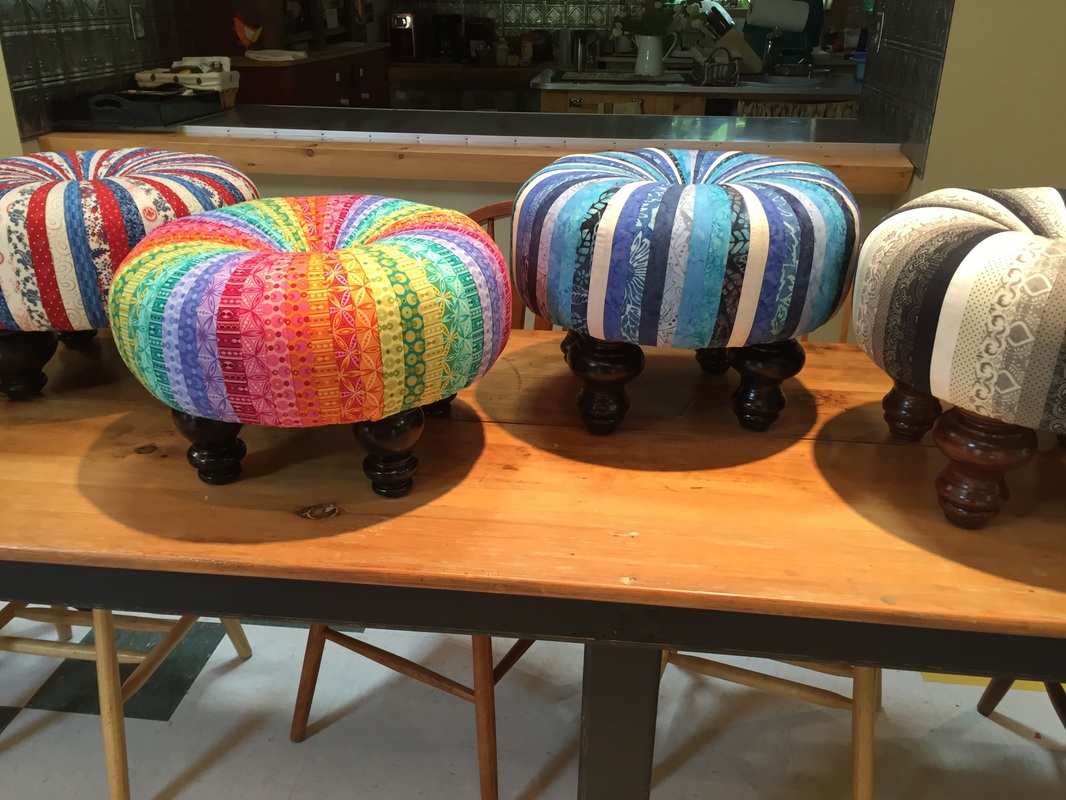
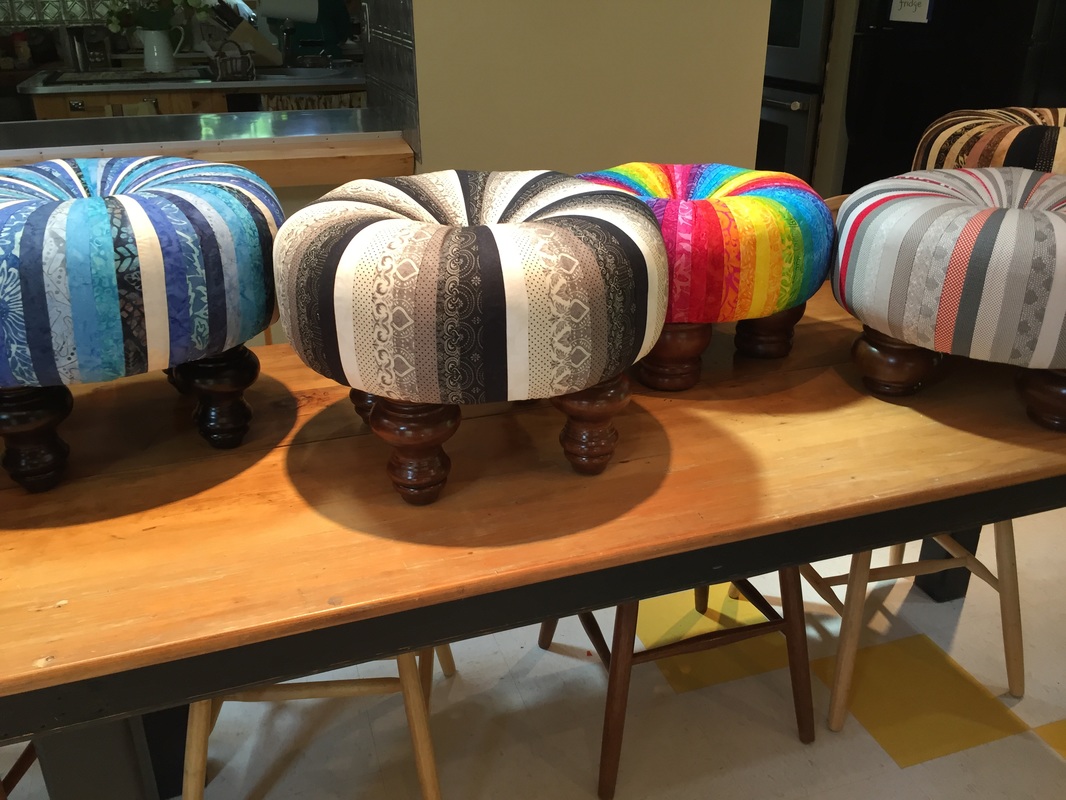
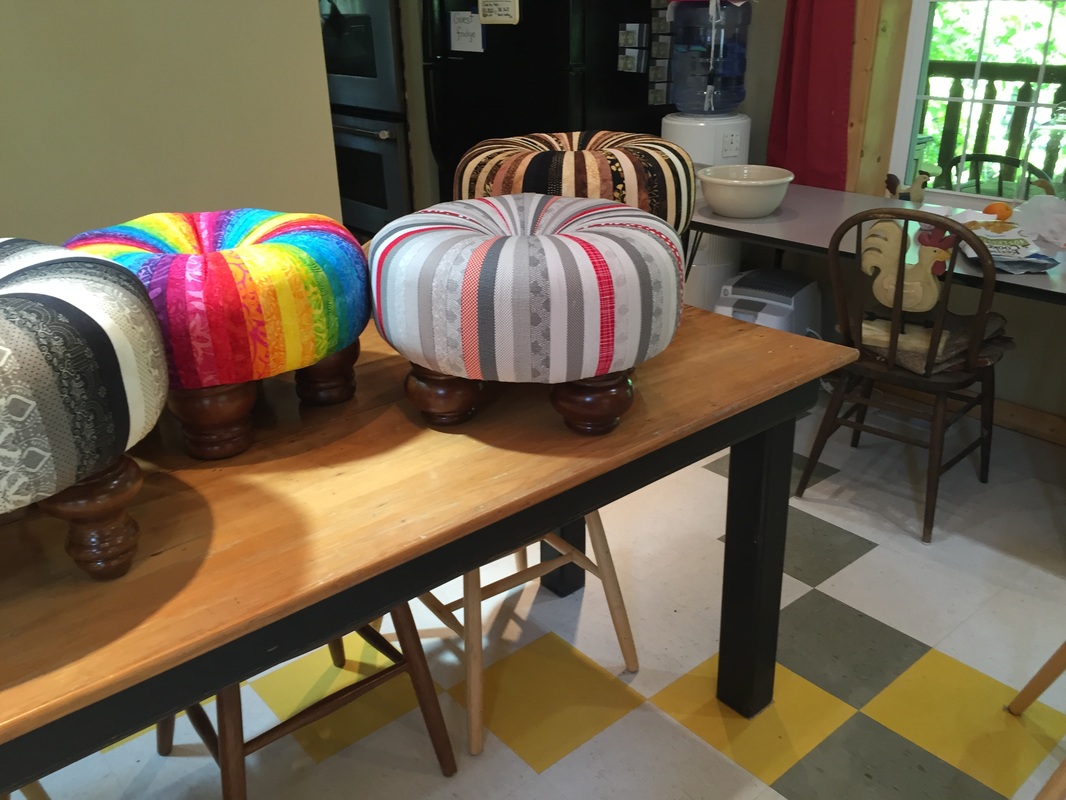
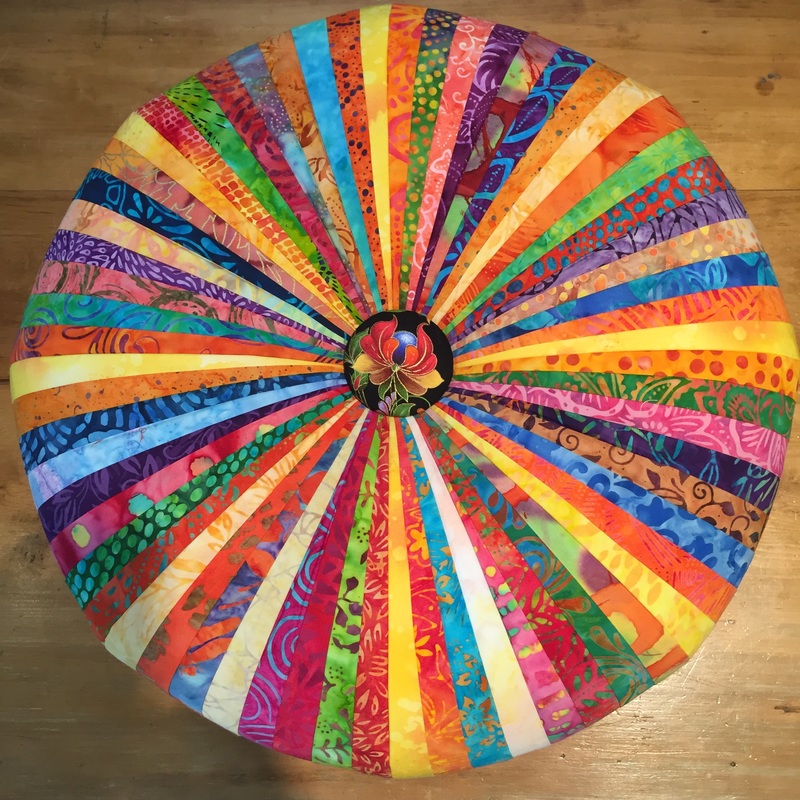
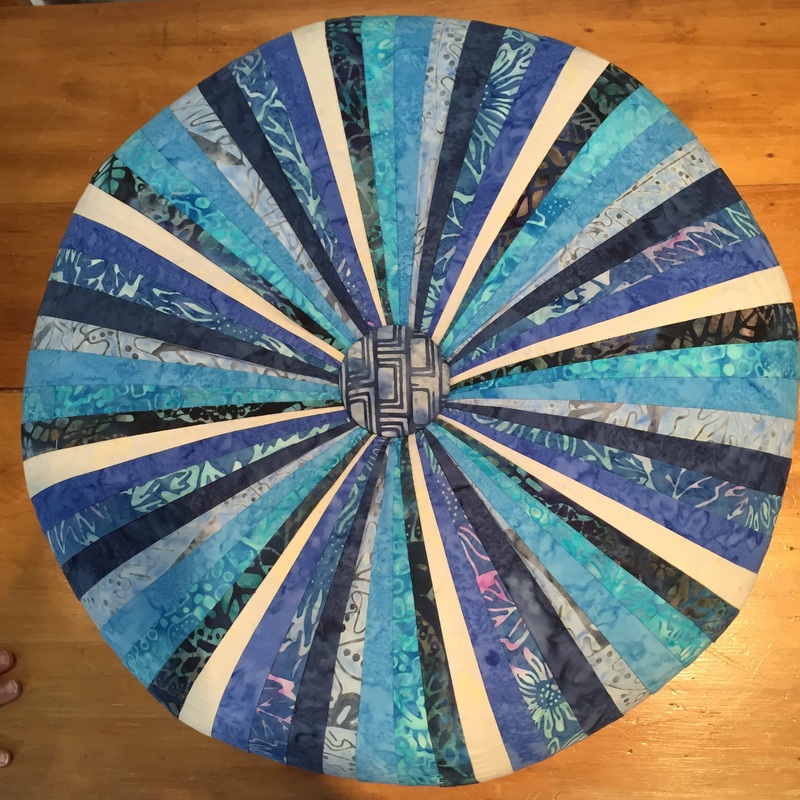
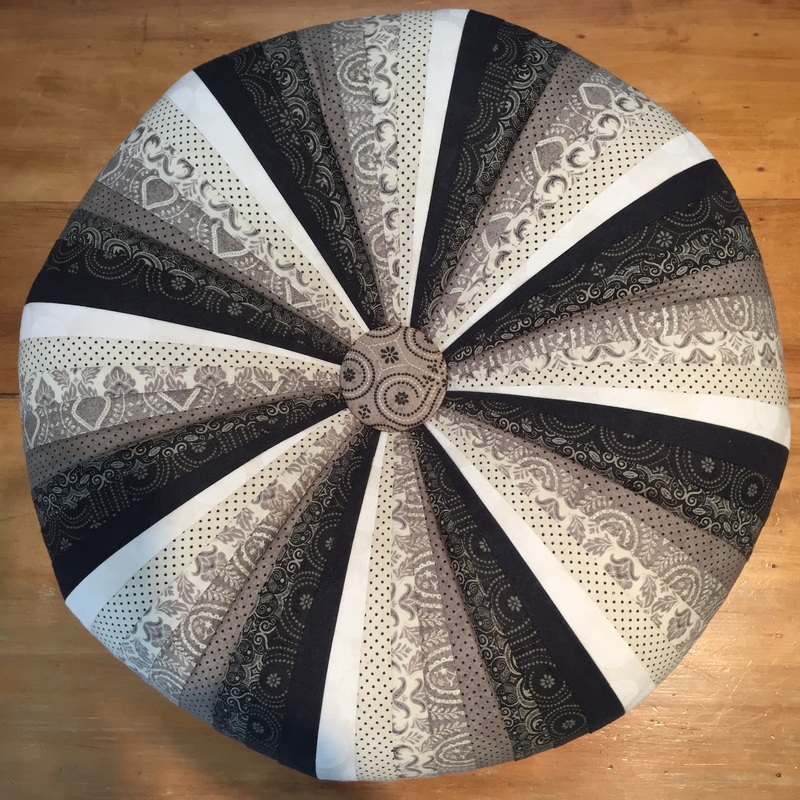
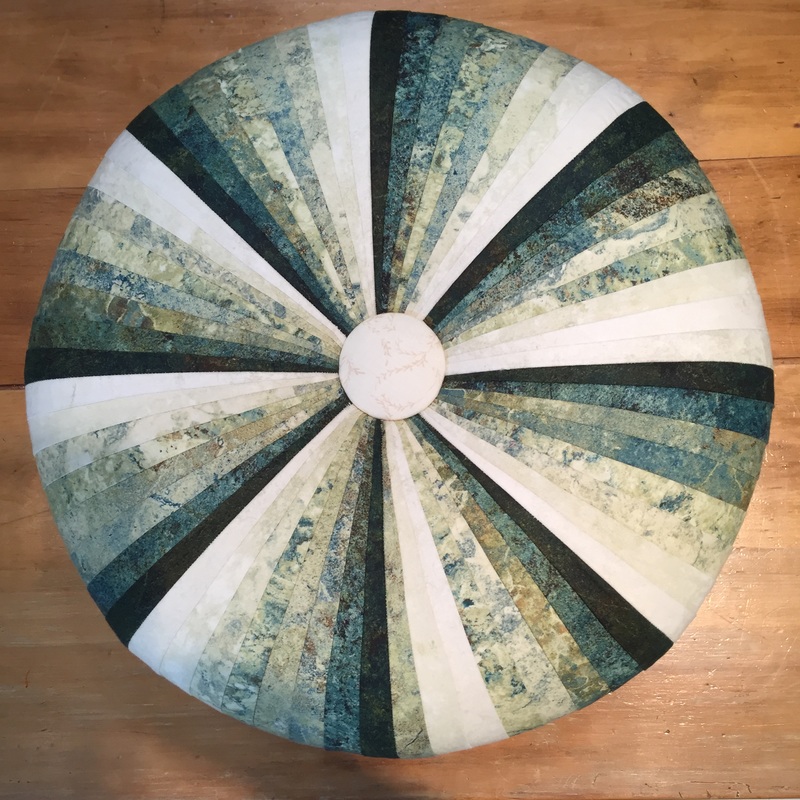
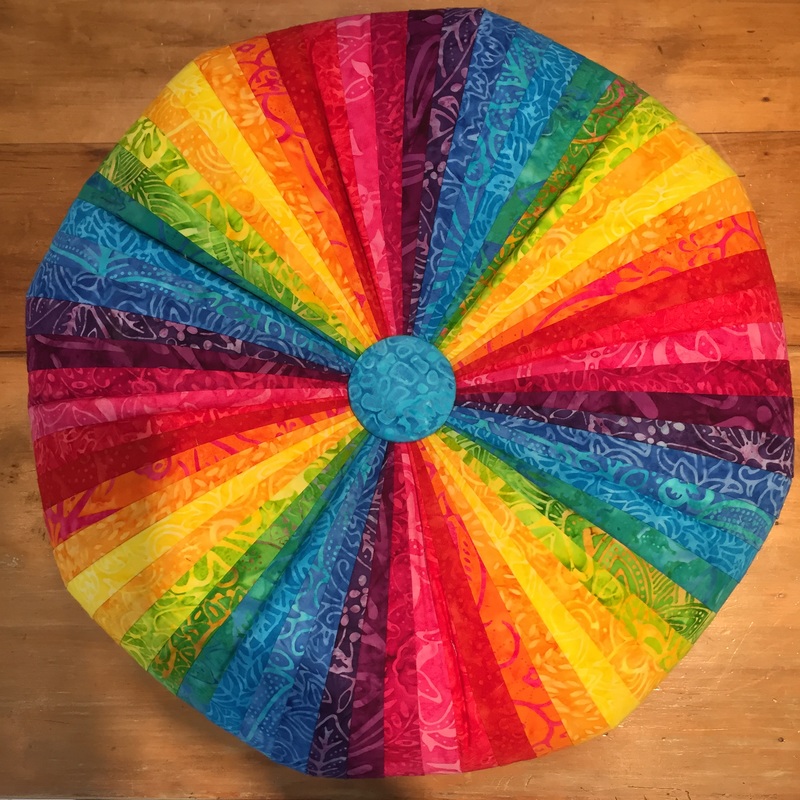
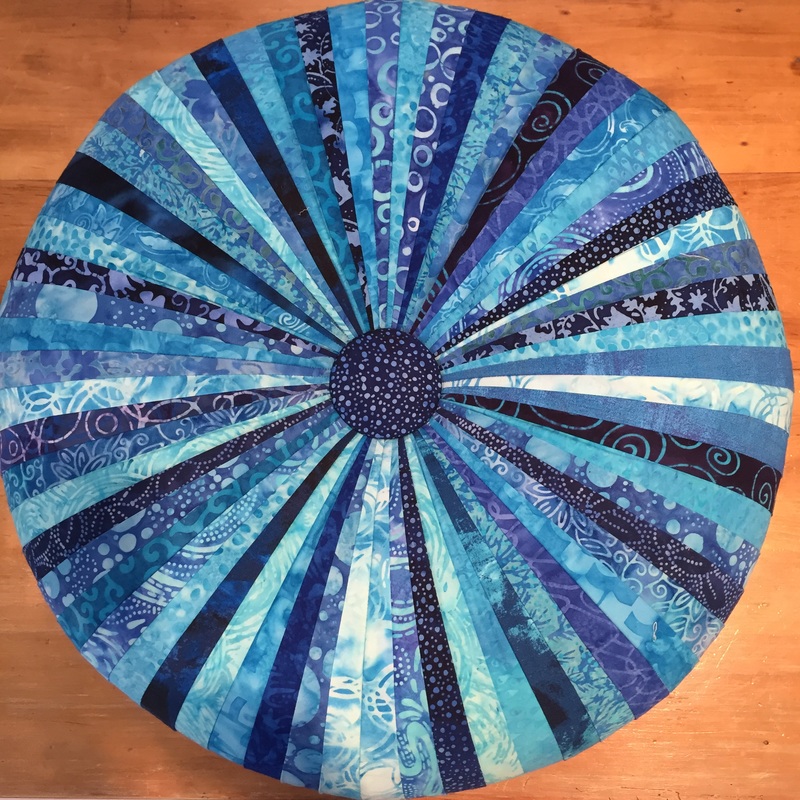
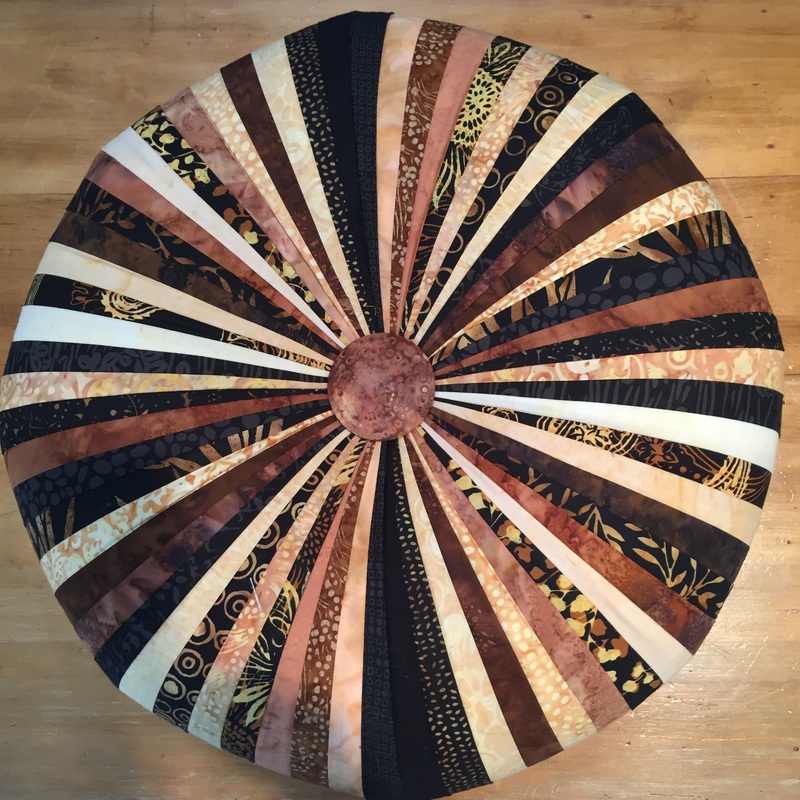
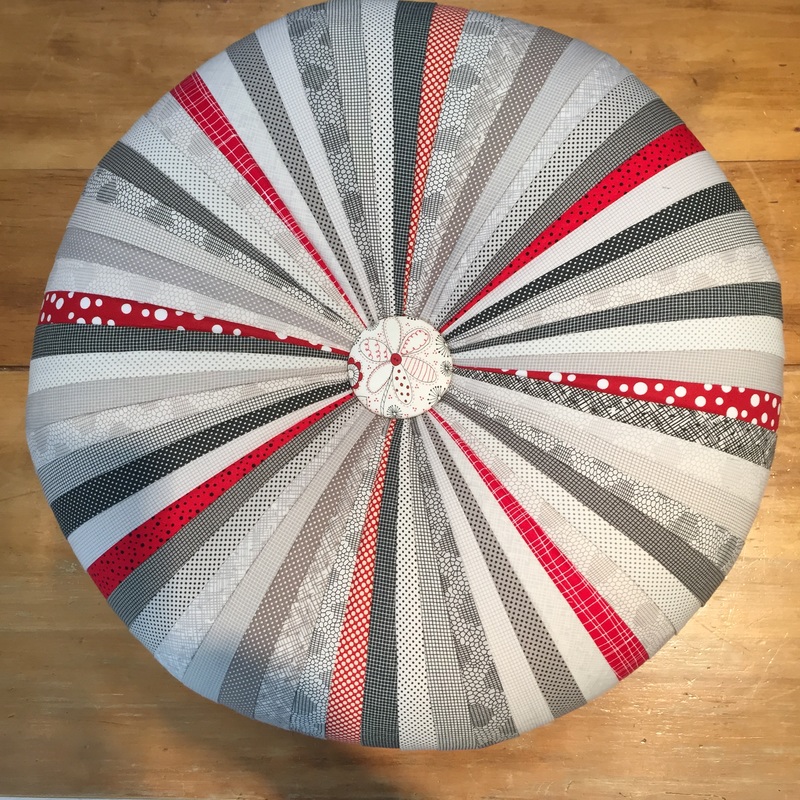
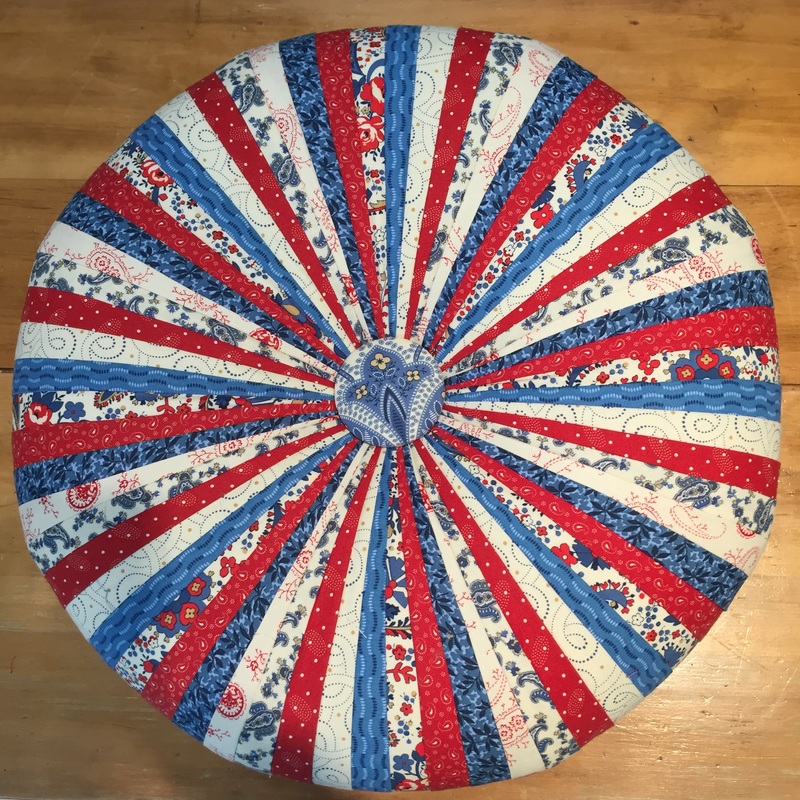
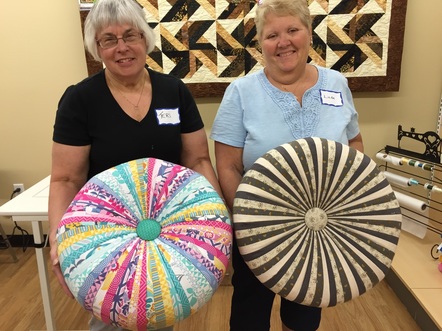
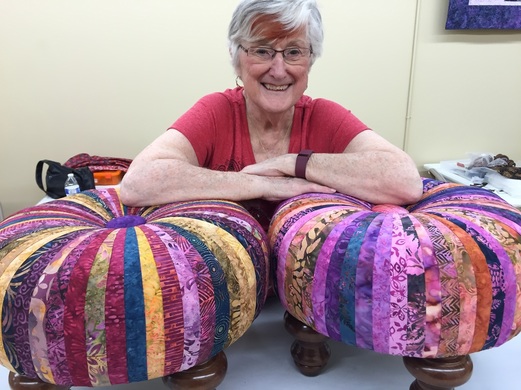
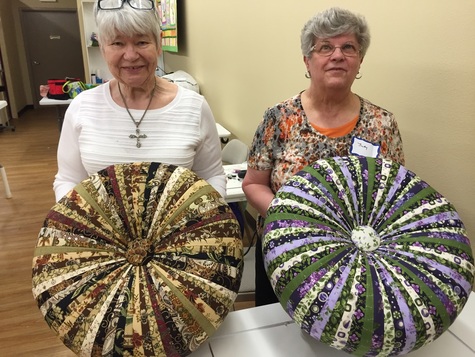
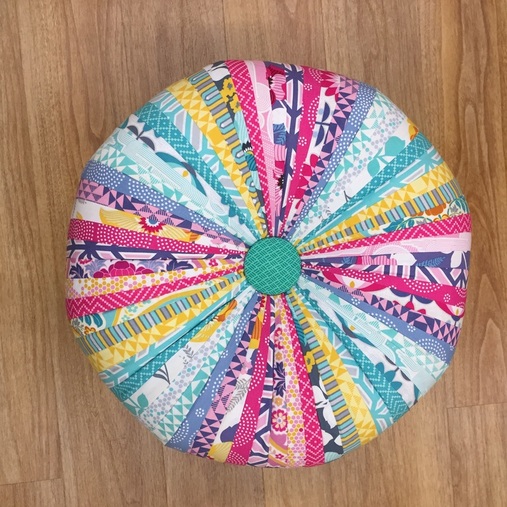
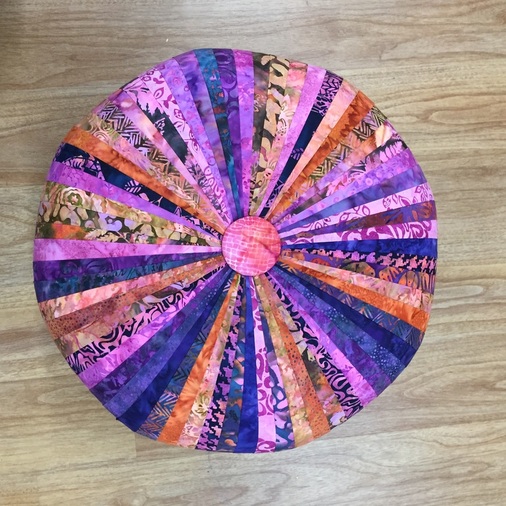
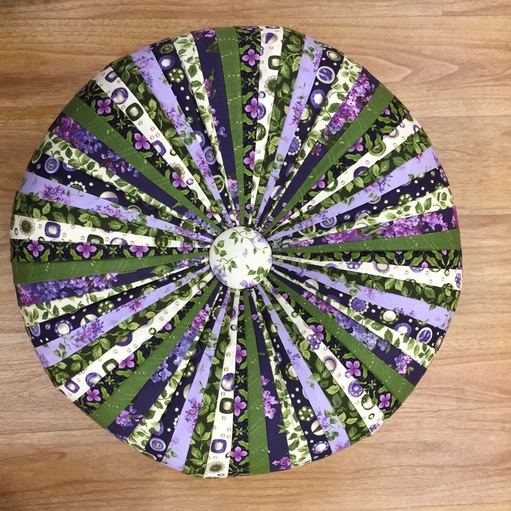
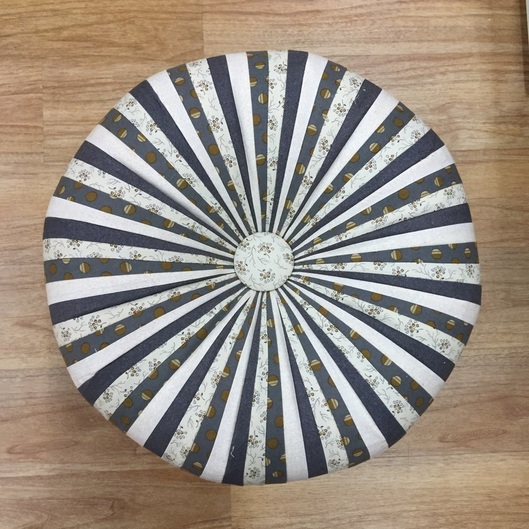
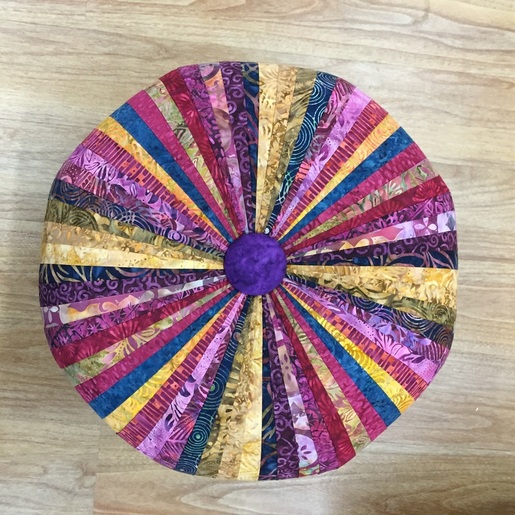
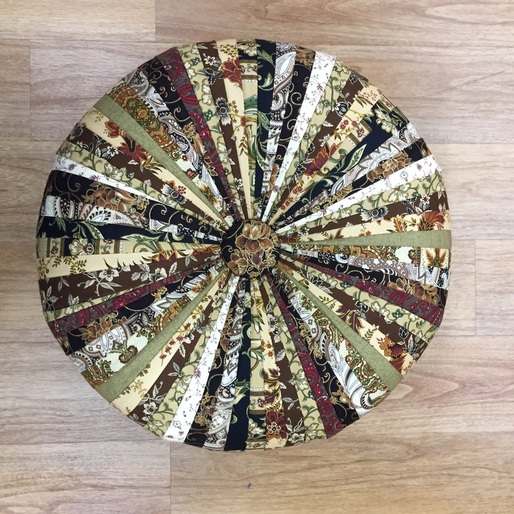
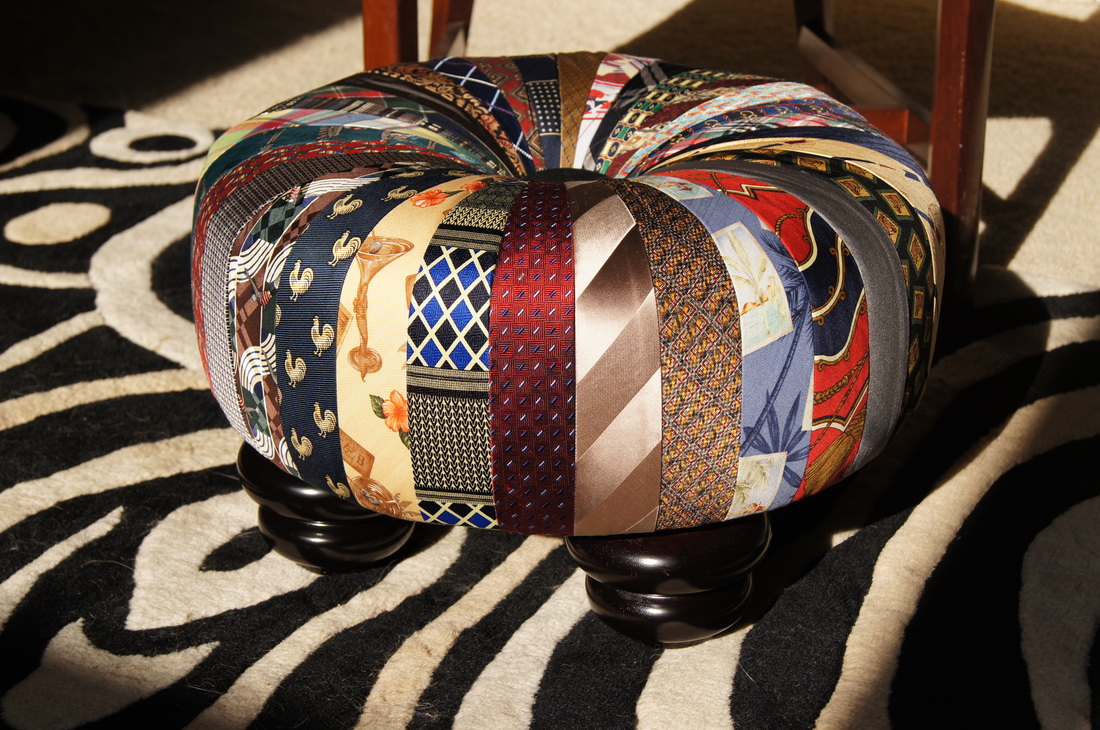
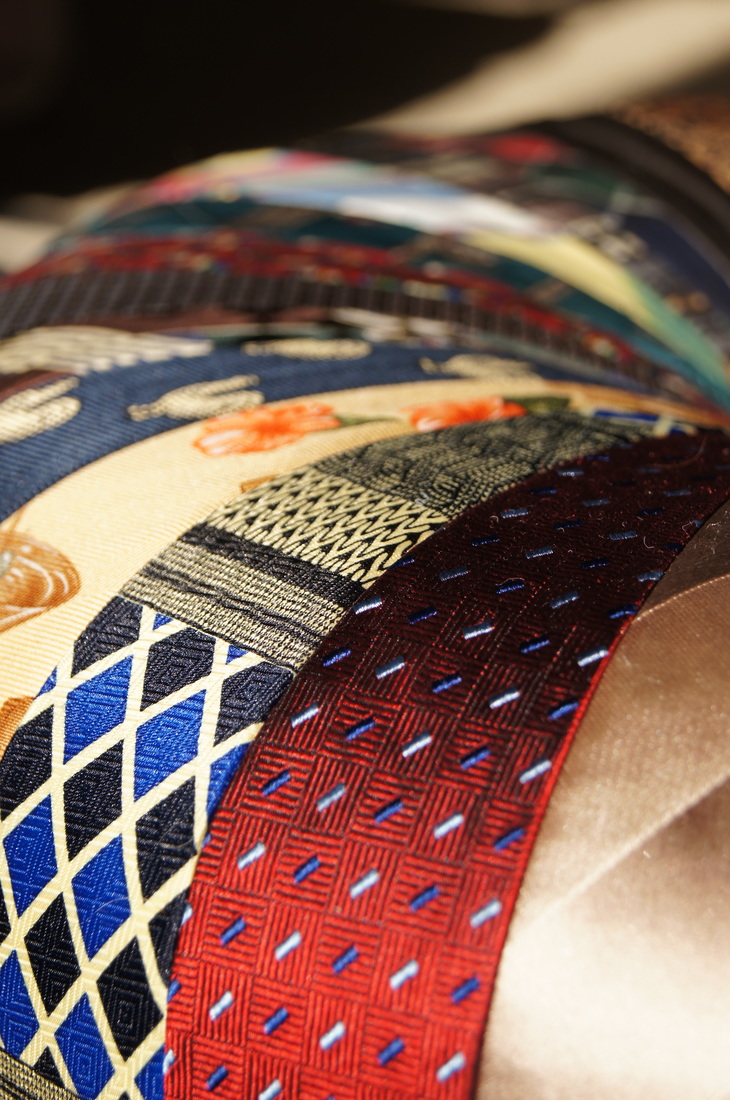
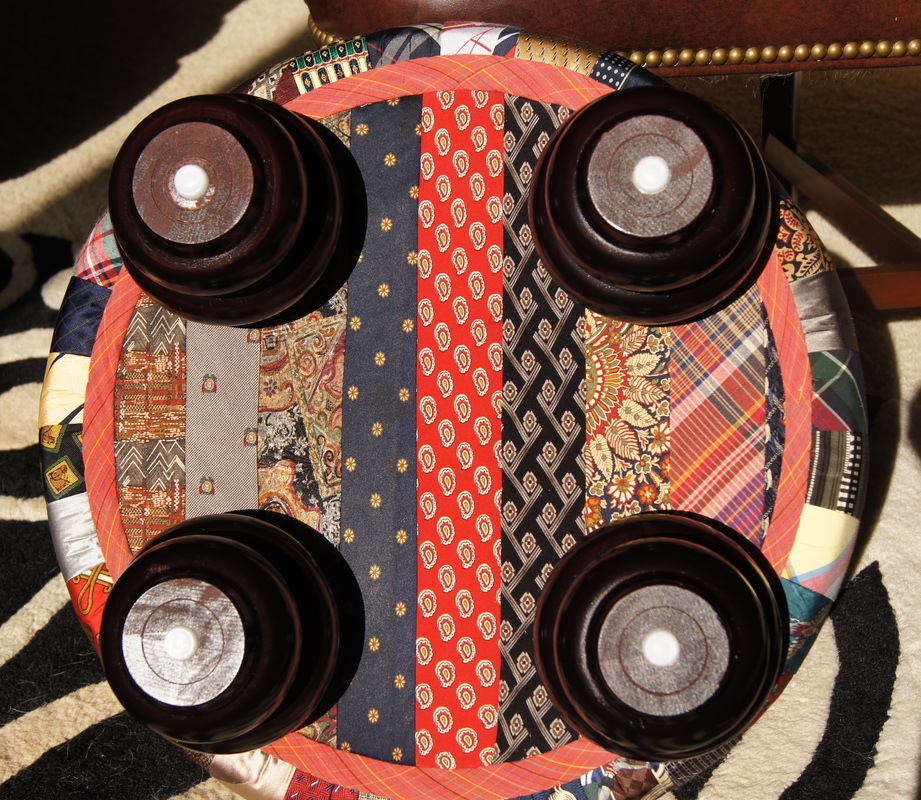
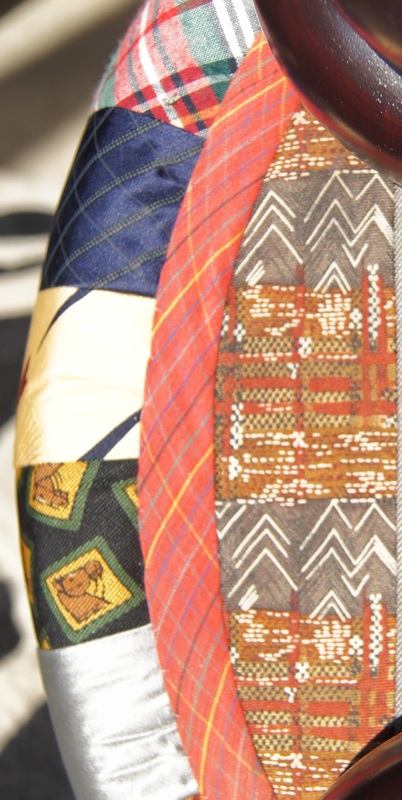
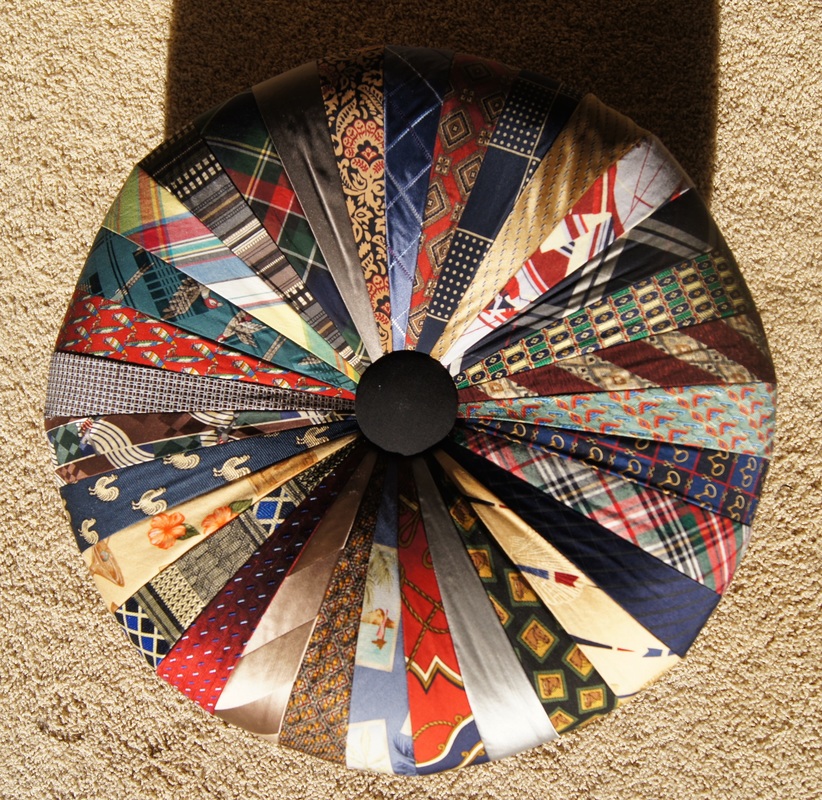
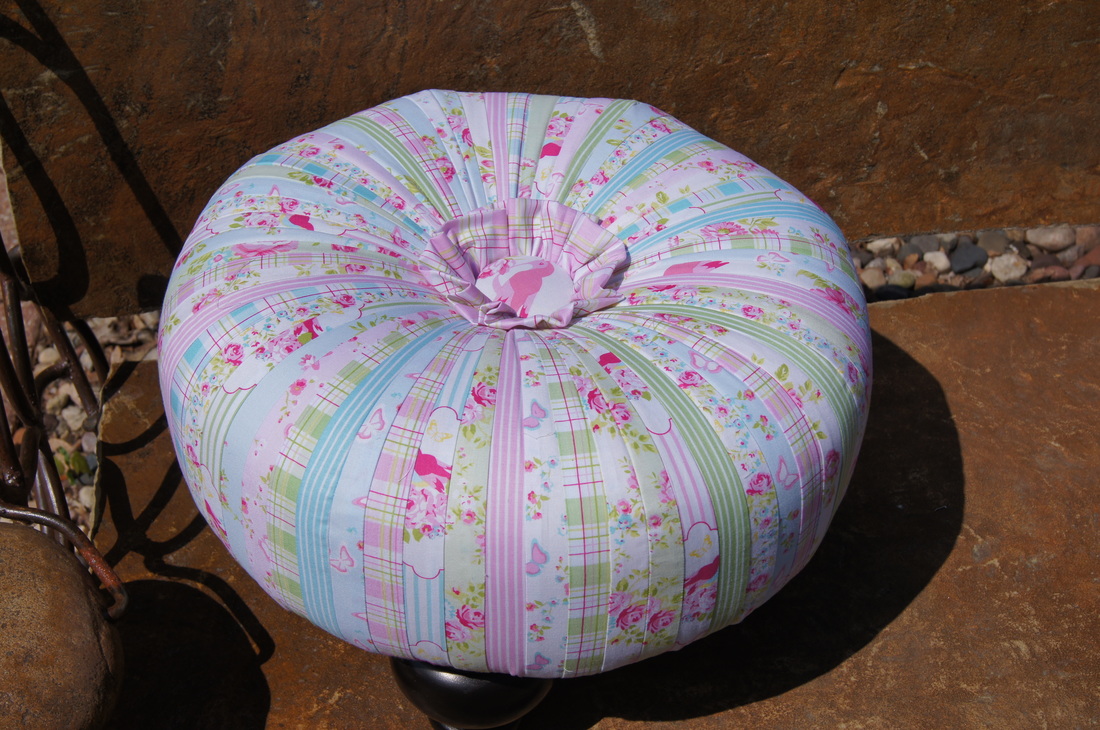
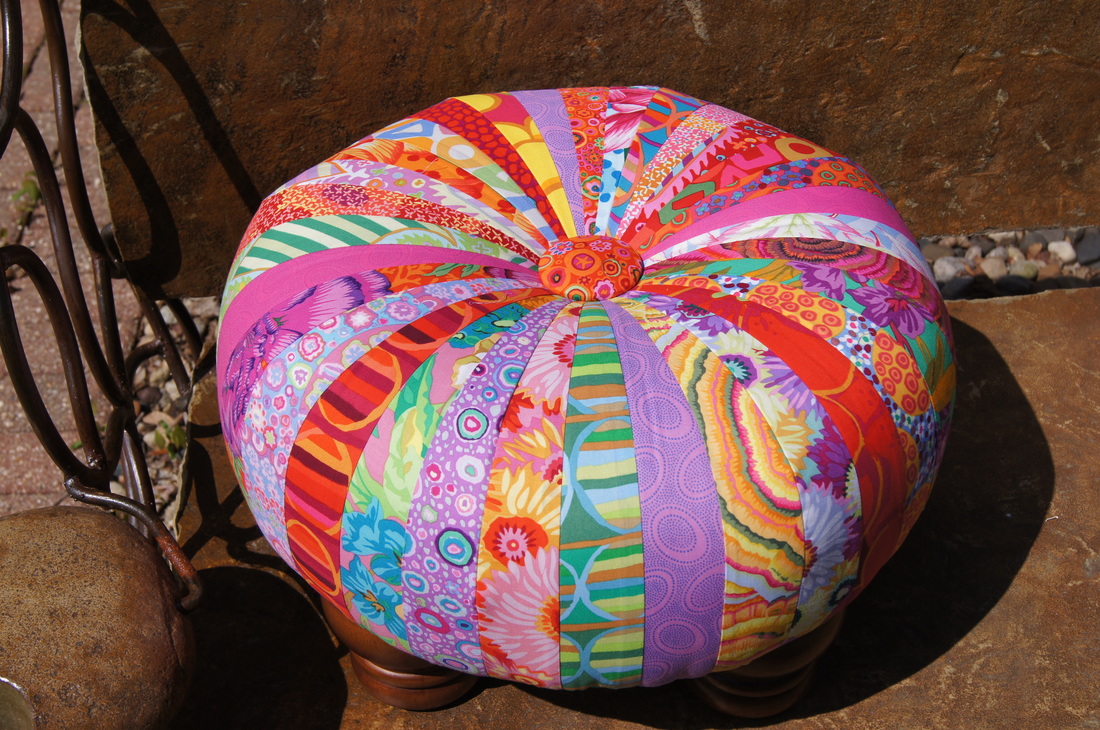
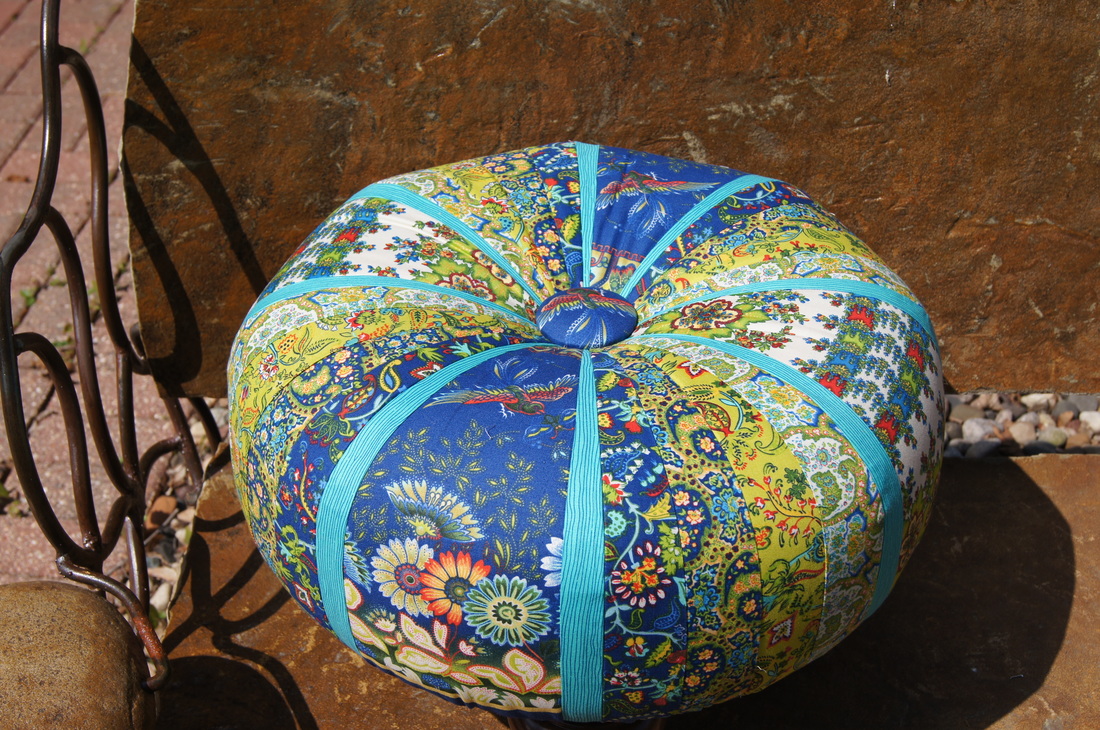
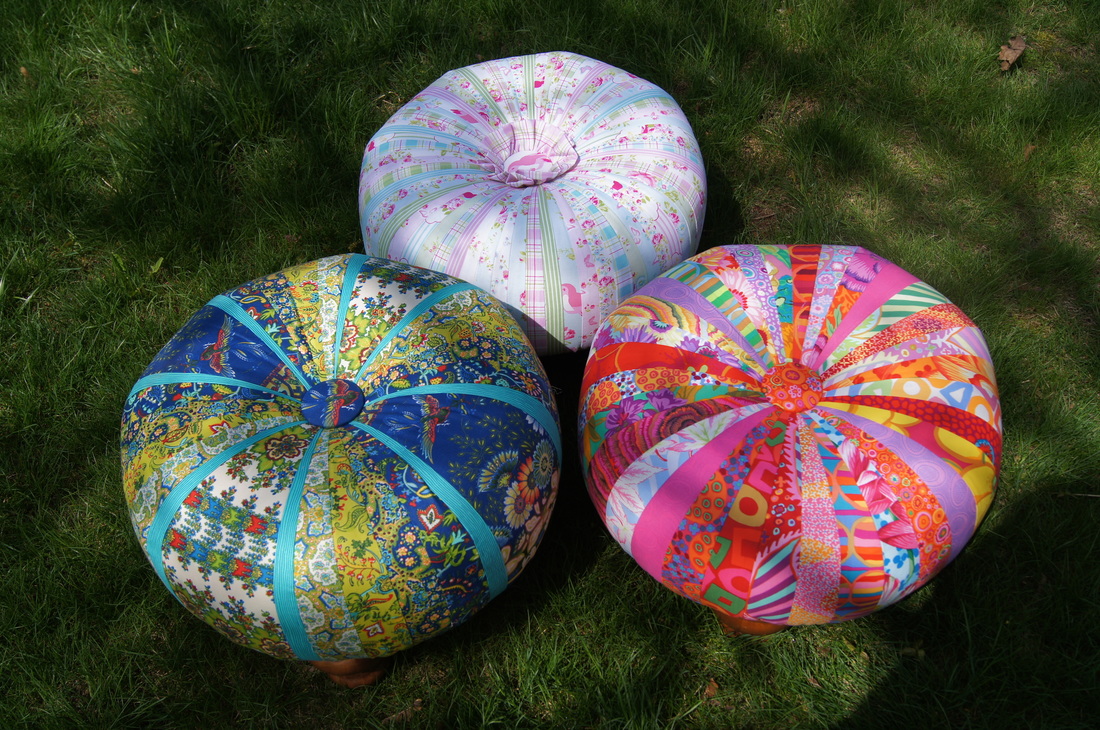
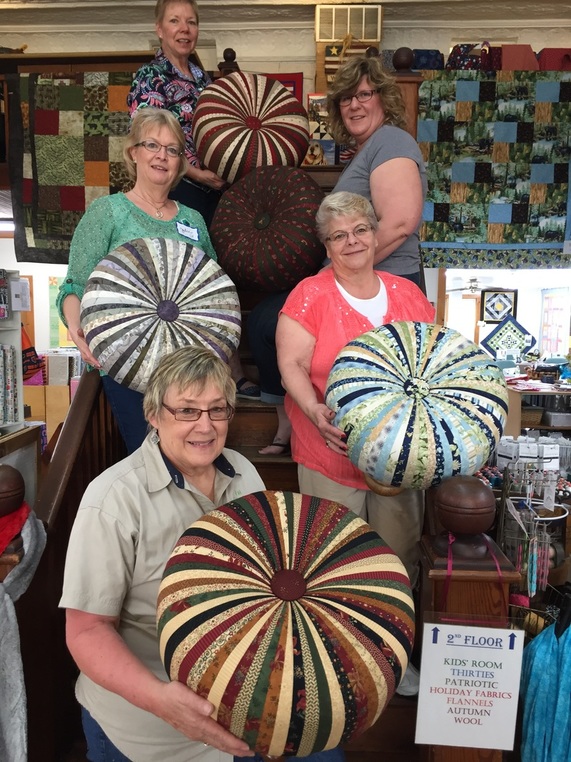
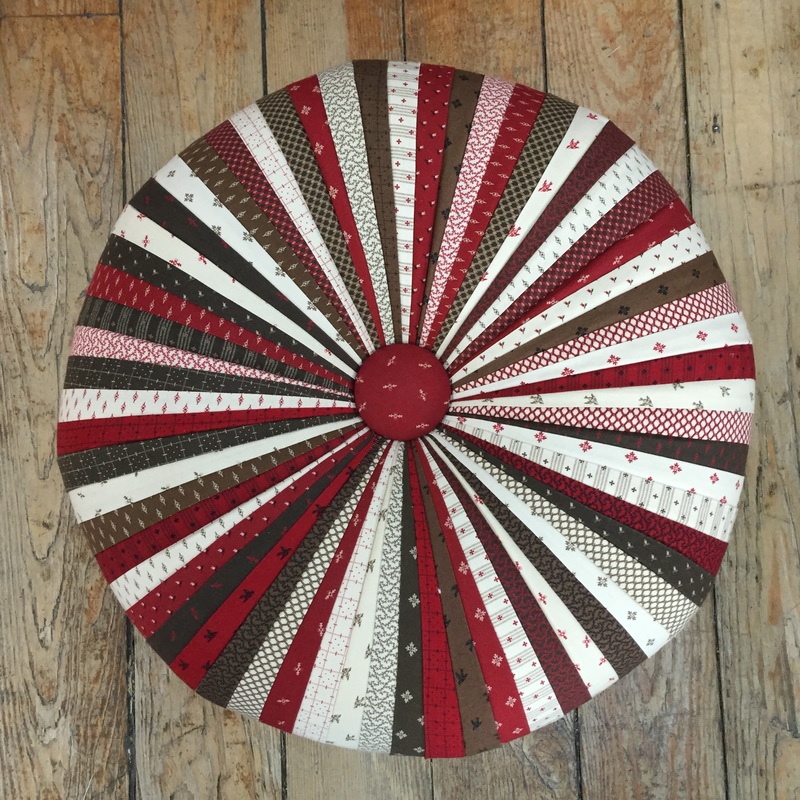
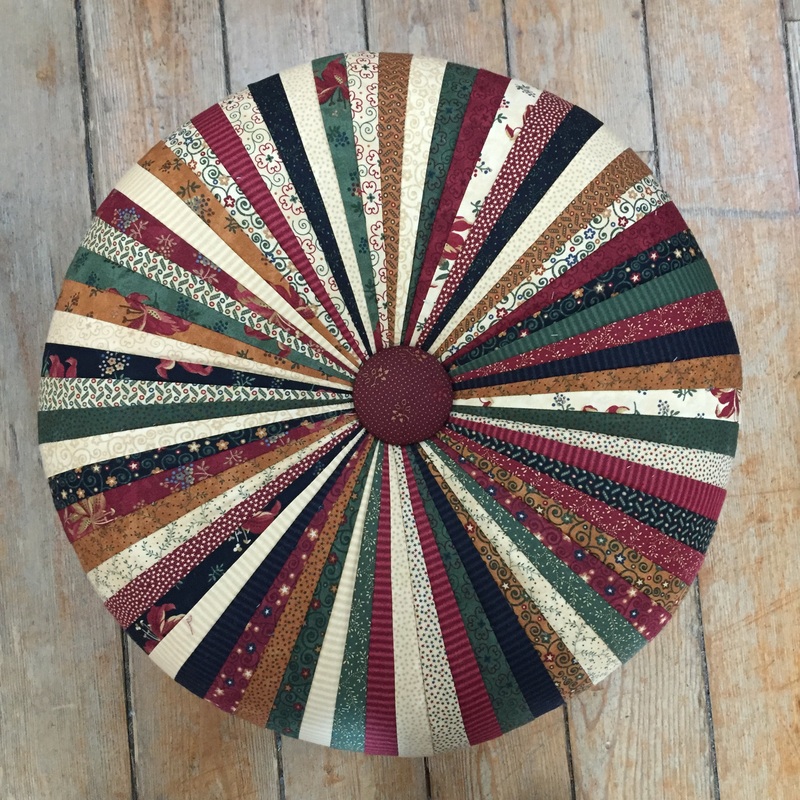
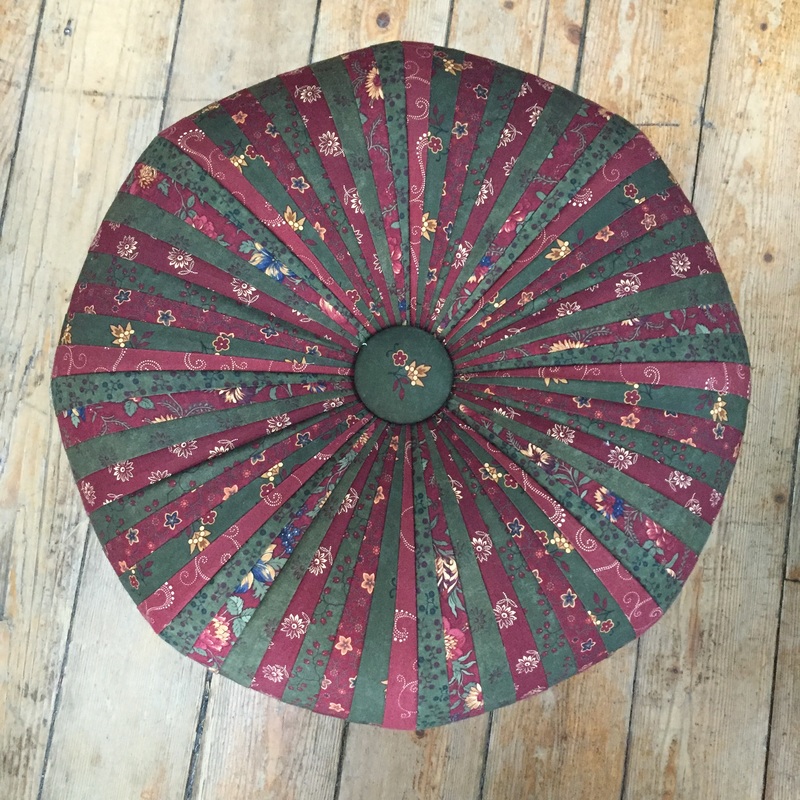
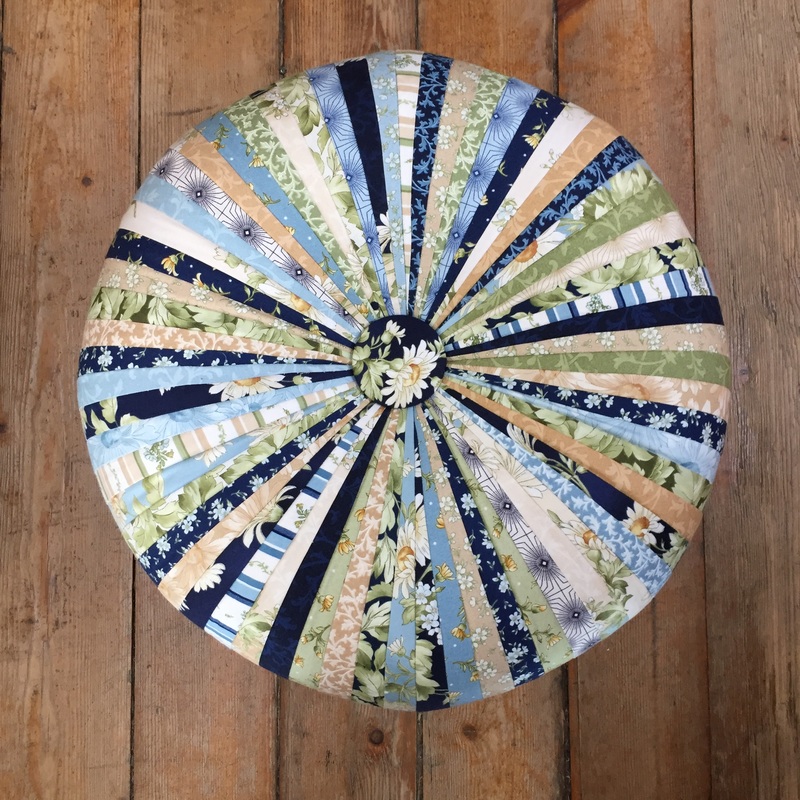
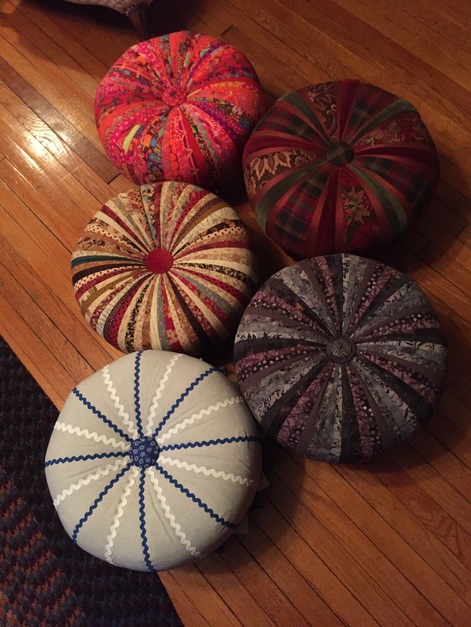
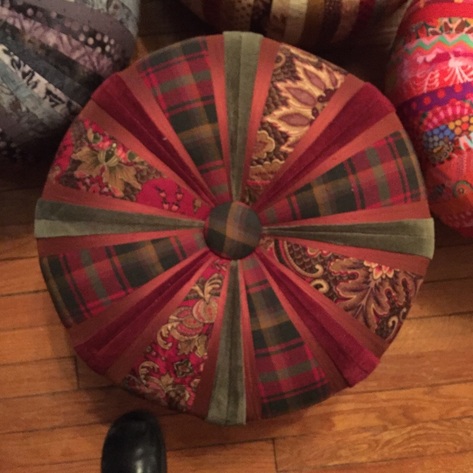
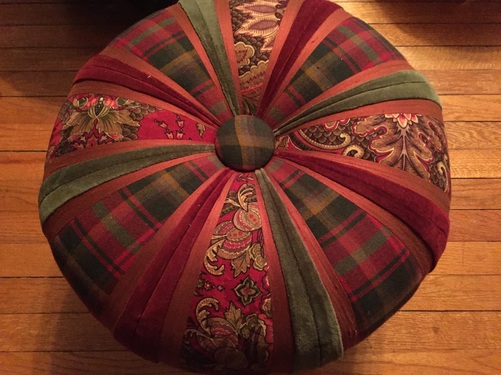
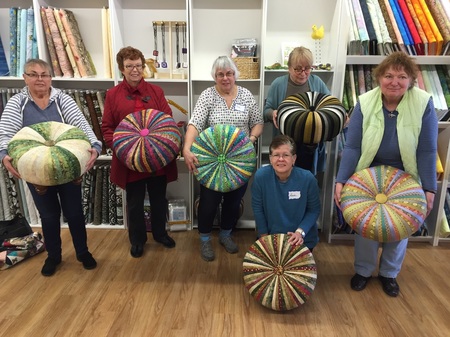
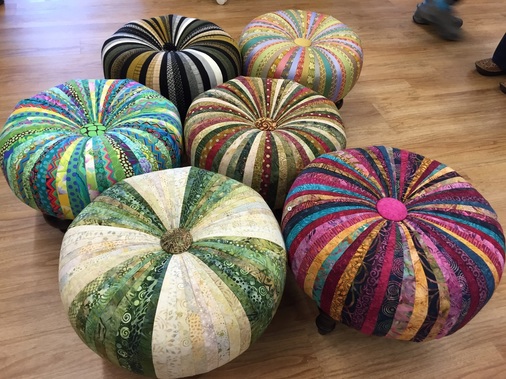
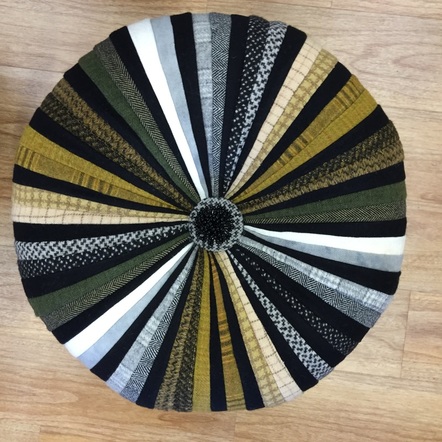
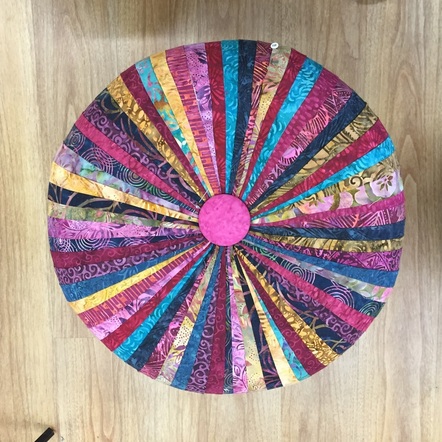
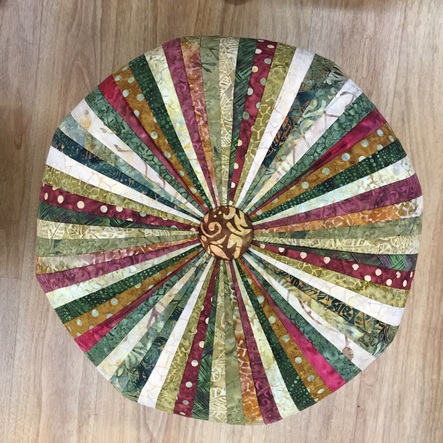
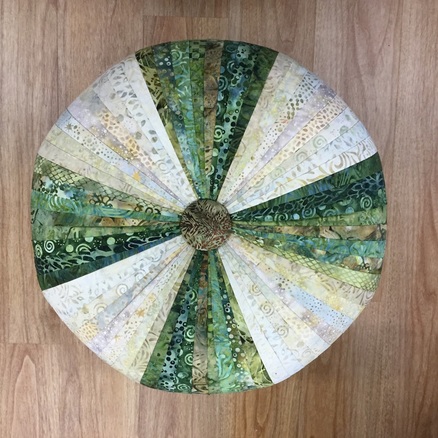
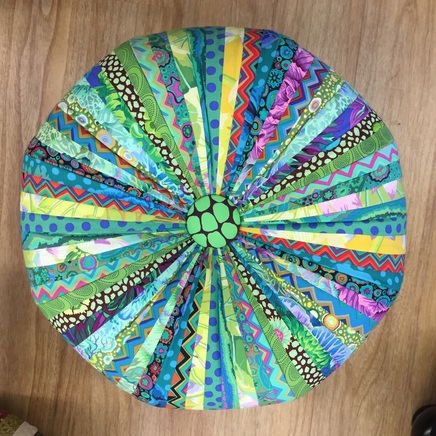
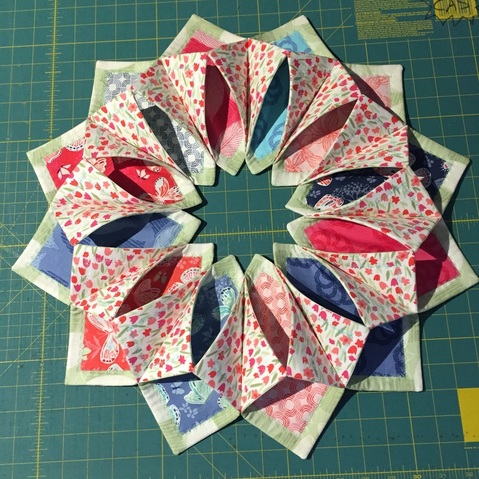
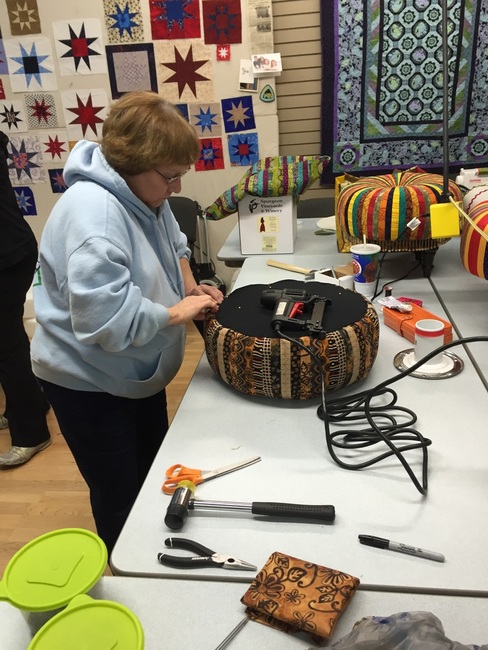
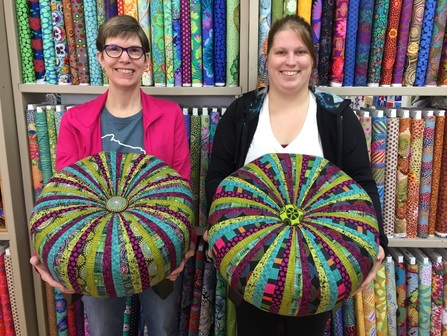
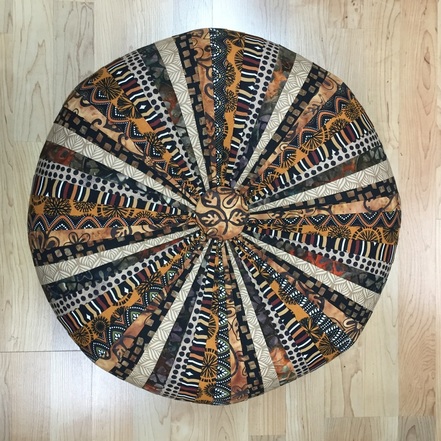
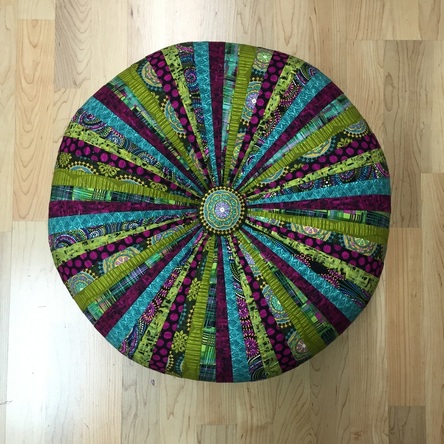
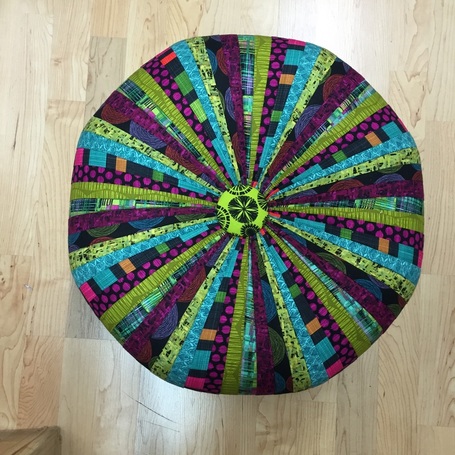
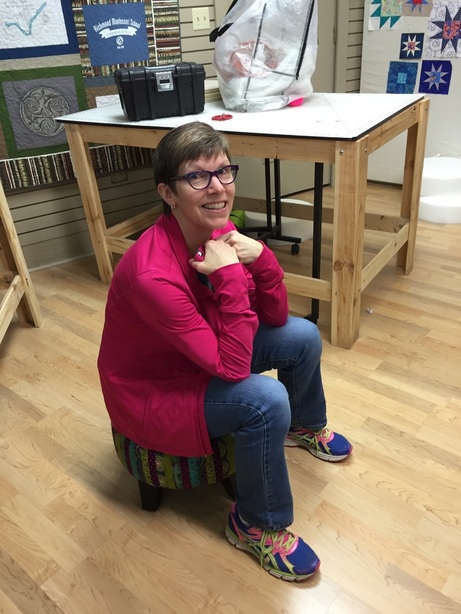
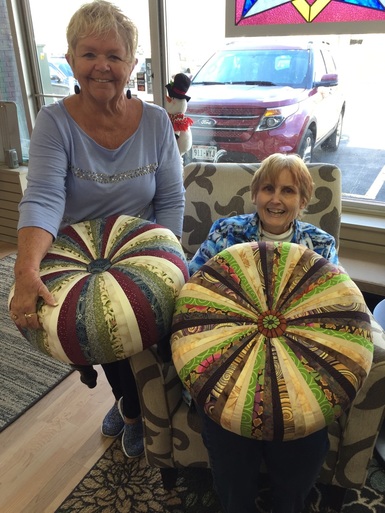
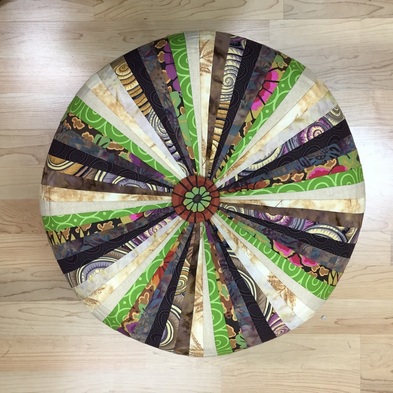
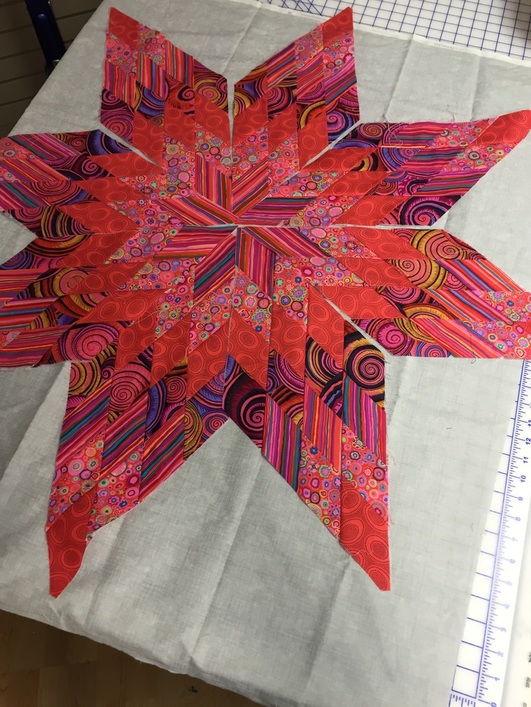
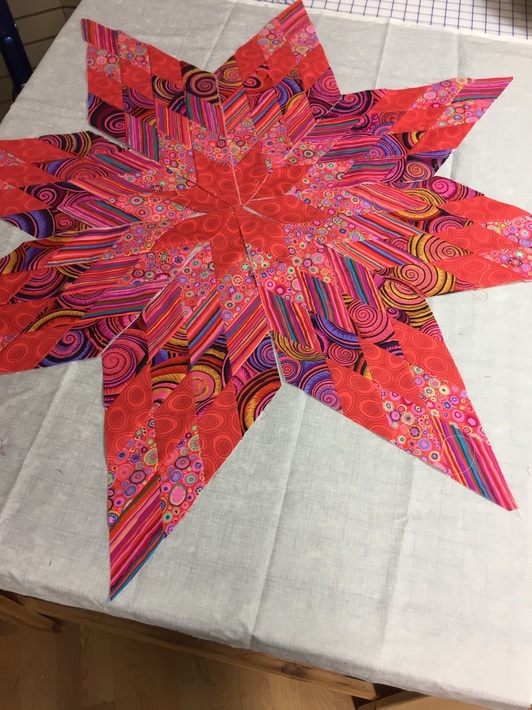
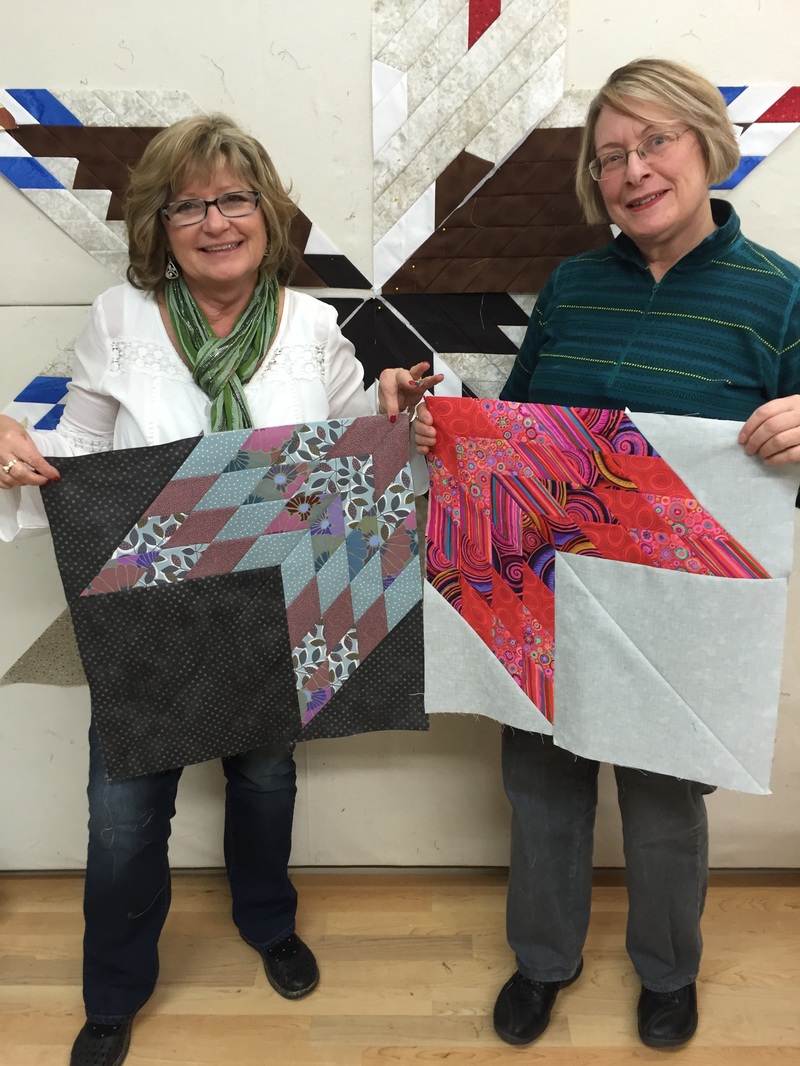
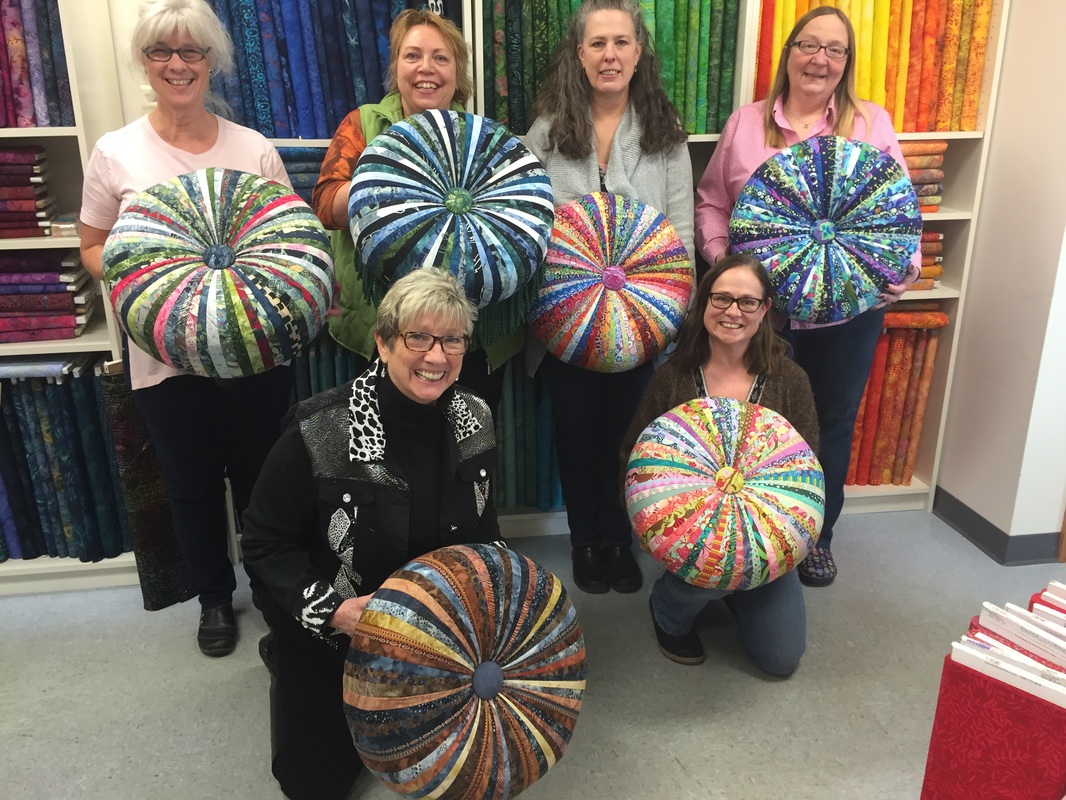
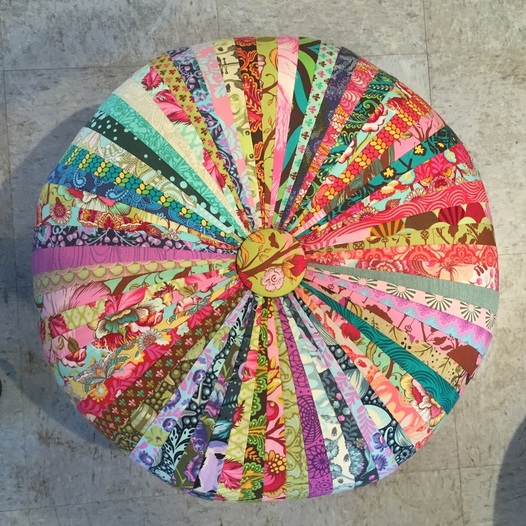
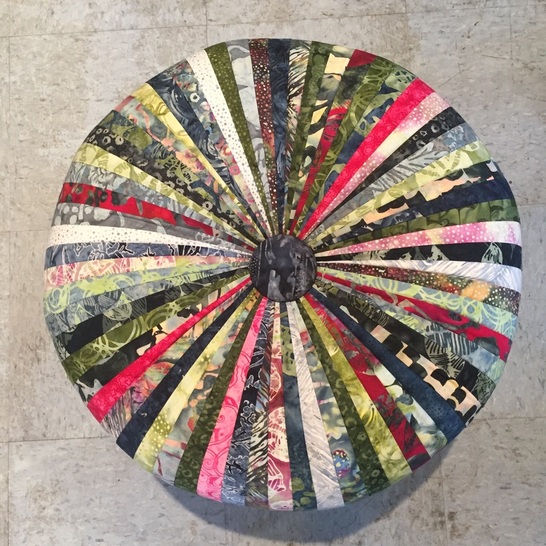
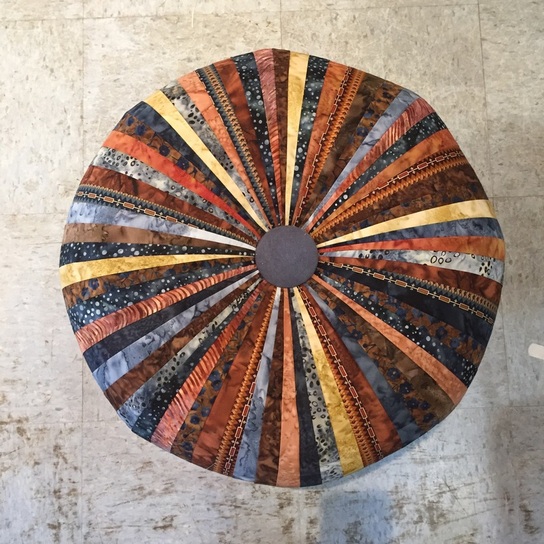
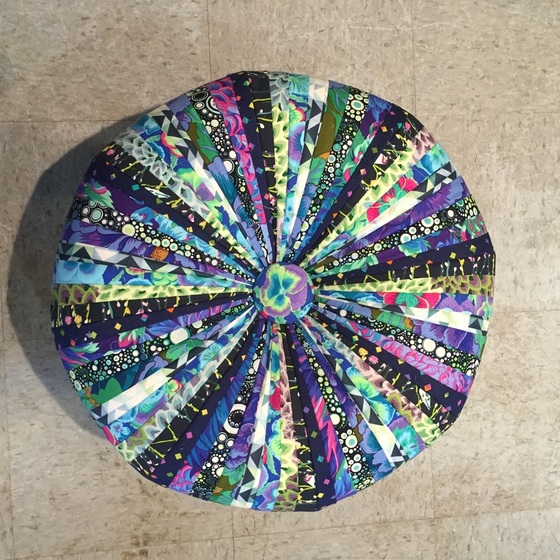
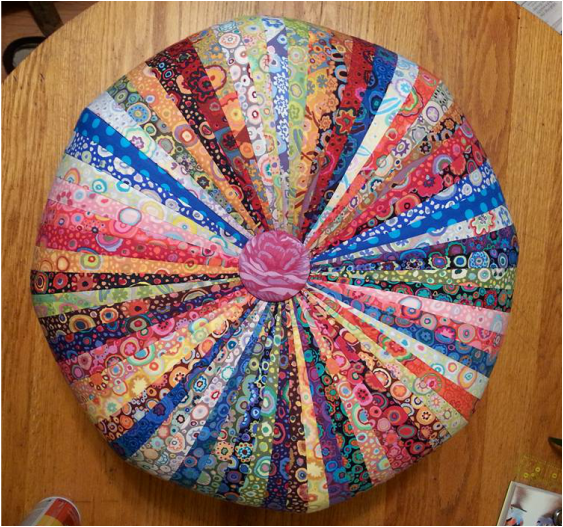
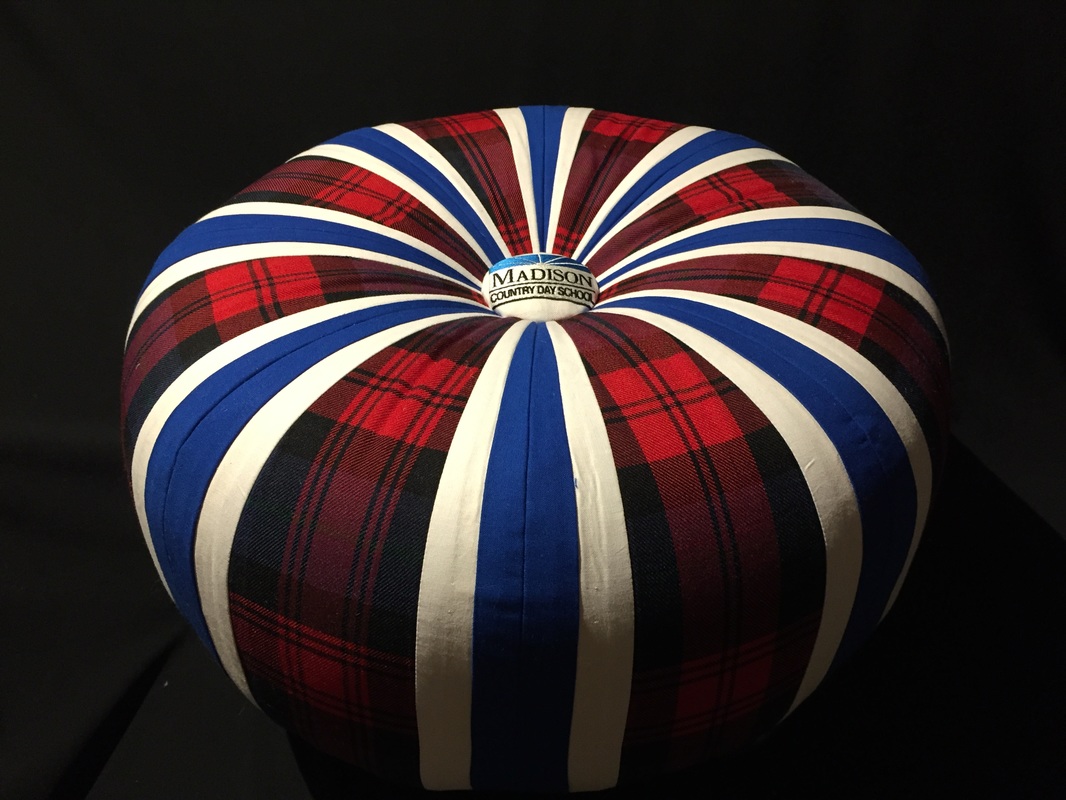
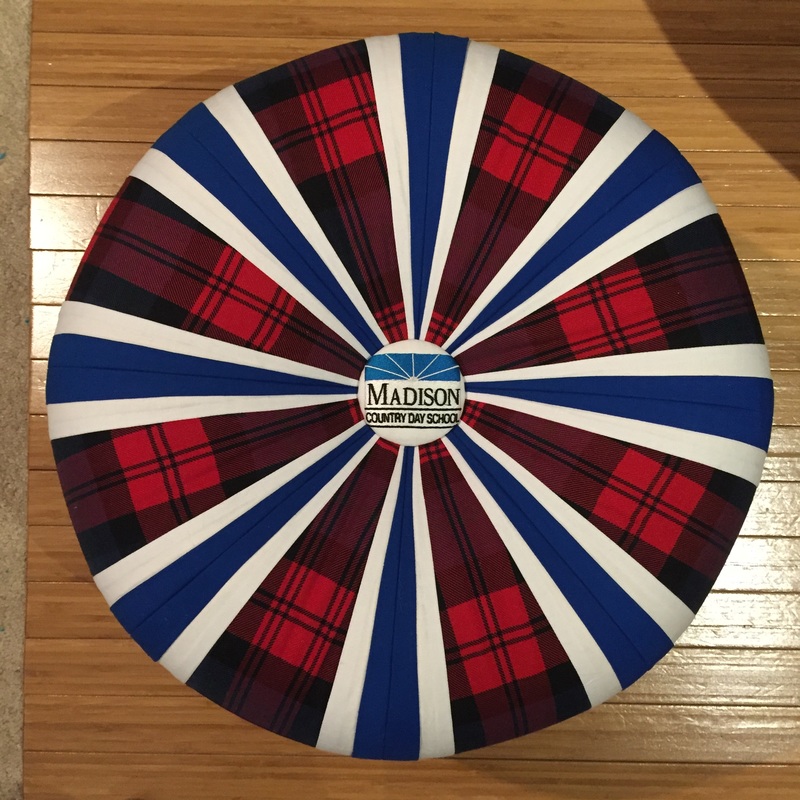
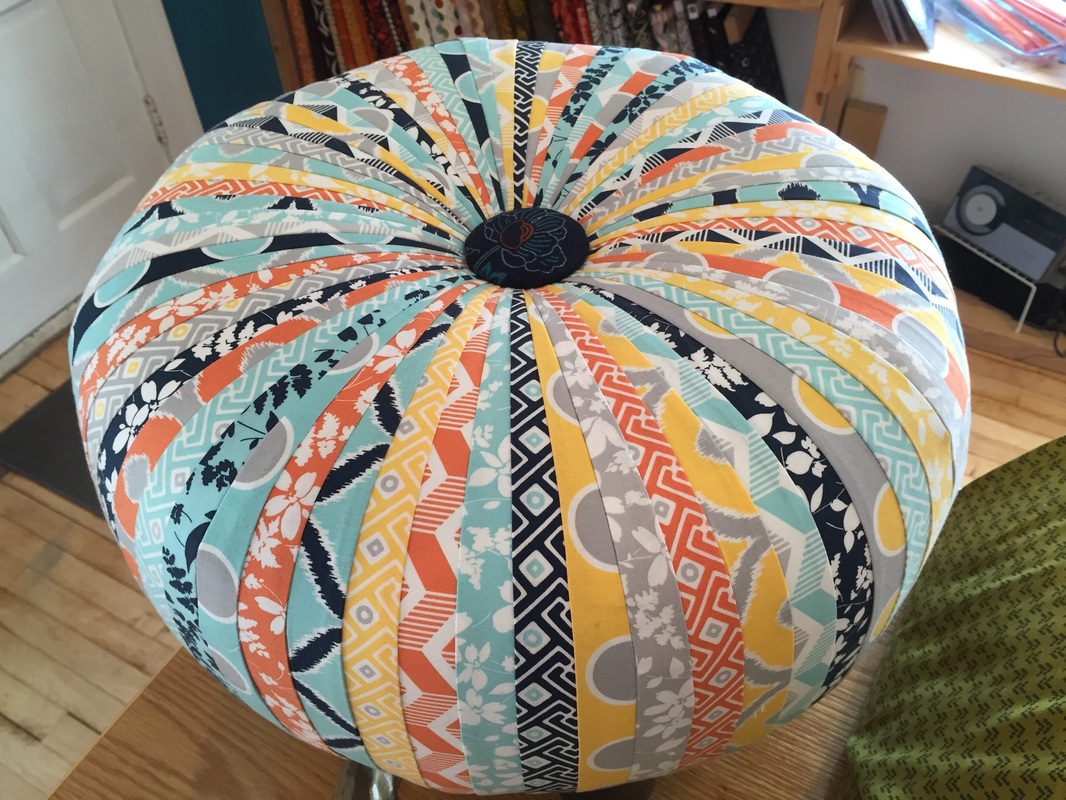
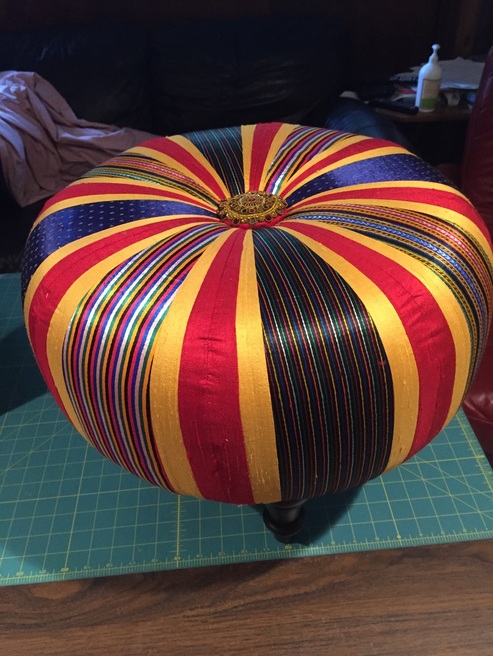
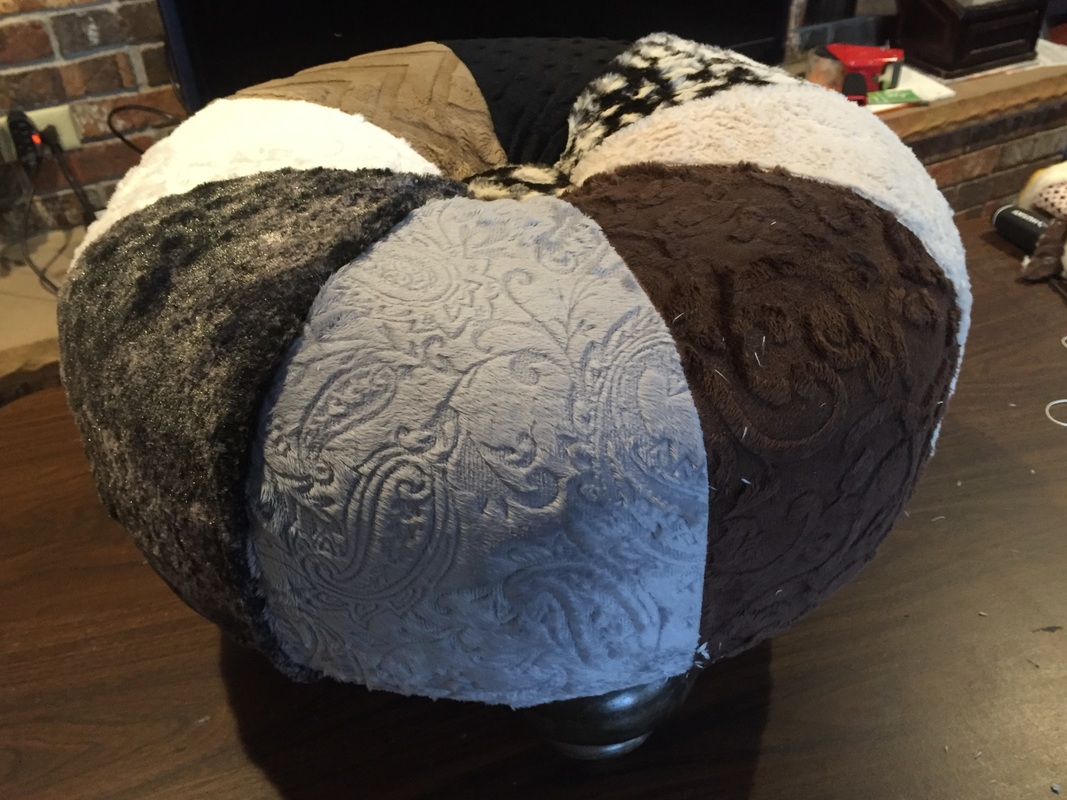
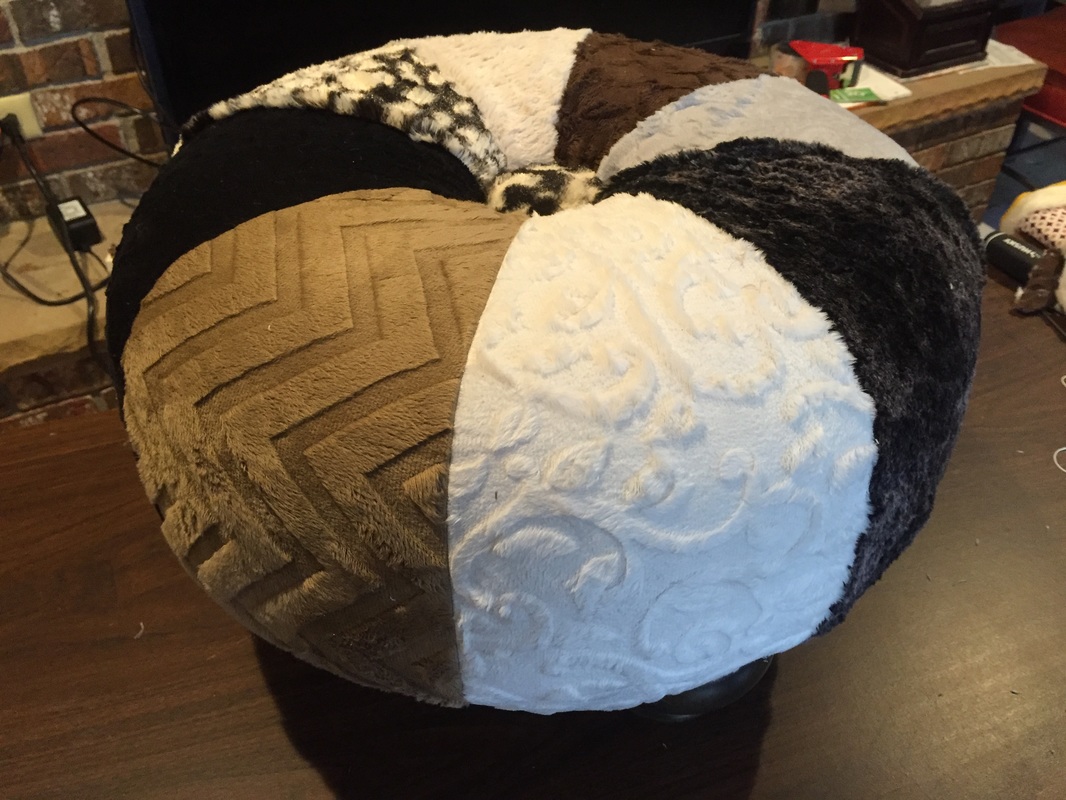
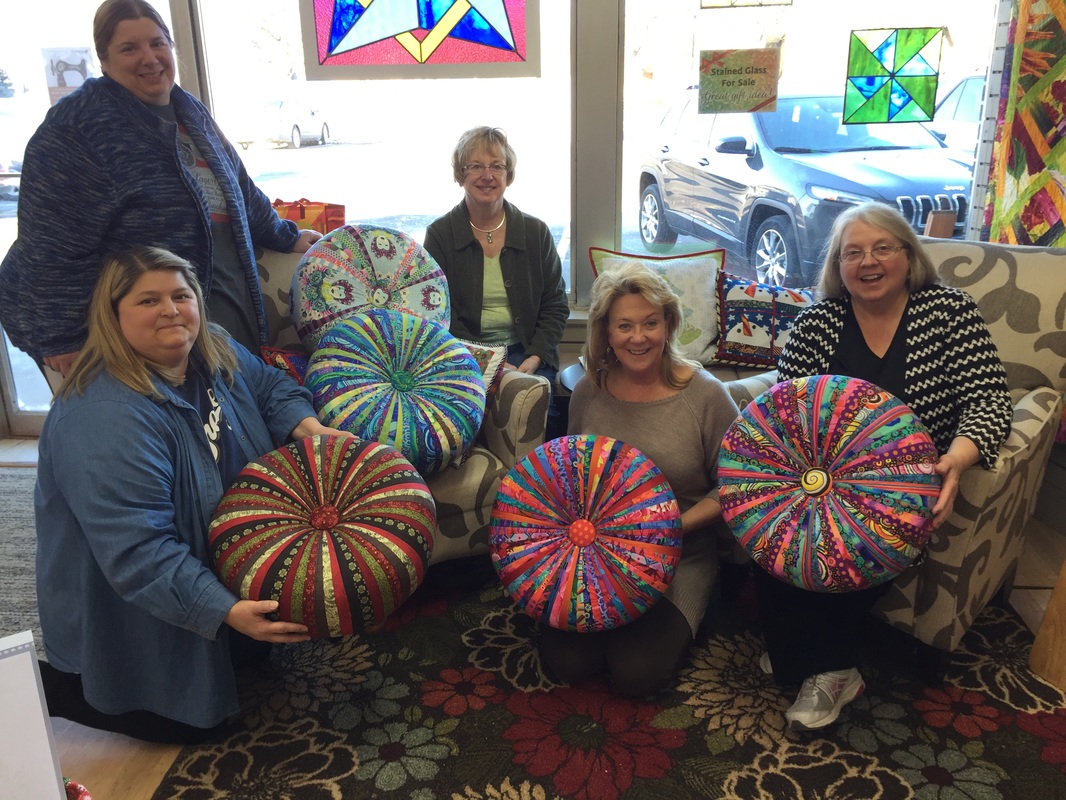
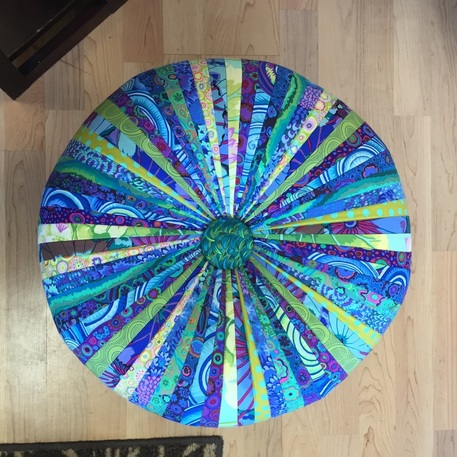
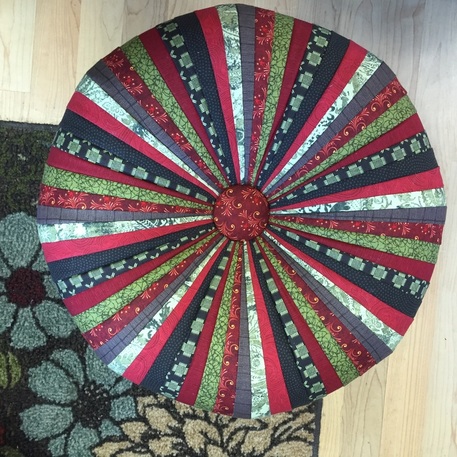
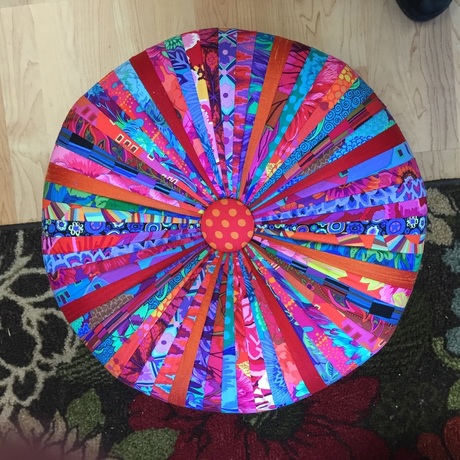
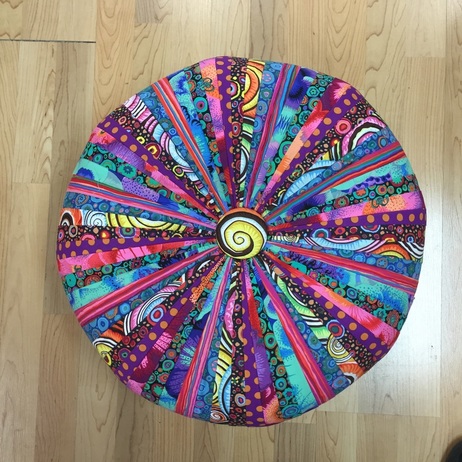
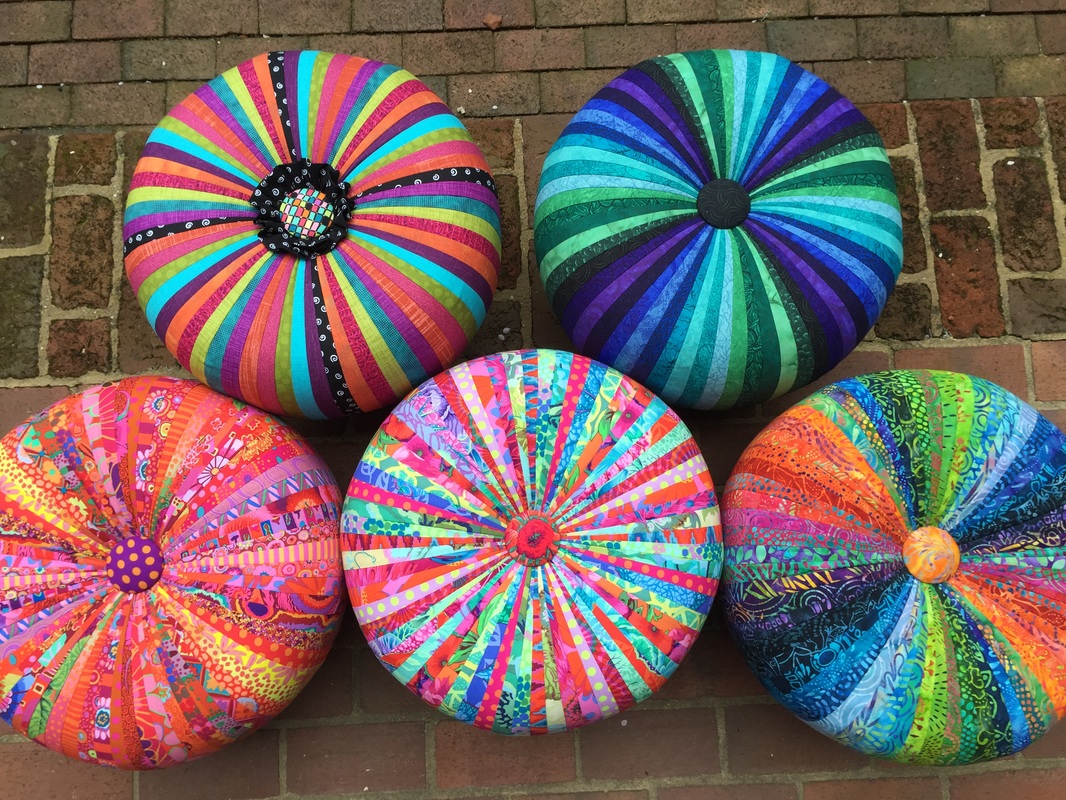
Let's check out the wonderful tuffets made by everyone!
Picture
Picture
Picture
Picture
Picture
Picture
Picture
Picture
Picture
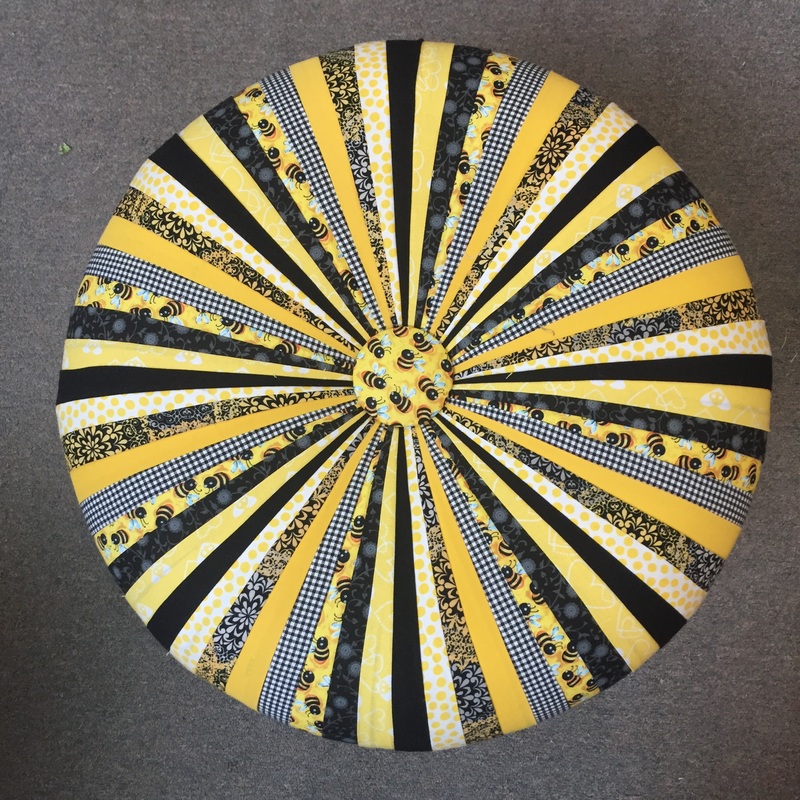
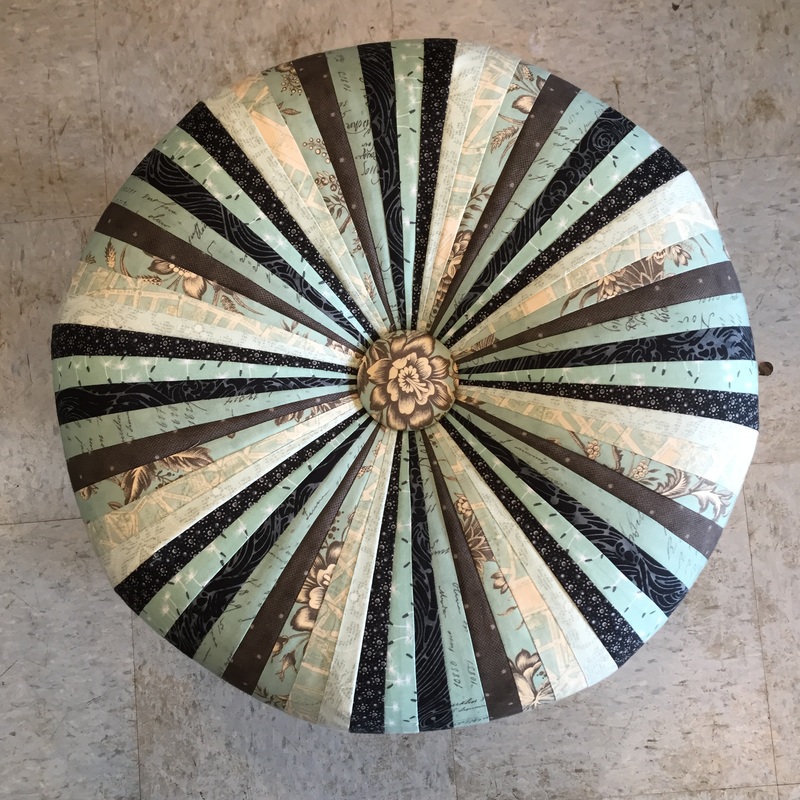
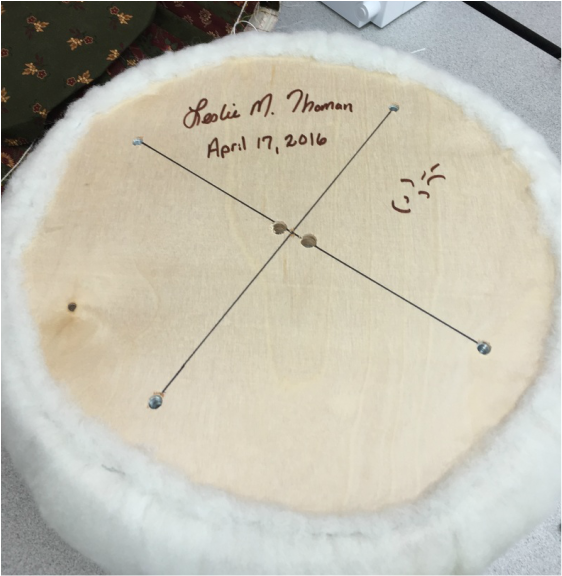
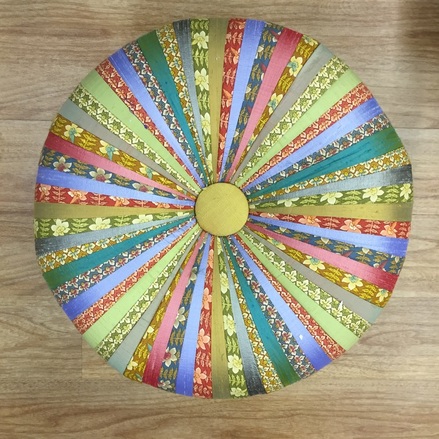
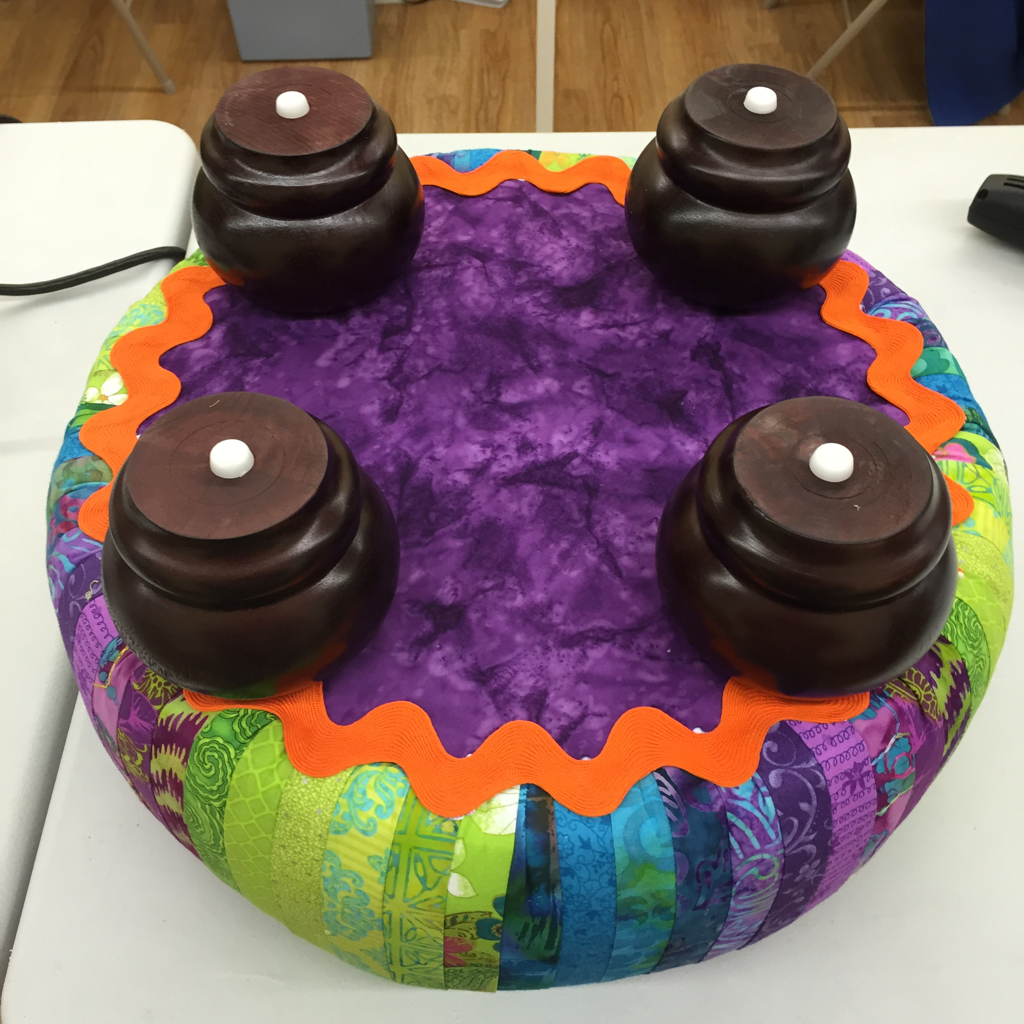
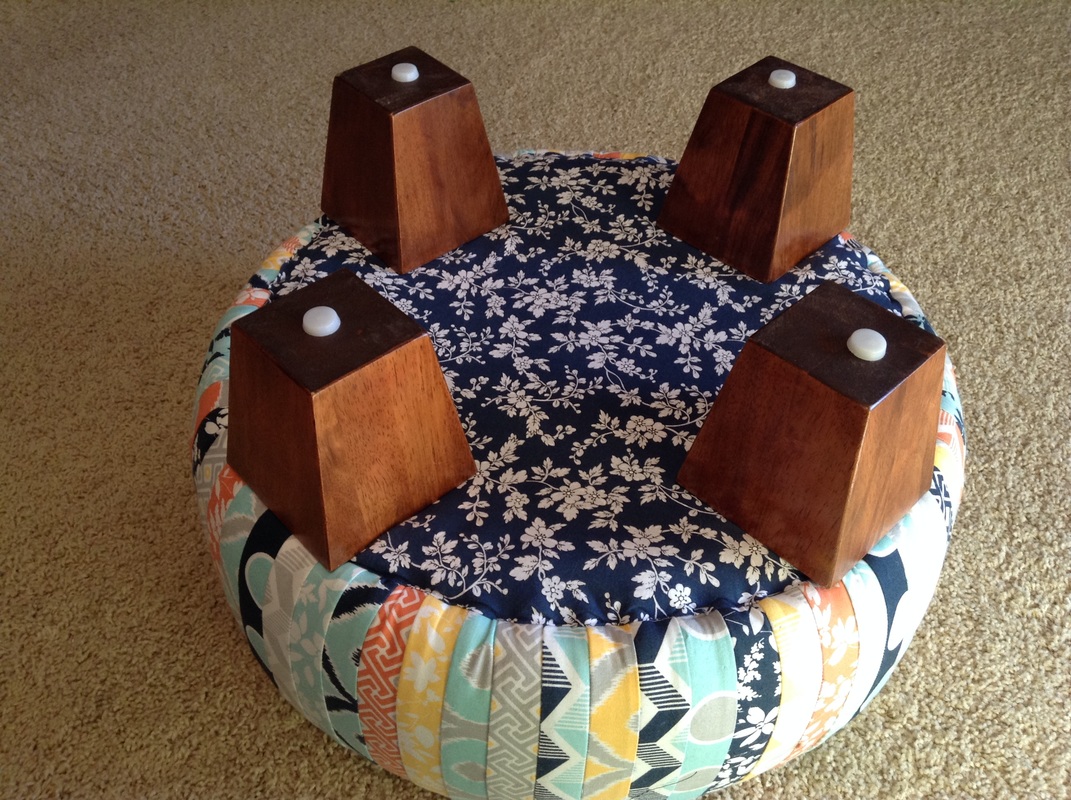
Heres the bottom of Sandy's bee-themed tuffet:
Picture
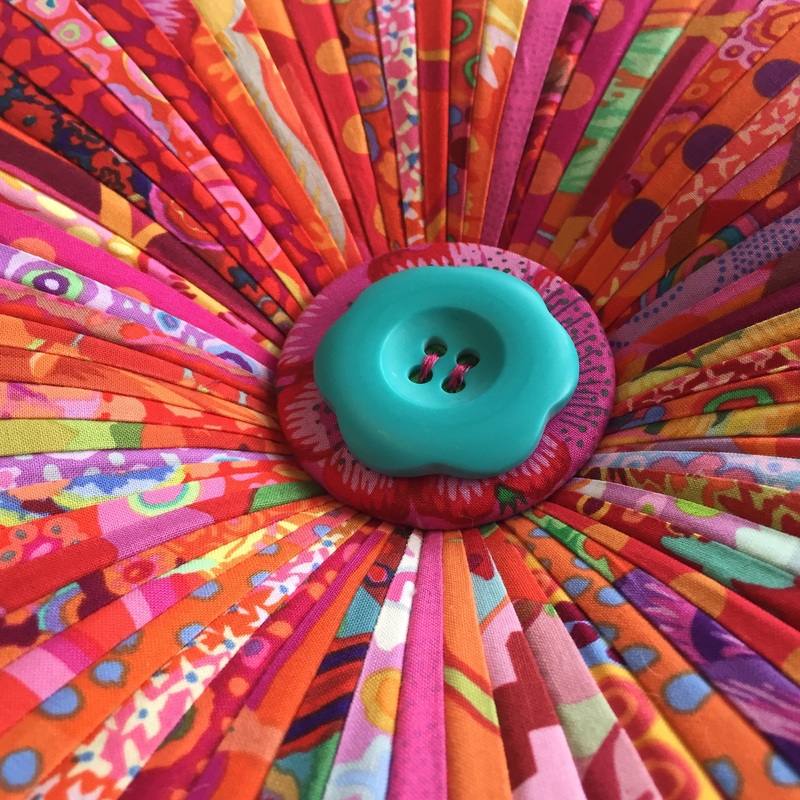
And the detail of Toby's button. She did this by flipping button form over so the flat side was up and sewing the aqua button to the fabric before making it.
Picture
Picture
Picture
Picture
Nearly complete feet depletion!
Picture
So, if you've read this far, I am thrilled to announce that we will be having another tuffet retreat at Jones Mansion! Thursday, November 10 through Sunday, November 13, you can come and work on your own projects as well as make a tuffet (or two!) If you can't come Thursday, Friday arrival is an option. 

Think of it -- you can make at least one tuffet in just a few days! What an opportunity to make that special gift, for you or for someone else! Come and join us; click here for information. Space is limited, so be sure to sign up soon.
3 Comments

Tuffet play at quilt play!

7/22/2016

0 Comments

 
Time for another installment of "Cheryl catches up on tuffet posts"! This time we're visiting Quilt Play in Grayslake, IL. We had a great class, even though not everyone finished at the same time. I love being able to teach in so many different places!
Picture
Picture
Picture
Picture
Picture
Picture
Picture
Picture
Picture
Picture
Picture
Picture
Check out the fringe on this one!
If you haven't been to Quilt Play before, you should go. I couldn't resist buying some fabric (and socks!) myself. 
Picture
0 Comments

mukwonago in may

7/20/2016

0 Comments

 
Wow, May. It's been a long time since I've posted! Not that it's a good excuse, but since then I've camped twice, held a garage sale, went to an out-of-state funeral, held another tuffet retreat (post to come later), and am currently dealing with some water damage at my house. But you'll see a number of posts from me coming up because I have a lot to share!

So this post will be all about a tuffet class we had at Quilt-agoius in Mukwonago in May. As an aside, if you're a Kaffe Fassett fan, Quilt-agious has more KF fabrics than any shop I've ever visited. But I digress... on to the tuffets!
Picture
Picture
Picture
Picture
Picture
Picture
Picture
0 Comments

Beginners no more!

5/25/2016

0 Comments

 
Since we moved to Madison, Wisconsin from Richmond, Virginia, I've been wanting to teach beginning quilters. I just love sharing in their excitement and enthusiasm for this this wonderful hobby.

So, I've started teaching a beginner class at Mill House Quilts in Waunakee. Check out the progress made by my students! This was a long class -- eight weeks. 

On day one we talked all about fabric selection and I gave them a challenge where I assigned them a focus fabric and they had to pick out coordinates. They weren't always given the fabric they would have chosen themselves, so it's a great exercise.

The next several classes focused on making the different blocks themselves. Then we had a "putting it all together" session. Finally, we ended with quilting and binding. Two of the students took on the challenge of trying free motion quilting for the first time!

I really got to know this group of quilters and am happy to call them friends as well as students. If you're interested in learning to quilt, check out my classes. 
Picture
0 Comments

we had a retreat and it was awesome!

5/23/2016

3 Comments

 
Nope, this isn't about the retreat I'm hosting in June; this is about a retreat we had at the Homestead Cabin Retreat in Hillpoint, Wisconsin. I cannot express how wonderful this experience was! Patsy (and her sister Nancy) really made the weekend special. We had nine students, though one of them made four tuffets! This was my first time teaching tuffets in a retreat format and it was really great. Typically, the class is two sessions of four hours each, but in a retreat scenario, we did it all in one weekend. So fun!
Picture
The calm before the storm: Our workspace!
Picture
The kitchen is gorgeous!
Picture
Things are getting underway: the workspace from the other side of the room. We hadn't started sewing the tuffet panels yet because not everyone had arrived; but we had some fun arranging fabrics.
Picture
The back deck. The weather was beautiful too so we ate some of our meals out here.
Picture
Picture
I love this birdhouse/perch sculpture! We saw lots of birds, though I wasn't quick enough to get photos of them.
Picture
Picture
I made them wait until after dinner before I started teaching (insert evil laugh here). For a standard retreat, people bring their own food, but for a class situation, meals were included. And they were soooo good! Patsy and her sister Nancy really did a great job. Those breadsticks were warm!
Picture
Now we're underway!
Picture
It's a plethora of tuffet panels!
Picture
Lunch on Saturday. I asked several times if I could move in, but no such luck.
We started doing our tuffet building in shifts starting after dinner on Saturday. From that point forward they kept me pretty busy so I don't have any action shots, but if you follow my blog you've seen plenty by now. But I do have finished tuffets to show you! First we have Annette's tuffet. She wasn't able to stay long enough for the group photo, but here's her gorgeous Kaffe tuffet. It's so pretty!
Picture
Picture
Picture
Here we are with all of our tuffets. Yes, I made one too!
Picture
There were so many we couldn't even fit them all on the table facing the same direction!
Picture
Picture
Picture
Picture
Picture
Not even all of them!
Picture
Picture
Picture
Picture
Picture
Picture
Picture
Picture
Picture
Picture
Picture
What a fantastic weekend! If you're interested in taking a tuffet retreat with me, I have one coming up in Mineral Point from June 24 - 26, and another one the weekend of October 7 - 9 at Prairie Star Lodge in Browntown, Wisconsin.

In the meantime, check out the Homestead Cabin Retreat. Patsy is a great hostess, and you can have groups of multiple sizes! 
3 Comments

Quintessential tuffets

5/23/2016

1 Comment

 
We had a fun class at Quintessential Quilts in Madison earlier this month. Not everyone finished at the same time, so no group photo, but check out these tuffets!
Picture
Teri and Linda, who are both repeat students. I think this is Linda's fifth tuffet! They really are addicting!
Picture
Lovely Evelyn!
Picture
Every one is different -- and gorgeous!
Picture
Picture
Picture
Picture
Picture
Picture
1 Comment

Necktie tuffet

5/16/2016

22 Comments

 
I was asked to make a very special tuffet out of some neckties. It was such an honor to turn these beloved ties into a special memory piece. 

Note: Ties are pretty difficult to work with. I highly recommend interfacing them, and also being very careful that ties with vertical motifs go straight up the middle of each section instead of running into the strip next to them.

For the bottom, I pieced more ties. I sewed them directly to a circle of fusible fleece. Then I topstitched around the bottom after folding the edge under. I finished with another tie. This one was sewn on not unlike a quilt binding. After I sewed it on (and joined the ends, which is tricky around a curve), I first glued and then hand stitched the finished edge to the bottom of the tuffet.
Picture
Picture
Picture
Picture
Picture
Picture
22 Comments

quite an honor

5/6/2016

0 Comments


I was honored to be asked by Free Spirit fabrics to make three tuffets for their booth at Spring Quilt Market in Salt Lake City! The gorgeous fabrics I was given were from the Kaffe Fassett Collective Spring 2016 line, April Cornell's Gypsy Dance, and Tanya's Whelan's Zoey's Garden. You can image how thrilled I was!

Here is the Zoey's Garden tuffet. I made it with the typical 64 strips, but added a ruffle and fussy cut the button to highlight the bird:
Picture
Next is the Kaffe Fassett Spring 2016 line. For this one, I decided to go with strips that were twice as wide as a typical tuffet has. I felt it was a nice way to show off the fabrics.
Picture
Last is the Gypsy Dance tuffet. This was especially fun because it involved a border print. I chose to do a combination of wide and narrow strips for this one. Its button also features a fussy-cut bird!
Picture
I still can't get over how honored I was to be asked. I know I'm gushing, but you'll forgive me, right?
Picture
We had to take this on our neighbor's lawn because ours had too many weeds!
0 Comments

Belleville beauties

5/1/2016

0 Comments

 
We had a great tuffet class at Patches and Petals in Belleville, Wisconsin a couple of weeks ago! Jean, Julie, Diane, Candy, and Leslie all did a great job!
Picture
The piecing isn't so bad once you get used to the trimming.
Picture
Making her mark....
Picture
Such variety!
Picture
Picture
Picture
Picture
Picture
0 Comments

tuffet mini-retreat

4/29/2016

0 Comments

 
So, you may or may not know that I'm holding a retreat at the Jones Mansion in Mineral Point, Wisconsin this June. If you didn't know that, you should check it out because it's going to be a lot of fun!

Anyway, I was honored to be asked to teach some members of a private retreat how to make tuffets. Lori, Hillyn, Jane, and Marcia all had a great time!
Picture
Working together to make their forms.
Picture
Lori does not fear the stapler!
Picture
Sadly, I don't have top-down photos of all of these like I usually do -- it was dark when we finished. But I did get one of Lori's tuffet, which she created from fabrics that are already on furniture at the Mansion, so it fits right in! She also did a great job cutting her plaids so they all match, and working with very squirrely velveteen.
Picture
Stunning. Excuse my foot!
Picture
What a great job she did!
0 Comments

how to baste a quilt without breaking your back, part 2

4/19/2016

0 Comments

 
In my previous post, I showed you what you need to baste a quilt without breaking your back. Now it's time to get started!

So, the first thing I did was put my folding table on bed risers. This will raise it to more of a counter height and will help you from bending over as much. Shorter people might not need the bed risers. I've seen people use lengths of PVC pipe too, but bed risers work really well.

Lay out your backing on the large table, right side down. Make sure the backing is flat, but not stretched. Secure with binder clips, or masking tape if your top isn't too big. There are a few minor waves in this photo, but nothing that will cause a pleat in your quilt. 
Picture
Here you can see that I used the corner of the table to help make sure the backing is straight on the table.
Picture
Lay your batting out on top of the backing. You can see here where the batting is hanging over the edge of the table by a couple of inches. That will help you to hold on to your quilt while you're quilting it. You can also see the bed risers!
Picture
Next, peel back the batting and spray. If you chose to use pins, you would, of course, skip this step. 
Picture
Not really an action shot; just pretending to be one.
Smooth the batting back down.
Picture
Now lay your top down. Note that I am only placing it here; there is no adhesive yet. I'm using the corner of the table again to ensure that it is straight.
Picture
Now that you know how your top will be placed, peel it back and spray the top of the batting.
Picture
Lay the top down and smooth. Note that you will only be able to smooth down the part where you sprayed; in this case, it's only where the white fabric is.
Picture
The blue lines are for my reference while quilting later.
Now, unclip your binder clips and slide the quilt -- the part that's basted -- off the table. Remember that up until now I have only basted the part which is solid white. That's the part hat's hanging off of the table. Reclip.
Picture
Now flip the quilt top and the batting over where you just placed your binder clips, and smooth the rest of the backing and clip that down.
Picture
Here you can see the batting and top hanging off of the edge of the table.
Picture
Lift the batting and spray, only covering the area that will be on the table in the next step (in other words, don't spray the rest of the batting, just the next 24 inches, or however wide your table is). Then smooth it down.
Picture
Not completely smoothed yet -- look how weird it is at the top. But you get the picture.
Spray the top of the batting.
Picture
Still a faked action shot!
Smooth the top down as before. Then, repeat the unclipping and sliding the quilt until you reach the last part.
Picture
Basically, you're going to repeat this until you're finished. If your quilt is longer than your table, repeat the same steps, but you might be able to get away with turning the quilt 90 degrees to get he bottom part.

And that's it! I usually flip the quilt over to the back side and smooth out the backing one more time. All of the clipping and unclipping can make things shift, and it will help the temporary adhesive adhere better anyway. On to quilting!
Picture
Yes, it can hold up to this much pushing and manipulating. A pin every 24 inches or so wouldn't hurt, but I haven't done it here.
Thanks to my friend Shara for her quilt top. I'll be sure to post when I'm done quilting it for her!
0 Comments

how to baste a quilt without breaking your back, part 1

4/17/2016

0 Comments

 
We've all been there: on the floor, bending over, trying to not disturb our perfectly-laid-out quilt. It's awful, it hurts your back, it hurts your knees, etc. And to top it all off, unless you can suspend yourself over the quilt like Tom Cruise in Mission Impossible, you're going to have to crawl on your quilt in order to pin in the middle. Yuck.

In this post, I'm going to show you in photos how to baste your quilt using a table. It keeps it off the floor, it saves your back and knees, and you can do it yourself.

To start off, you need the following:

A large table. It's great if you have one of those older, heavy folding tables. Not the white, lightweight ones that bounce around when you sew on them. It's easier if you have one of those heavy ones that looks like this:
Picture
Big old heavy table.
If you don't have one like this, that's okay -- your local quilt shop probably does, and they are usually happy to let you use their classroom if there is no class in it. 

The next thing you need are a bunch of these:
Picture
1 inch binder clips
If you only have access to a thicker table than these will fit, you can get by with masking tape.

Next on the list, either of these:
Picture
Picture
Curved safety pins -- not the big ones!
Both of these options have their pros and cons.

The benefit of the spray (and I recommend 505, not the stuff in the pink or blue cans) is that it's quick. I also find that it's not too stinky. Some people insist that it be sprayed outside, and if you have breathing issues, I certainly would, but I use it inside my house and have had no issues with the smell, or even with overspray. However, if you don't want to spray it inside, note that it will take two people (one to hold the batting and the other to spray), and that weather will be an issue. Certainly that would be a con! The other is that it gets used up, so it's an ongoing expense. Also, because the spray won't hold up if you, say, catch your sandwiched quilt on the edge of the table, I often will put a few curved safety pins in the corners and every so often just to be safe.

The benefit of the curved safety pins is that they are reusable, and they are permanent. Note that if you leave them in your quilt for a really long time, they can leave holes that are difficult to get out. The newer ones shouldn't rust, and I haven't ever had a problem with them. The cons are that they only hold where they are located (as opposed to spray which holds everywhere), and they take a really long time. They can also wreak havoc on a manicure.

Theoretically either form of basting should work with this method, but I find that because the is some smoothing involved, spray makes more sense. Smoothing things out with pins means moving all of those pins. Again, yuck.

Next post? Getting started!
0 Comments

velvet and lace

4/10/2016

1 Comment

 
I was honored to make this dress for one of the skaters on the adult synchro team. She wanted the skirt a little longer so I added a strip of the velvet fabric with a slightly shorter strip of lace overlaid on top of it. The pattern is the Carmen dress from Jalie. I cant wait to see her skate in it!
Picture
Picture
1 Comment

Tuffets at Quintessential Quilts in madison

4/7/2016

0 Comments

 
We had a great time making tuffets at Quintessential Quilts in Madison! If you haven't been to QQ in a while, you should check them out -- they've expanded their space and added fabric and a beautiful classroom. They share a parking lot with Target and Michaels behind East Towne Mall. Tell them I sent you! ;-)
Picture
Happy tuffeteers!
Picture
Picture
Hints of silk dupioni and fabric from the Netherlands!
Picture
This tuffet is ALL WOOL!
Picture
Picture
Picture
Picture
0 Comments

mill house quilts

4/5/2016

2 Comments

 
I'm happy to announce that I'm teaching classes at Mill House Quilts in Waunakee! These are all new classes and different from what you've seen from me so far. I'm excited to be teaching at this shop, which has been around for quite a while but is under new ownership. 
Picture
My still-unquilted sample.
I'm also teaching the ferociously popular Fold N Stitch Wreath pattern. Here's my spring-y version. This class will be held on Thursday, May 5. You know you want to!
Picture
2 Comments

more mukwonago tuffets

4/3/2016

0 Comments

 
We had fun making more tuffets at Quilt-agious a couple of weekends ago. What can I say, I love that shop! And it's the only area shop that has a certified TuffetSource instructor (that would be me). Unfortunately, I'm better at teaching people how to make tuffets than I am at getting photos sometimes -- I'm missing one from this group. But on to the show!
Picture
Making the tuffet form!
Picture
Making sure the bottom is on correctly.
Picture
Like mother like daughter -- it applies in the tuffet world, too!
Picture
Picture
Picture
Picture
Little Miss Muffet?
0 Comments

quilt-agious happenings

4/1/2016

0 Comments

 
We had a busy couple of Thursdays at Quilt-agious in Mukwonago! I had three classes -- tuffets, a Lone Star quilt class, and a t-shirt quilt class. Those were some long, but fun, days! 

First up, tuffets! Here we have Elaine's first and Herni's third tuffets! Nice job, ladies!
Picture
Picture
Elaine's tuffet.
Picture
Henri's tuffet. They're both so pretty!
Next up: Lone Star quilts! We used the QuiltSmart foundation for these. The panel makes it easy to sew the diamond shapes without having to worry about wasting too much fabric. You can get these panels in a small or large size. For the first class, we work on the diamonds. For the second, we put it all together.
Picture
Stripe in the center....
Picture
... or stripe on the outside?
Picture
She chose the outside! Here are Penny (left) and Shar showing off their Lone Star quarters. Check out Cat's in the background. She was making an eagle!
I don't have photos of the t-shirt quilt class, but since it's a technique class, there's not too much to show. But we had fun!
0 Comments

Little lion king dress

3/30/2016

0 Comments

 
I can't believe it's been over a month since I last updated this blog. Shame on me! As I'm sure you know, when you get busy, some things fall to the wayside. This, sadly, was one of them. But taxes are done (yes, taxes were the culprit) and I'm back at it!

I made this little Lion King inspired skating dress for my youngest-ever client, who is all of five years old! I used some of the fabric from my daughter's synchronized skating team's dresses. 
Picture
Roar!
Picture
Adjust those straps and she's ready for the ice!
0 Comments

Mary Poppins skating dress

2/20/2016

0 Comments

 
So when I'm not teaching tuffets or other classes, I spend a lot of time making skating costumes! You might remember my previous post about the synchronized skating team costumes I made last fall. Since then I've been spending a lot of time teaching or at skating competitions. Right now I'm also making a few individual costumes. Here's Molly's friend who is skating to "A Spoonful of Sugar Helps the Medicine Go Down" at a competition tomorrow:
Picture
She'll be wearing white tights at the competition and I think she'll look great! Of course, a can of Static Guard will have to be no more than ten feet away from her at all times! There are a couple of layers of tulle between a base layer of swimsuit lining fabric and a top layer of glissenette, which means there will be a lot of static.
0 Comments

Colorful tuffets!

2/18/2016

0 Comments

 
We had a sweet Valentine's Day at Quintessential Quilts in Madison! Our small group persevered through the snowy weather. It's hard to believe it's supposed to be 51 tomorrow!
Picture
Marcia made a beautiful bright tuffet!
Picture
Paula made a space themed tuffet this time around. I wish I had gotten a shot of the bottom -- it was the solar system!
Picture
Darlene's tuffet is cool in blacks and reds!
Picture
Carrie made this bright tuffet in my favorite colors!
Picture
And check out the fun orange rickrack on the bottom!
0 Comments

illinois tuffets! And a bonus wisconsin one

1/28/2016

0 Comments

 
We had a fantastic time making tuffets at Quilt Play in Grayslake, IL, last week! It was my first time teaching at the shop and the students were very enthusiastic. That always makes for a fun time. Again, I was having so much fun that I didn't get any action shots. But I do have results!
Picture
Georgia, Marla, Susan Shelley, Barbara, and Xenia show off their beautiful tuffets!
Picture
Xenia's Tula Pink tuffet is super cute!
Picture
Georgia's tuffet is gorgeous in batiks. I love the pops of pink!
Picture
Barbara's tuffet in rich earth tones. The button is microfiber and the bottom is faux leather.
Picture
Great bottom fabric!
Picture
Shelley's tuffet has lots of pretty florals. And I really like the value range. Plus, that Effervescent fabric is one of my favorites!
Picture
Susan's tuffet was all Kaffe Fasset paperweight (and a few dots). I love the effect, and I really like that her button is of a different scale fabric. It really makes it stand out nicely!
And a bonus Wisconsin tuffet from my latest class at Quilt-agious in Mukwonago, Wisconsin (finished outside of class). 
Picture
Roxann's tuffet is more traditional. I like her color groupings.
0 Comments

auction tuffet

1/24/2016

0 Comments

 
Every year my daughter's school holds an auction to raise money. Last year I donated a quilt; this year I went with tuffets (of course)! This first one is from a used school uniform. It was a jumper, which gave me lots of yardage once I ripped out the seams. One half of the jumper went into the top and the other half I used for the bottom. The solids are Kona cottons in school colors, and the button is from an embroidered uniform shirt. 
Picture
Picture
Picture
Picture
I also donated the second tuffet I ever made, from the Moda Mixologie line of fabric. It was from a jelly roll, so I didn't have yardage. The button fabric was from my stash and the bottom fabric is from the Weekend line from Swirly Girls Design.
Picture
Picture
0 Comments

a minky tuffet!

1/20/2016

0 Comments

 
Ever since I became a TuffetSource affiliate, I've been wanting to do tuffets out of different materials. Up until now my biggest stretch had been this silk tuffet:
Picture
Picture
The striped fabrics are a cotton/silk blend and the solids are silk dupioni. The fraying was the hardest thing to deal with. I ended up zigzagging in the seam allowances to keep the fray in check. As for fitting the top, the silk doesn't have as much give as cotton, fitting is a little tricky, but not too bad.

Since then, I've been collecting fabrics to make different types of tuffets. I have some neckties, some leather scraps, and more silk. But I just had to try to make one from minky fabric.
Picture
The chosen fabrics.
Picture
All put together!
Picture
The other side.
Picture
Even the bottom is Minky!
I'm calling it the Fluffet.

I know some people don't like working with Minky because of the shedding which is really just from where you cut the fabric -- once that's done, the fabric itself doesn't actually shed). To them I say, "get thee a lint roller!" Of course, I don't mind glitter everywhere either. Personally, I love Minky, and using it just means it's time to vacuum my sewing room. 

I got all of these wonderful fabric from Quilt-agious in Mukwonago, Wisconsin. They've put together the Minky for the tuffet top in kits (I'm not sure if there is enough for the bottom in their kits, fyi). Click here to contact them if you want to make your own! While you're shopping, check my store here for tuffet kits. ;-)
0 Comments

First tuffets of 2016

1/19/2016

0 Comments

 
The high was -2 the day we finished these tuffets at Quilt-agious in Mukwonago! But though it was frigid outside, we stayed warm and had fun inside.
Picture
Brand new tuffets by Carrie, Lana, Karla, Linda, and Deb!
I'll be teaching tuffets at Quilt-agious again Fridays, February 5 and 12, from 1 to 5 pm. Call the shop at 262-363-3066 to sign up!
Picture
Karla's tuffet is beautiful in aquatic colors.
Picture
Lana's tuffet is bold yet traditional.
Picture
Carrie worked hard to center her Queen of Hearts!
Picture
Linda's bright tuffet is after my heart!
Picture
Deb's swirly button is so fun!
0 Comments

tuffet retreat!

1/7/2016

4 Comments

 
I'm thrilled to announce that I'll be hosting a tuffet retreat this summer at the Jones Mansion in Mineral Point, Wisconsin! The dates for the retreat are June 24 - 26, 2016. If you've been wanting to make a tuffet but live too far from me to take a class, this is a great chance for you to make a tuffet in a weekend. If you don't live in the area, that's okay, we'll help you get to and from the airport and even help ship your tuffet home! 

The Jones Mansion is gorgeous! It's a three-story home with seven bedrooms, plus a great work area. The town it's in, Mineral Point, is known for its art galleries and shops. 

Picture
Included in the retreat are most meals, lodging, a full tuffet kit, and expert instruction. You can even choose to make more than one tuffet if you'd like!

I've written up a FAQ which should give you all of the information you need. If you have other questions, please let me know and I'll add them to the list!

Registration is here. Sign up soon! Spots are very limited and some are already taken!
4 Comments
<<Previous
Forward>>

    Archives

    November 2017
    September 2017
    July 2017
    May 2017
    April 2017
    February 2017
    January 2017
    December 2016
    September 2016
    August 2016
    July 2016
    May 2016
    April 2016
    March 2016
    February 2016
    January 2016
    December 2015
    November 2015
    October 2015
    September 2015
    August 2015
    July 2015
    June 2015
    May 2015
    April 2015
    March 2015

    Categories

    All
    Blog Hop
    Classes
    Commissions
    Focus Through The Prism Challenge
    Quilts
    Shop
    Shows
    Skating
    Student Tuffets
    TBT
    Troubleshooting
    T Shirt Quilts
    T-shirt Quilts
    Tuffet
    Tuffet Retreat
    Tuffets
    Tutorials
    Website

    RSS Feed

All images on this site are (c) unSpooled, LLC. Thanks for reading this far. You want to make a tuffet, right? Don't forget to like unSpooled on Facebook!